A quirky, pointy hydrangea paniculata wreath

Hi there! I love crafty projects – you might have guessed that by now if you’ve followed me for a bit. 🙂 Wreaths are my favorite, hands down. They don’t take a lot of time to make, and they are simply fun to create. Whether for yourself or for others, they make great gifts, too! This week I made a wreath with the dried flowers from my hydrangea ‘Vanille Fraise’ Paniculata Renhy. The hydrangea starts out white early in the season. As it matures it changes first to light pink and then continues darkening throughout the season.

I started taking cuttings from the plant in early August, as I wanted smaller flowers to work with. It was nice having those smaller blooms, but their stems were not very strong, which made it a tiny bit tricky when pinning them to the wreath frame. The more mature, bigger blooms had nice strong stems and were easy to work with. The key to getting really nice dried flowers is to not cut them too soon (a lesson that is very hard for me to accept)!

The wreath frames are simply made of straw, and I always reuse mine. Dried flowers need to be replaced over time, so after they fade, I take the wreaths apart and reuse the wreath frame as well as the floral ‘U’ pins (I use the ‘u’ pins to attach the flowers to the wreath). As always, I started with all of my flowers on the table, and one by one I placed them on the wreath. I placed two large flowers across from each other, and then added a third (smaller flower) in the center, working my way around the wreath with that pattern. I didn’t have a plan, or an idea of how I wanted it to look. Only once I began, and I could see what I had to work with and how they were falling into place, did I have an idea of what I wanted to achieve. When I work this way, the wreaths tend to come out a little bit quirky and definitely bespoke! That fits my personality perfectly. 🙂

We have been enjoying some beautiful weather, which I find very helpful for my creativity. I hope the weather has been nice where you live, too! Take care and stay safe.

In Peace,
Dana

Hydrangea Vanille Fraise Paniculata Renhy full plant white
In the beginning of the season, the flowers are mostly white.
Hydrangea Vanille Fraise Paniculata Renhy full plant pink
The flowers change from white, to light pink, and then to further shades of dark pink.
Hydrangea Vanille Fraise Paniculata Renhy full plant pink in sun
What’s not to love about those pretty cream and pink flowers?
Hydrangea Vanille Fraise Paniculata Renhy close up
A creamy white flower contrasted with shades of pink.
Hydrangea Vanille Fraise Paniculata Renhy Wreath set up
This is how it starts: A big mess on the table!
Hydrangea Vanille Fraise Paniculata Renhy first four stems
These are the first 4 flowers which I attached – starting with two at a time.
Hydrangea Vanille Fraise Paniculata Renhy close up of floral u pins
Here is a close up of how I attach the stems with the floral ‘U’ pins.
Hydrangea Vanille Fraise Paniculata Renhy wreath in progress
Half way there!
Hydrangea Vanille Fraise Paniculata Renhy wreath in progress
Close up – wondering if the lumps and bumps and pointy bits are all going to fit into place (and look nice)…
Hydrangea Vanille Fraise Paniculata Renhy full wreath outside
Ta-da! Finished!
Hydrangea Vanille Fraise Paniculata Renhy close up outside
This pointy greenish section on the outside, and dark pink on the inside were both an ‘add on’. I had to cut a few more stems while making the wreath as I was going to be short of flowers. So they are fresh and not dried. But given how late it is in the season, I think they will dry perfectly ok (fingers crossed!).
Hydrangea Vanille Fraise Paniculata Renhy wreath outside Center
The center is anything but circular! I’m getting used to wreaths like that.
Hydrangea Vanille Fraise Paniculata Renhy on the playhouse
Of course I had to hang it on our playhouse door! It’s a right of passage for my wreaths.
Hydrangea Vanille Fraise Paniculata Renhy Playhouse
What a beautiful morning it was to take pictures!
Playhouse Sept 20 hydrangea paniculata vanille fraise
Another quirky and fun wreath completed!

I really enjoyed making that wreath. I hope you enjoyed seeing the process. Thank you for visiting! 🙂

The time for playing with lavender is now!

Hi there! At this time of year I am usually too busy to stop and write a ‘how to’ post about lavender and the different crafts I make with it. But by the time I do get to write about it, with ‘how to’ instructions, it is a bit too late! So this year I am providing links to all of my previous posts about lavender in this blog. That way, if you want to make a lavender wand, or a lavender wreath, you can do so while the lavender is still available!

12 seems to be the number of lavender wands that I enjoy making in a season. I make those 12 really quickly, and then I don’t have any interest to make more. I looked at possibly trying some different styles this year, but honestly, I like mine best (says she, trying to be humble about it). I did make one change for the last few that I made this year – instead of using 25 stems, I used 35 – 41 stems. They were really thick! I’m not sure if that is better, or just different. You can read how to make lavender wands here, or watch a video here.

I did get a bit of a head start on my wreath making this year. That’s because for the first time, instead of waiting for the lavender to dry, I made a fresh lavender wreath. I usually make wreaths with dried lavender, and attach the lavender with floral ‘u’ pins. This wreath was made using fresh lavender and the lavender was attached with one continuous piece of floral wire. It has a very different look! It hangs in my kitchen, and in the past couple of weeks it has grown on me. I now like it very much! You can see some of my past wreaths and how I made them here, here, here, here, and here .

There are quite a few lavender plants in our garden. They are at different stages of maturity and their blooms develop at slightly different times. I’ve gone through and cut most of the mature stems over the past two weeks. They are now drying out – in my house. It’s a bit tricky this year! I usually dry them in our ‘sitting room’ which isn’t usually used. But this year, the ‘sitting room’ is my husband’s office and my son has started playing our piano, which is also in that room. So if my husband isn’t in the room, my son is! Instead, the lavender is drying in our front hall. Some people hang their lavender. I hang my roses and other flowers to dry them, but I just haven’t managed to figure out how to hang the huge amount of lavender I have, yet. The lavender dries out really quickly – a few weeks, tops. I still have two plants with immature blooms, that should be ready for me to use next week (so I could make more wands if I wanted to!).

I will start making dried lavender wreaths in the next couple of weeks. Again, it is a bit tricky this year as the table I usually use for my crafts is now my work desk. It means that I’ll have to start and finish the task over the weekend – including cleaning up the mess! Boy do I miss the use of the ‘unused’ sitting room where I could come and go to craft, and just close the door to hide my mess until I was completely finished.

I hope you find the tutorials helpful! It is fun for me to look back on all of the different styles of wreaths and different colors of wands that I’ve made over the years. My lavender pages are by far the most popular pages on my website – I’m not alone in my enjoyment of making things from the garden! It is such a bonus to be able to enjoy the relaxing fragrance of lavender while working with it. 🙂

Will you make any lavender crafts this year?

In Peace,
Dana

July 10 front gate garden
It is traditional to post a picture of this bed! It has 2 lavender plants, Incrediball hydrangea, hydrangea paniculata, Lychnis Coronaria Rose Campion, Pittosporum Tom Thumb, Bergenia, and Syringa v. Beauty of Moscow.
Bunch of lavender wands
This season’s lavender wands in front of one of our lavender plants. The stems are a bright green when they are first cut, but will dry to a dark green over time.
lavender wands in lavender
Lavender wands are easy to make and mostly involve weaving ribbon through stems.
Lavender display
The easiest way to display lavender is to simply throw it in a vase (no water required)!
basket of lavender
This basket full of lavender is from part of one plant.
Lavender wreath in progress collage
It was a little bit challenging to make the wreath with one continuous piece of wire. But it was a lot faster than my usual method!
Wreath on playhouse collage
I used dried peony flowers (Sarah Bernhardt) as an accent.
lavender wreath inside collage
This is where the wreath lives now – in my kitchen.
fresh lavender wreath
A fresh lavender wreath hanging on our playhouse door.
Mom in the Garden with lavender
Sunny, blue skies are every reason to smile!

I hope your summer is sunny and full of fun for you 🙂

Things will get done when they get done

Lavender wreath in the making - first round

It starts with a straw wreath frame, some floral ‘U’ pins, and groups of 12 stems of lavender each being pinned into place!

There are lots of good things about getting older, and one of them is knowing that things will get done when they get done. Are you smiling? I hope so. Because isn’t it the truth? I definitely used to fret more when I was younger, worrying about when things would get done. Now, a bit older and (hopefully) wiser, I see that life is so full, and most of us are always in ‘go’ mode which makes it really difficult to slow down or even rest. I’m learning that it is perfectly O.K. to stop and take some time out, because things will get done when they get done.

Lavender Wreath in progress - half way

Section by section the lavender is pinned in place.

Lavender Wreath + fuschia roses side view

A side view shows that the wreath frame is completely covered in lavender, with an accent of roses and hydrangea.

Lavender wreath + fuschia roses + hydrangea full view

This design has the lavender go in one direction, ending with flowers.

This leads me to my lavender story. You see, I needed a rest. I’m used to going ‘non-stop’ and this past year I’ve just had to slow things down a bit. With my lavender this meant that while I harvested it in July, and even made some lavender wands, after I laid it out to dry, I just left it. One wreath was made ‘on schedule’, but then … nothing. I have no reason, and 100 reasons. There was a little progress as the summer shifted into fall and chilled into winter, and the little progress kept on going and bit by bit the wreaths were made. I needed that extra time to not rush through and make them just to make them. I wanted to enjoy the process and be present when I did so.

Lavender wreath + Rosemary and Rose focus - in progress

This wreath has Rosemary and roses in the design.

Lavender wreath + Rosemary in progress

I really like the green of the Rosemary when it is first cut. Everything is attached with the floral ‘U’ pins, except for the roses, which are glued on with a hot glue-gun.

Rosemary from my garden

Rosemary from my garden.

Lavender Wreath with Rosemary + roses complete

I’m glad to have someplace to make my wreaths – and not worry about the mess!

I can be somewhat impulsive, and when the mood strikes to create a wreath, I just go with it, gathering up whatever materials tickle my fancy that day. This is the first year that I used up nearly all of my dried lavender from this season. The wreaths were so full of lavender!

Lavender wreath in progress roses on top

This design was rather unusual. I worked the lavender in three rows around the frame. I have to say that this was a bit tricky to work through.

Lavender wreath with roses on top

Close up of the dried roses.

lavender wreath + roses on top + ribbon on door

The finished wreath embellished with a ribbon.

Repeating designs is not really something I like to do. I prefer to try new ways of making things. Sometimes this works well, and sometimes I think ‘I should have stuck to the original plan’! It’s a learning process. This season my dried roses really kept their colors, which I think adds a nice contrast to the shape and color of the lavender. I do like to work with greens, too, so the Rosemary was a nice addition – although sadly, it won’t keep that pretty bright green color. This is the first time that I worked a very tiny amount of hydrangea into the lavender wreath, too, just to try something different!

Lavender in basket

This is my lavender basket, which is now nearly empty.

I am now finished with making lavender wreaths for this year, and I’m happy to say that I enjoyed the process (and I like the wreaths, too)! And it is so true that things will get done when they get done.

In Peace,
Dana

Lavender wreath + Rosemary + roses outside

Lavender, Rosemary and Roses

Lavender wreath roses on top + ribbon

Lavender wreath with roses and a ribbon

Lavender wreath + fuschia roses full view

Lavender wreath with roses and hydrangea


Having fun making hydrangea wreaths

straw wreath frame

a plain straw wreath frame with a hanging wire

Hello there! I’m very happy to report that I have two more wreaths completed (so far!) this season and I am very happy to share pictures of how I made them. The wreath making process starts weeks before actually putting flower to frame, when the flowers need to be gathered and dried. About a month ago I went out to the garden and cut as many hydrangea stems as I could. I’ve found that the stems need to be sturdy (not young), or they will just wither. I then hung the stems from drying racks (we usually hang our socks from these – I’m not sure what their official use is!). It doesn’t take that long to dry out flowers, maybe a couple of weeks. For me, the tricky part is finding enough time in one ‘go’ to start and finish making a wreath. My life is such that I squeeze in these projects in between ‘life’. I think I’ve mastered ‘ad-hoc’ project making! Anyway, I made these two wreaths in half of the time it took to make my last lavender wreath – it’s great working with large flowers! They were super simple to make and it was fun to use up all of my dried flowers.

hydrangea paniculata flowers

These stems are from my Hydrangea ‘Vanille Fraise’ Paniculata ‘Renhy’

Confession time: I have several wreaths around my house. I hate throwing things away if they still have some life in them. But hydrangea and lavender wreaths do fade with time. I might get two good years out of them, but not more than that. So for this first wreath made from my Hydrangea ‘Vanille Fraise’ Paniculata ‘Renhy’, I stripped down an old wreath, leaving just the Spanish moss since that is the background and doesn’t really age.

Spanish Moss covered wreath

Spanish Moss covered 15″ (38 cm) wreath

I used floral ‘U’ pins to attach everything, and 15″ (38 cm) straw wreaths. All of the flowers are from my garden. Now, it was interesting making this first one because the shape of the flowers are pointy. It looked really funny as I was making it, but I think I was able to balance it out in the end. Well, maybe it still looks funny, but I love the shapes in it and the textures and the quirkiness about it!

Hydrangea 'Vanille Fraise' Paniculata 'Renhy'

The first layer: Hydrangea ‘Vanille Fraise’ Paniculata ‘Renhy’

The hydrangea plant is not that old, and this is the first year that the flowers were a substantial size (they were quite small before!). They are the prettiest colors as they change from cream to pink to dark pink. It’s a lovely plant to have.

Hydrangea 'Vanille Fraise' Paniculata 'Renhy'

Adding on a second layer:Hydrangea ‘Vanille Fraise’ Paniculata ‘Renhy’

I was trying to soften the pointy-ness of the blooms by having an outside layer. I’m not sure if that happened or not!

blue hydrangea for wreath

Adding in a change of shape and color with this blue mophead hydrangea

Ah, yes, interesting picture. See the heat stain on my table in the picture above? I learned that lesson 25 years ago – never put a hot pot directly on a wood table (duh, right?)! This table is my craft table now 🙂

Hydrangea 'Vanille Fraise' Paniculata 'Renhy' wreath

Mophead hydrangea and paniculata hydrangea used to create this wreath.

Oh my gosh I just think it is the neatest thing ever! My mophead hydrangeas are quite funny looking (I sense a pattern in my garden…). It’s not that they don’t dry well, they are somewhat closed even when I cut them. I’m not sure if it is lack of water, or what. I’m still learning!

Hydrangea 'Vanille Fraise' Paniculata 'Renhy' wreath

Wreath made of hydrangea ‘Vanille Fraise’ Paniculata ‘Renhy’ along with some mophead hydrangea stems.

Wreath made of hydrangea 'Vanille Fraise' Paniculata 'Renhy' along with some mophead hydrangea stems.

Wreath made of hydrangea ‘Vanille Fraise’ Paniculata ‘Renhy’ along with some mophead hydrangea stems.

hydrangea paniculata wreath

This is the wreath hanging in my kitchen

Nothing ventured, nothing gained! That was the first wreath I made that day and it had gone so quickly and I still had time in my ‘free time’ window, that I jumped right into making a second one. This time I only had mophead hydrangea stems.

blue(ish) mophead hydrangea flowers to begin a wreath

blue(ish) mophead hydrangea flowers to begin a wreath

You can see in the picture above how short I cut the stems. Thankfully, the stems were quite strong and I was able to pin them in place with the floral ‘U’ pins. The flowers were big enough that when looking at the front you couldn’t see the sides of the wreath, so I wasn’t concerned with covering the sides.

blue hydrangea wreath outside view of stems

blue mophead hydrangea wreath view of side and pins

blue hydrangea wreath in process

One by one, the straw wreath gets covered.

With the large flower heads, it was easy and fast to cover the straw wreath frame. The colors are a mix of blues, greens, and pinks – and I reflect back to my garden trend of funny looking colors!

blue hydrangea wreath half finished

It was a simple process of adding a flower to the inside of the frame and then one to the outside. I used the larger of the flowers for the outside to cover as much of the side as possible.

blue hydrangea wreath bottom half close up

texture!

I like it! It’s just something fun, quirky, and from my garden. I still have LOADS of lavender left, too, so plans for more wreaths are working away in my head! 🙂

ta-da! completed hydrangea wreath

ta-da! completed hydrangea wreath

blue hydrangea wreath on playhouse

Requisite picture of the wreath on our playhouse

All that in just a couple of hours! It took longer to work around the sun’s schedule to take pictures than it did to make the wreaths.

hydrangea paniculata wreath playhouse + chickens

The chickens roam the yard full time, so they’re bound to be in pictures and never in a pretty posed way!

Being creative is a wonderful way to express ourselves, no matter what the medium. What is your creative outlet? 🙂

In peace,
Dana


(Another?!) Lavender Wreath

Front Gate garden with hydrangea, lavender and lupin

our front gate garden with hydrangea, lavender and lupin in early July

Well hello there! Welcome to my blog where I am hanging on to summer with both hands! It’s true, I am frantically working in the garden, and out, trying to get all of the summer jobs done before, well, summer ends. How does time fly by so quickly? (Thankfully, this is a true sign of enjoying ourselves!)

our front Gate garden with hydrangea, lavender in late July

our front gate garden with hydrangea and lavender in late July

July is the month for Lavender here in Ireland. The best time to make lavender wands is just as the lavender comes into bloom, in early to mid July. I made a few this year, because they are just fun to make!

Mom in the Garden with Lavender Wands

Mom in the Garden with this season’s Lavender Wands

Mid July is also the time when I harvest my lavender. I cut about 2/3 of the stems (including the blooms) and lay it flat to dry. It usually takes a couple of weeks to dry. So typically, I’d then use the dried lavender to make wreaths in August. I’m waaaay behind with that this year, and I have just made one wreath so far! But my lavender is at least all bundled up and looking pretty in some baskets. 🙂

Basket of Lavender

Basket of Lavender

drying lavender on the floor

This is where I dried most of the lavender this year – on the floor of the room my daughter uses to practice her Irish dancing. She was away for 3 weeks at the Gaeltacht (Irish camp) so it worked perfectly!

I’ve made several lavender wreaths over the past number of years (Have you checked out my ‘Wreaths of all Varieties‘ page? The link is at the very top of the Mom in the Garden page.) I like writing about wreaths because they are so easy to make, and really, anyone can do it! There are a few basic things I need to start with: “u” pins / floral pins, secateurs / garden shears, a straw wreath frame, floral wire to make the hanging hook, and dried lavender.  Extras include dried roses, Spanish moss, some ribbon and some coffee (decafe, of course).

Lavender Wreath set up

Lavender Wreath set up with straw wreath frame, floral pins, garden shears, dried lavender and roses, and Spanish moss

I love saving flowers from the garden. I’ve spray painted artichokes and created Christmas arrangements with them! If you cut artichokes and allium at the right time, their purple stays purple for a very long time. ‘Reduce, reuse, recycle’ anyone?

vases of dried flowers

vases of dried (and painted) flowers including allium, artichokes, bells of Ireland, barley, roses, and hydrangea

This year I’ve set up an old table in our ‘sitting room’. We rarely use this room, and I can make as big a mess as I’d like and it won’t be in anyone’s way. It has great lighting too.

floral pins, straw wreath frame, and hanging hook

getting started: the basics: making the hanging hook, floral pins, straw wreath frame

The first thing I do, after gathering all of my materials, is make a hanging hook. You can see in the picture above that I’ve used some floral wire which I doubled to make stronger. I wanted to know how many floral pins I’d need, so I started with a box of 50 – which covered about 1/3 of the wreath.  So I needed about 150 pins! I use a 12 inch (30.5 cm) straw wreath frame for my lavender wreaths.

Lavender Wreath starting with roses

Starting with the Spanish moss on the outside, and dried roses on the inside

I like to put Spanish moss around the outside of the wreath – just to make sure I don’t have any straw showing when I’m finished. Confession time: I actually made this wreath a tiny bit backwards (oops!). I started with my dried roses at the bottom, and I think it would have been much easier to add them last. I’m making a note here for next time! 🙂

Lavender Wreath roses + lavender start

I filled in the area around the roses and then went to the top of the wreath and worked down

Lavender Wreath sample group

each group of lavender has 7 to 10 lavender stems, and I cut the stems about a thumb’s distance from the blooms with sharp secateurs and ‘pin’ the group of stems into the straw wreath frame with the floral pins

I filled in the area around the roses first. Then I had a bit of an ‘ah ha’ moment and realized I should be starting from the top. I’m sure there are lots of different ways to do this, but I find that going from the top down makes it easier to cover the stems as you go along.

Lavender Wreath beginning

Starting from each side at the top and working down is a method that works well to cover the stems easily.

I think one thing you do need to have is patience. It is time consuming. The lavender smells so lovely as you work with it, though, and it definitely relaxes you!

Lavender Wreath in progress

Lavender Wreath in progress

Piece by piece, the frame gets covered with lavender.

Lavender wreath almost complete

One last little section to cover!

Lavender Wreath bow

The bow I made by playing around with the ribbon – like tying a shoelace over and over again!

Completed Lavender Wreath in garden

ta-da! Finished lavender wreath!

I had some video of my making the wreath on my Instagram stories the other day. Did you see it? Let me know what you think! The roses are also from my garden. I usually cut the first 20 or so roses at the very start of the season so that I’ll have them for wreaths. I cut them when they are still closed, as they dry best that way. And not to worry about the bees, I’ve left lots of lavender in the yard for them!

Lavender + bees + hydrangea

This bunch of lavender was left for the bees

I hope I’ve inspired you to try your hand at making a wreath! It’s really not hard. I’m glad I made (another?!) one!

In peace,
Dana

Completed Lavender Wreath on playhouse

completed lavender wreath on our playhouse door


It all comes down to Personality!

Morning sunshine gives a warm hue to the hydrangea wreath

Everything we do, and how we choose to do what we do, comes down to our individual personalities. For me, my personality is such that I like to find second uses for things. I don’t like to waste, or get rid of something if it can possibly have a second life. What better way to give a second life to flowers than arranging them in a wreath or a floral arrangement? None, I say! 🙂

This is how I dry my flowers 🙂

Hydrangea are great for drying. It is best to use “mature” blooms, which have a more substantial (papery) feel to them. If they aren’t mature, then the leaves tend to curl. There isn’t anything wrong with curled leaves, I just don’t think they are quite as pretty (although my wreath has some of them, too!)

It all starts with a straw wreath frame and some floral “u” pins.

Wreaths are so easy to make!  In my book, it is essential to have a straw wreath frame, floral “u” pins, and some Spanish moss.  Anything goes for the rest! My hydrangea didn’t flourish this year, due to the drought this summer I presume. So I did get some lovely deep cherry colored blooms from a friend. I traded her zucchini bread for hydrangea blooms, that’s fair isn’t it?

These green colored blooms are hydrangea Incrediball.

I have all of my colors on the table, or hanging on my Flower Tree, and I just dive in.  The hydrangea paniculata ‘Vanille Fraise’ had very small, beautiful blooms this year, but their stems weren’t very strong and most of them broke while pinning them. That was a bummer, as they were really pretty!

Piece by piece the wreath comes together.

I made this one night after work this week. I felt the need to create something! Since I don’t have anything on my crochet hooks, it had to be with dried flowers. I still have loads of lavender around my house, too! (See what I did with that further down the post.) I really enjoy working with my hands, and I’m glad to have such beautiful materials around me to create with.

Ta-dah! This is where my wreath will reside in our kitchen.

Purple, cherry, green, blue, pink: it’s all in there.

Inside lighting doesn’t give the exact coloring.

Nothing beats natural lighting, but then of course there is morning sunshine and evening sunlight, both of which slightly change the coloring again!  You can see for yourself in the following photos.

Bright daylight, but no direct sunlight: This coloring is probably the closest to reality!

This picture has the tiny pink hydrangea paniculata Vanille Fraise.

The dried hyrdrangea is mostly hardy to work with. The green stems are actually doubled-up stems that I have smushed together after taking off brown markings on them. You can really do anything with them (as long as their stems are strong!).

My go-to photo place for wreaths is our playhouse door! This is just for photos as I wouldn’t leave this outside…

Morning sunshine gives a warm hue to the hydrangea wreath

Like I mentioned, I still have loads of lavender “drying” around the house (that I really need to put away!).  I decided to create a simple arrangement, using a magenta colored vase which happens to perfectly match some of my dried roses.  Yes, these little things just get me all excited! First of all, I was able to use a lot of lavender to fill this vase, and secondly, that magenta color is *gorgeous*!

Dried Lavender + Roses = beauty

magenta colored roses and vase

And here is where they will live:

Home sweet home for my vase of lavender + roses.

It’s the little things! I’m glad to give a second life to my flowers, and the lavender and roses really do have a beautiful fragrance.  This is me, this is who I am, and this is my personality.  🙂

What’s your personality like?

In peace,
Dana

Our playhouse in the morning sunlight.

Wreath making in the height of Lavender Season

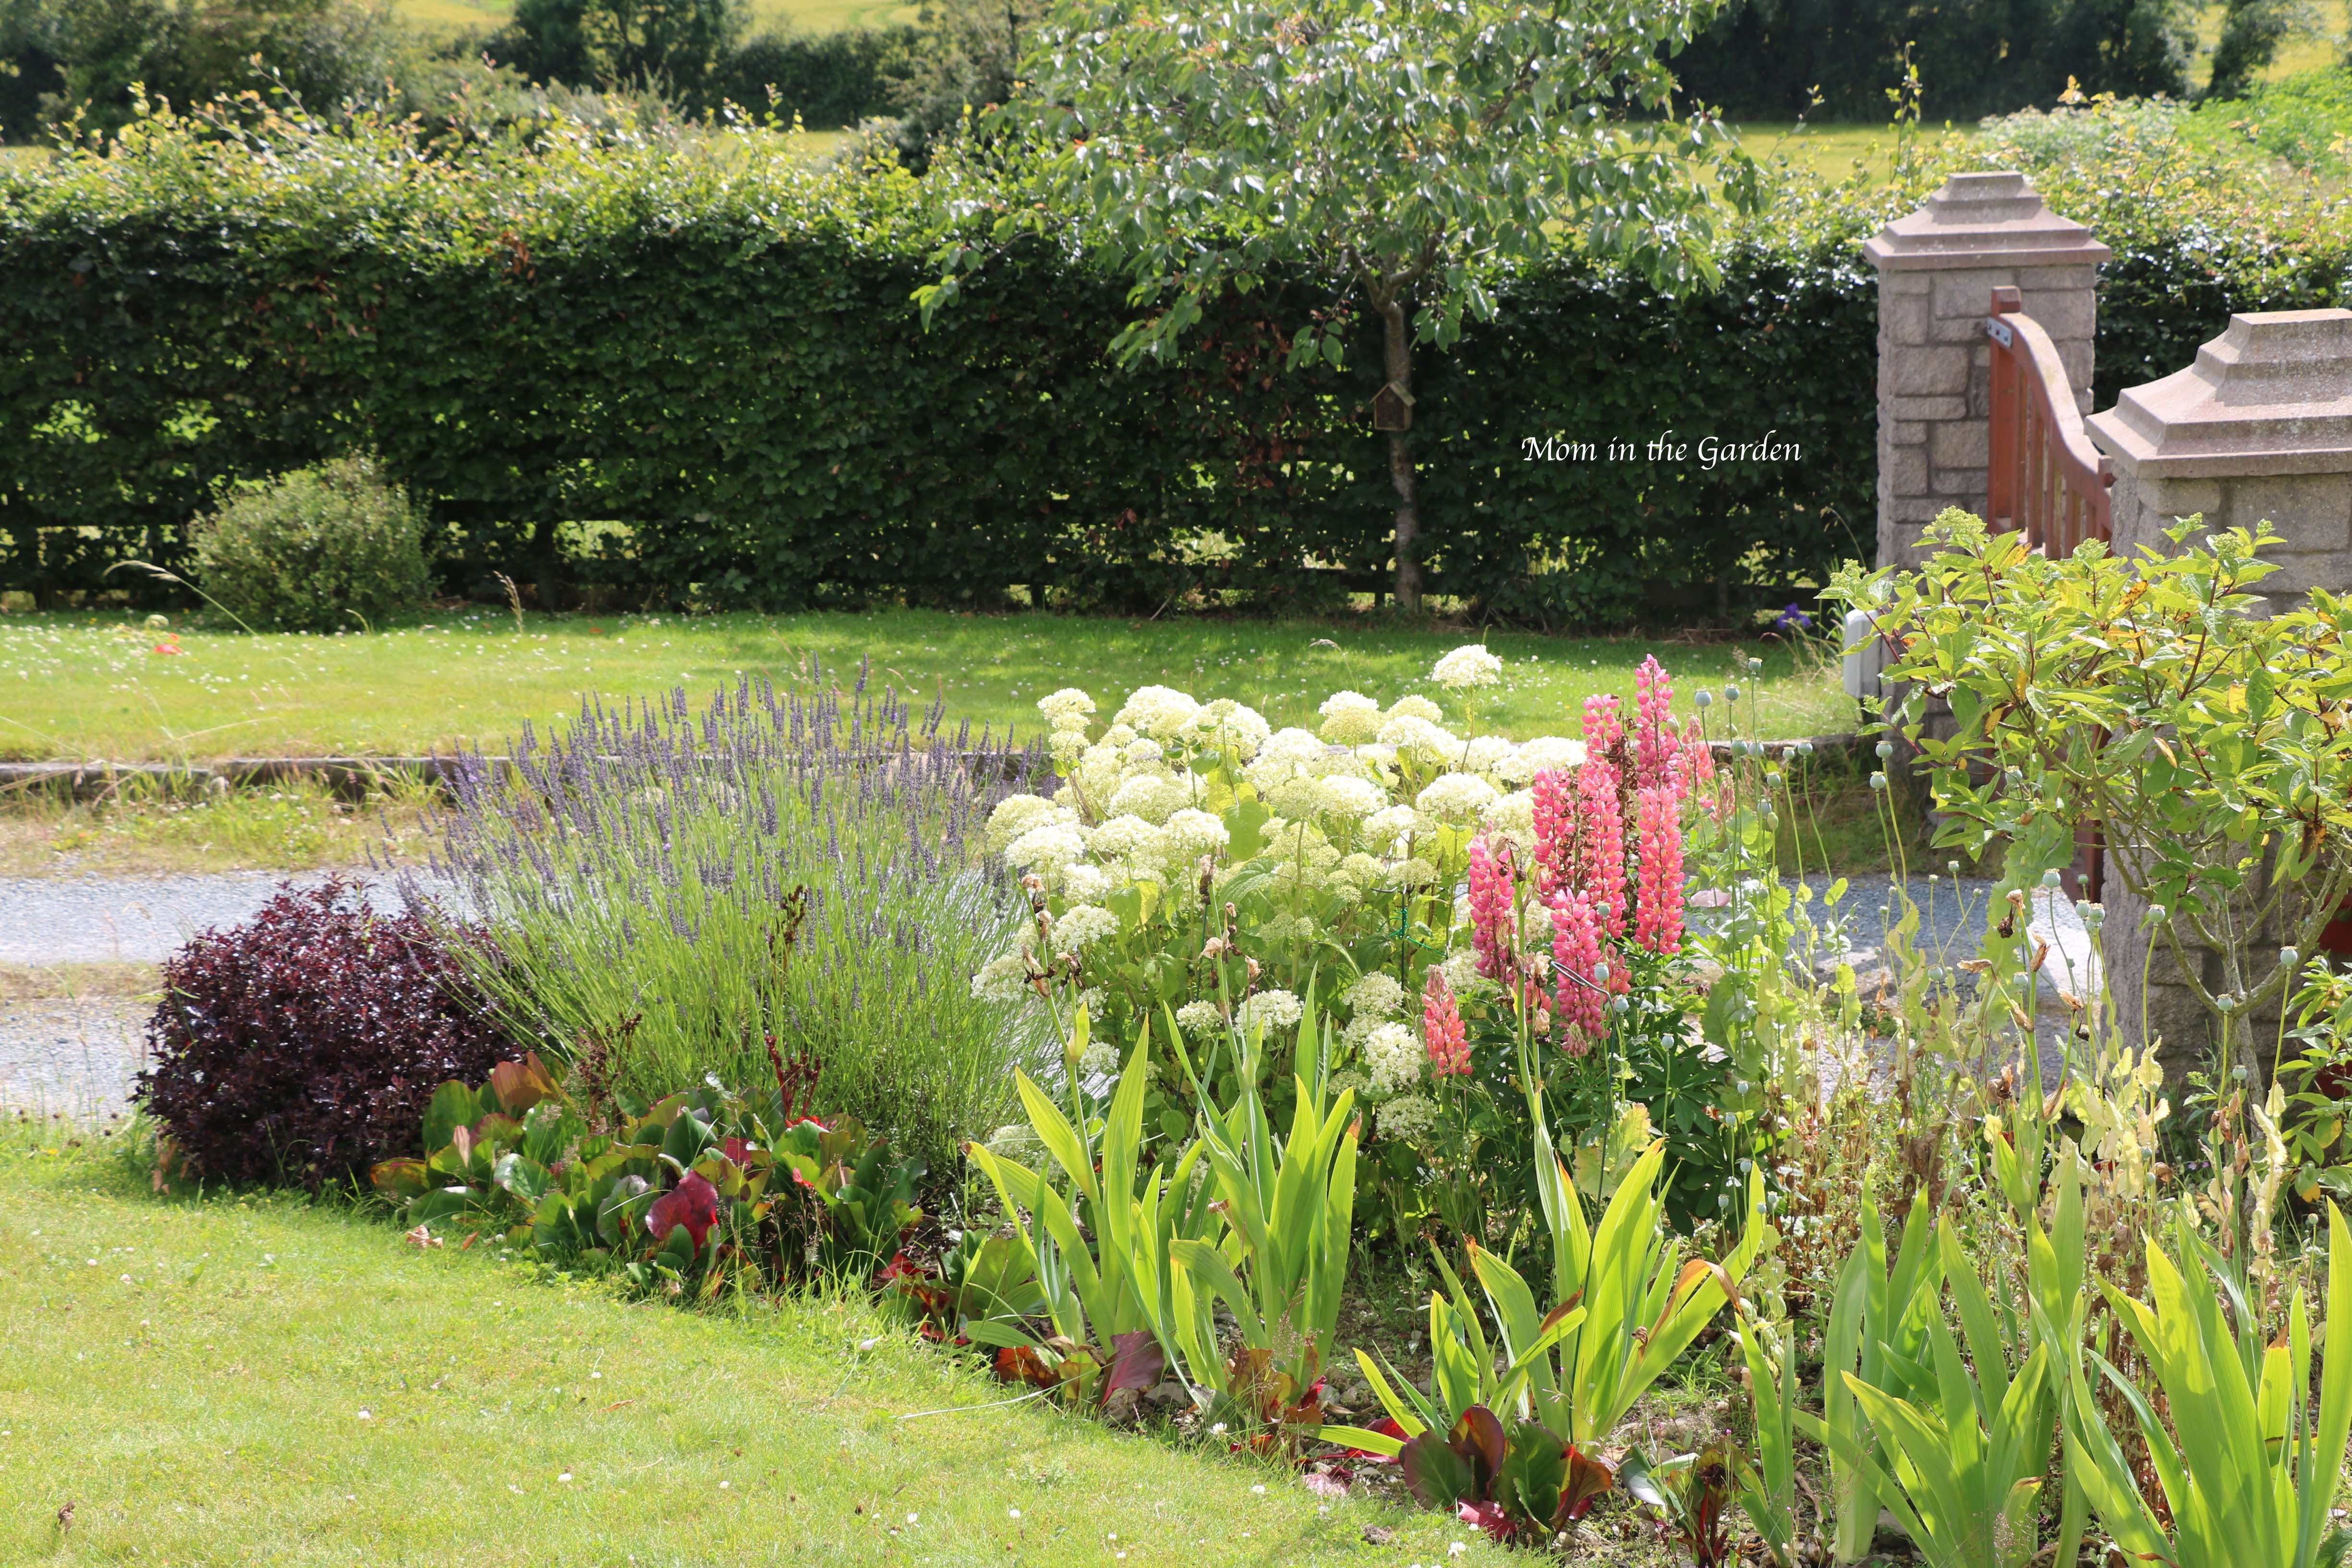
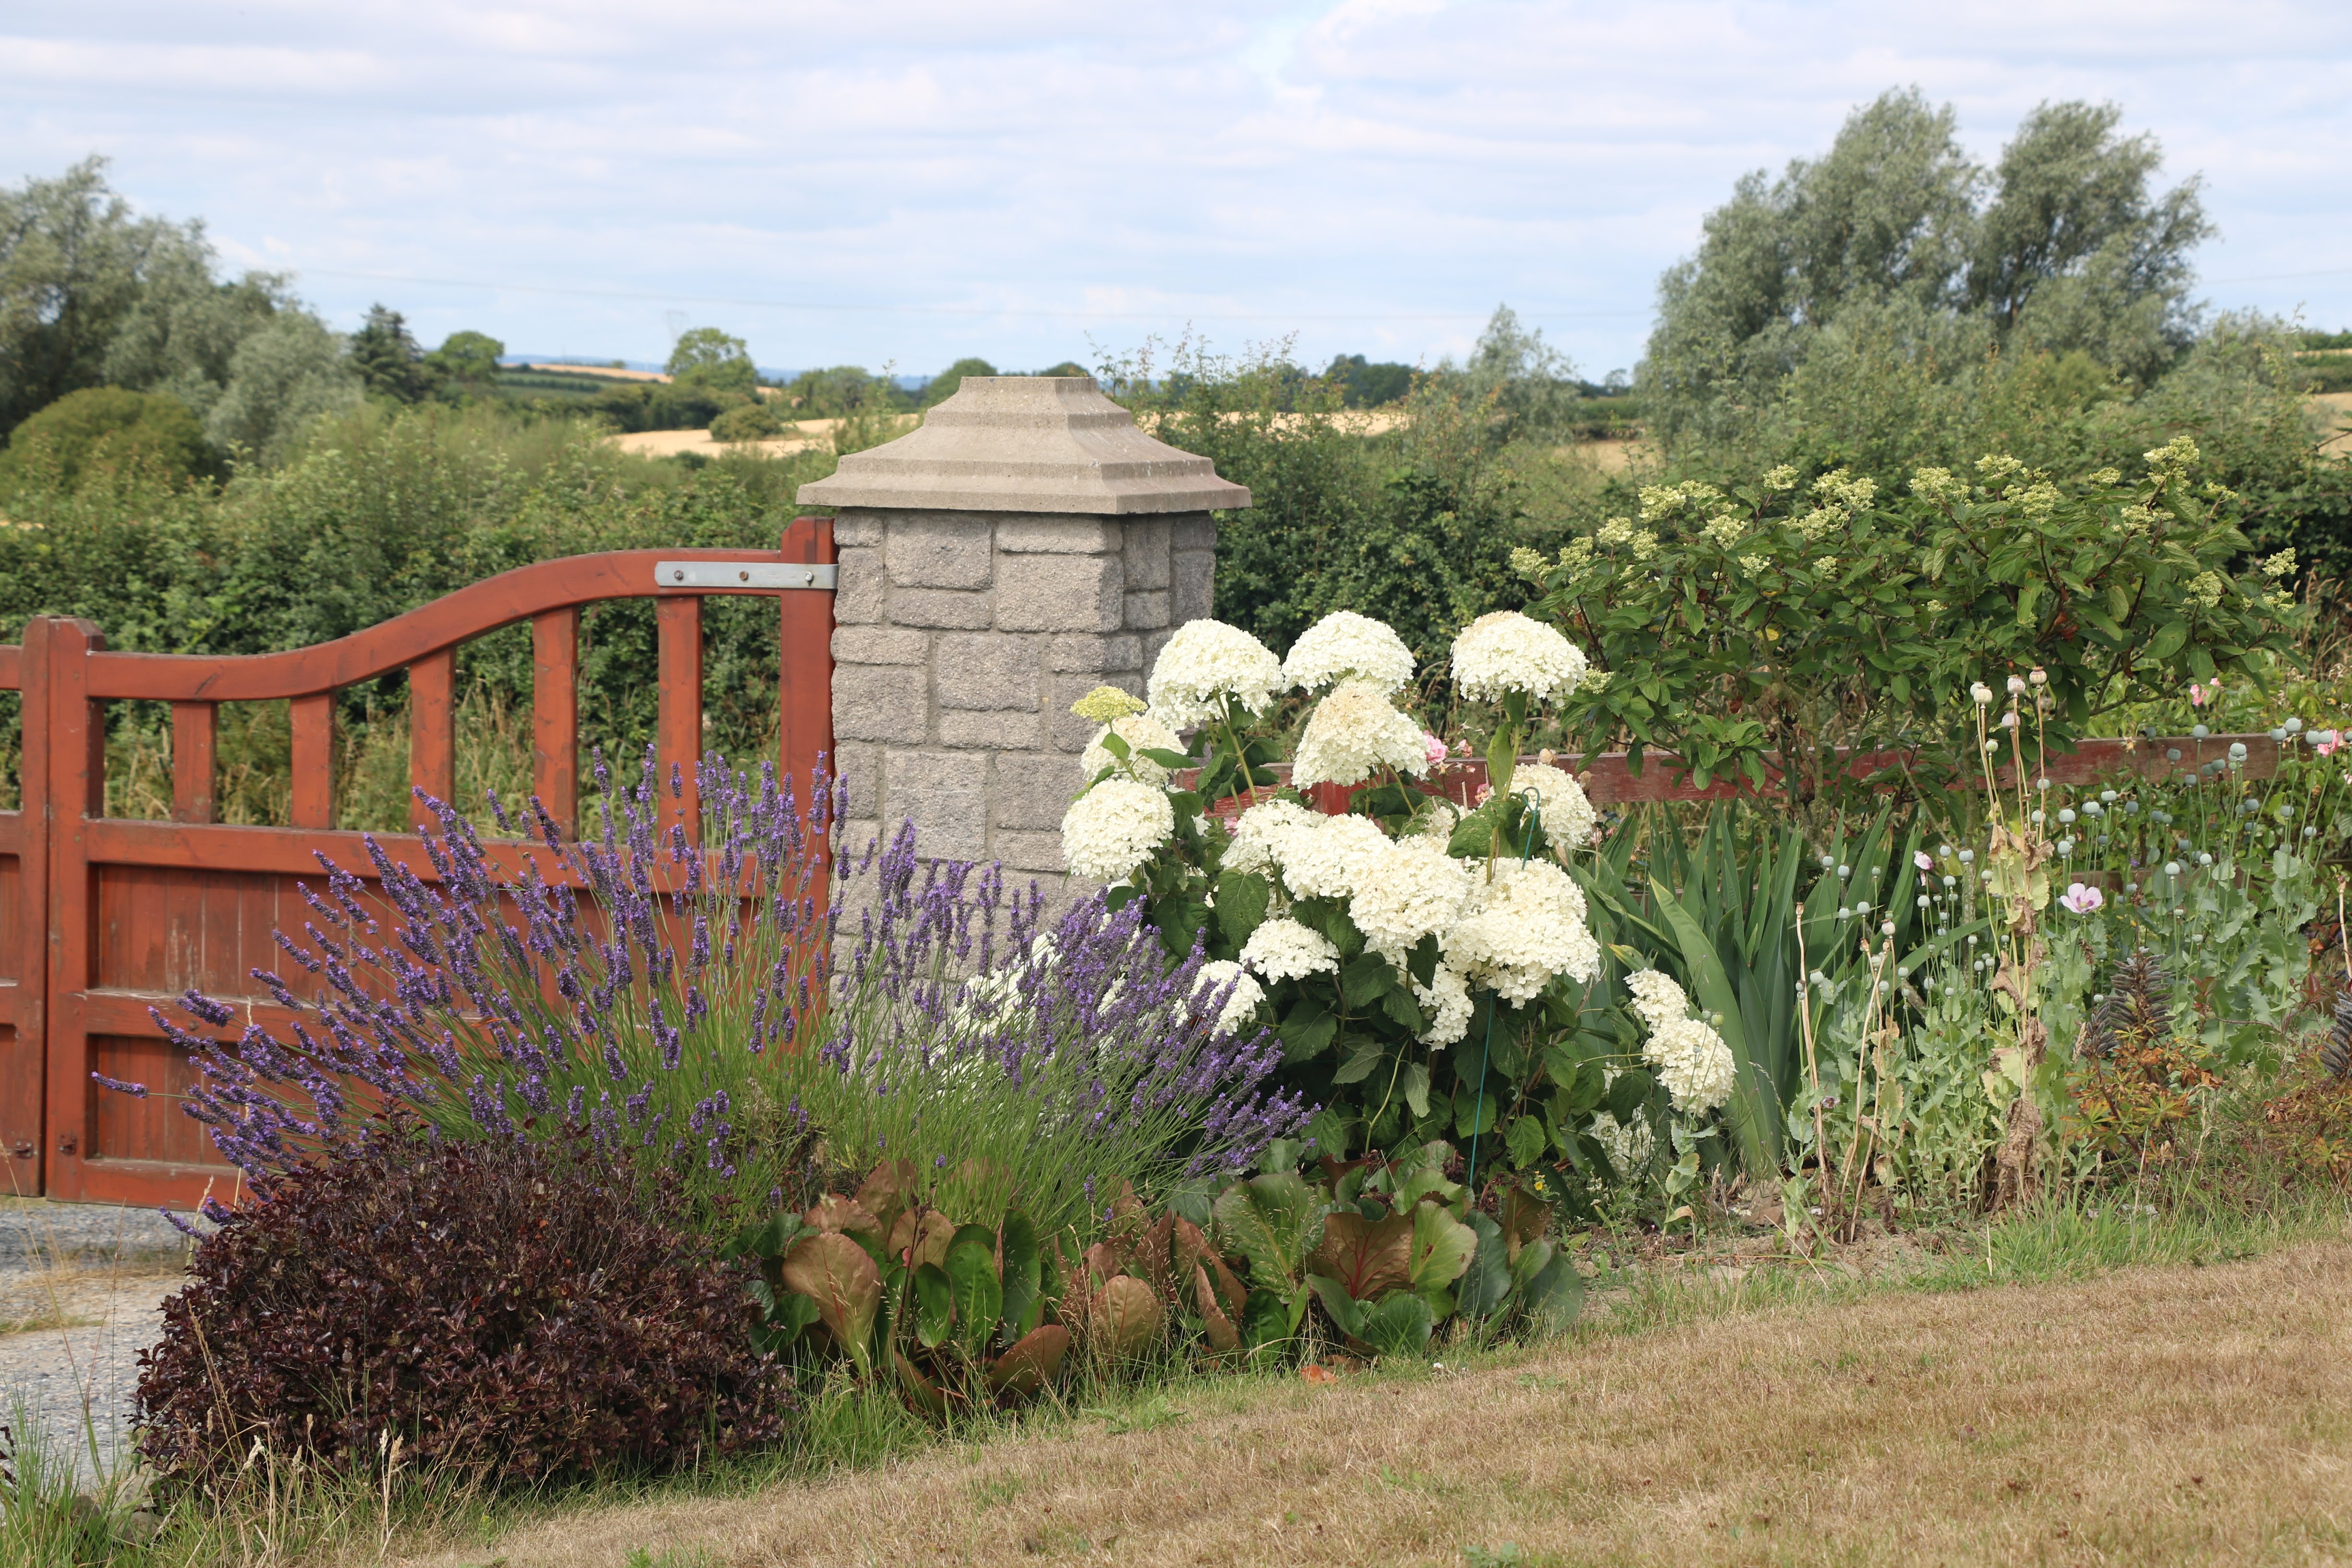
One of my lavender plants (lavandula angustifolia) nestled between Pittosporum Tom Thumb and Hydrangea Incrediball

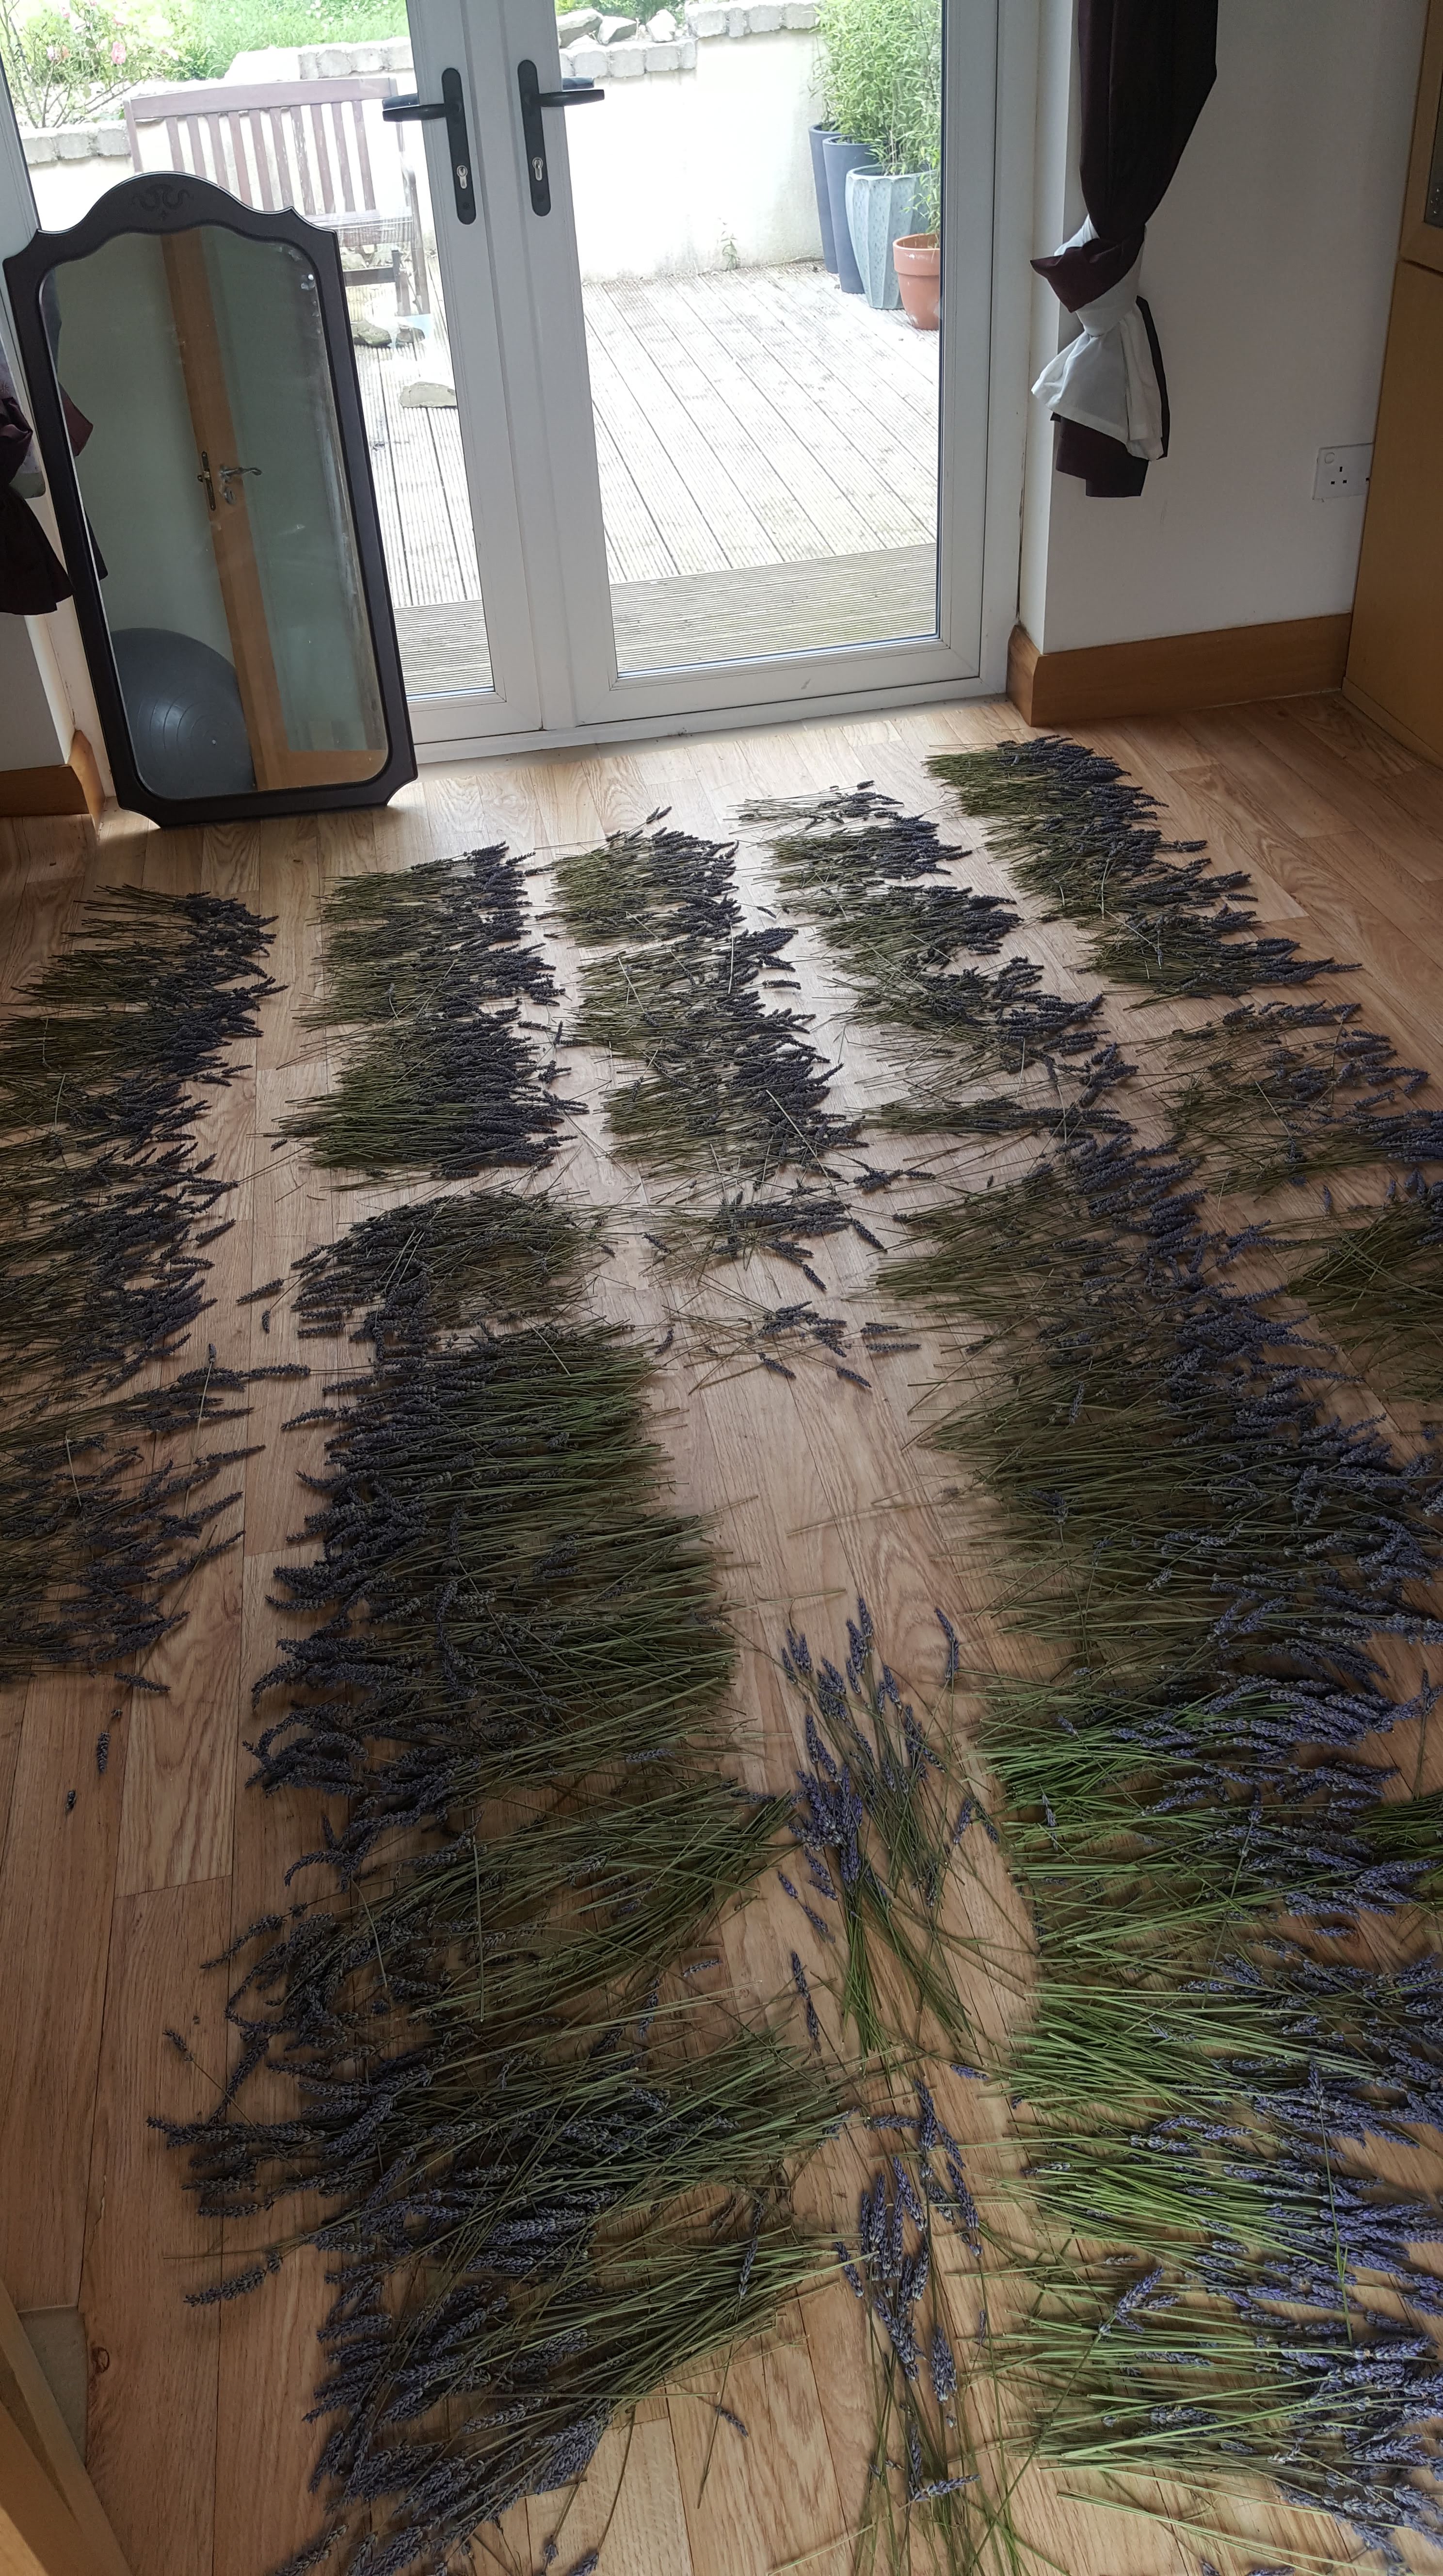
I have quite a few lavender (Lavandula angustifolia) plants . They thrive in my yard, and I am quite happy about that! About mid-July, depending on the weather, I start to “harvest” the lavender. I cut it as it just starts to bloom, cutting about 2/3 of the stem (or a bit more). Then, this is the fun part, I lay it on the floor around my house; in my sitting room, in my bedroom, in any free space that I can find, because it is a lot of lavender! I try and lay it flat, to help it to dry out as quickly as possible. A couple of weeks usually does the trick (as long as it isn’t wet when I cut it). Thankfully, we don’t really use the sitting room, so at least it isn’t a problem to use the entire floor of that room!

This one is my favorite lavender plant (Lavandula angustifolia) in bloom

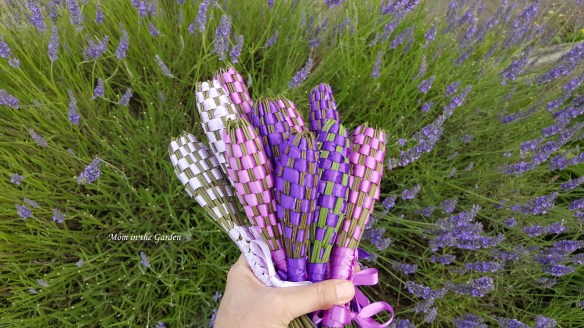
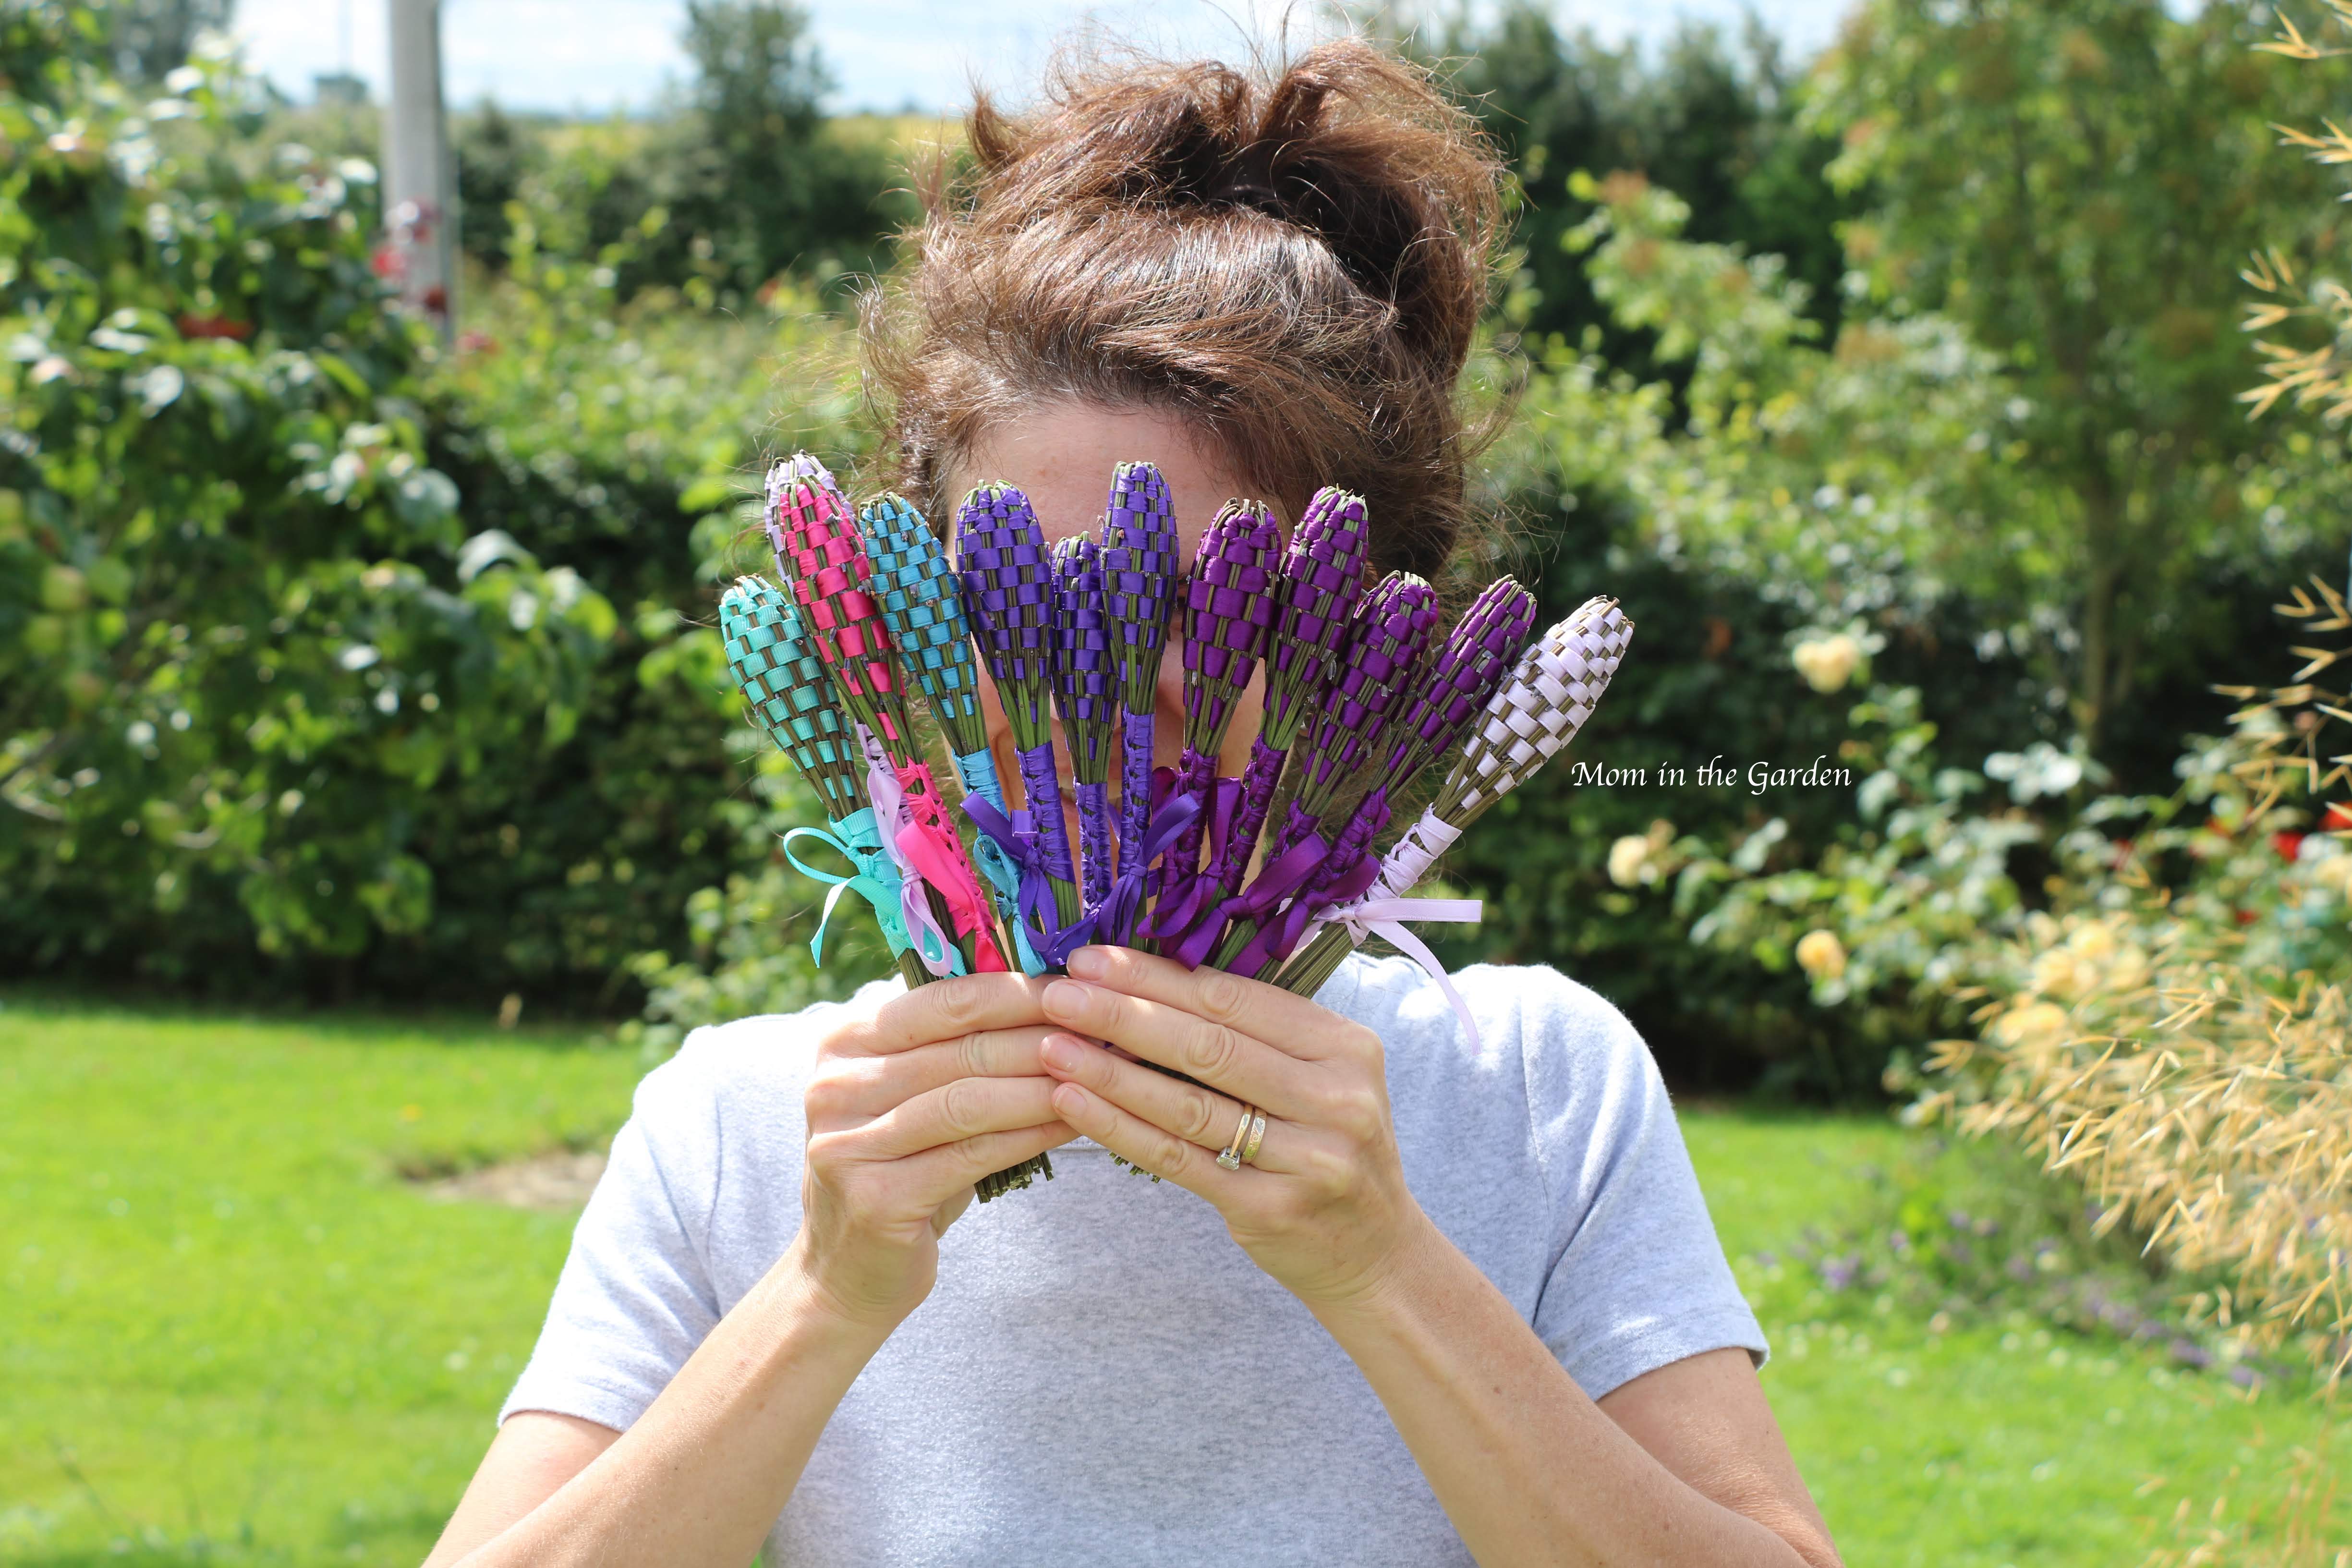
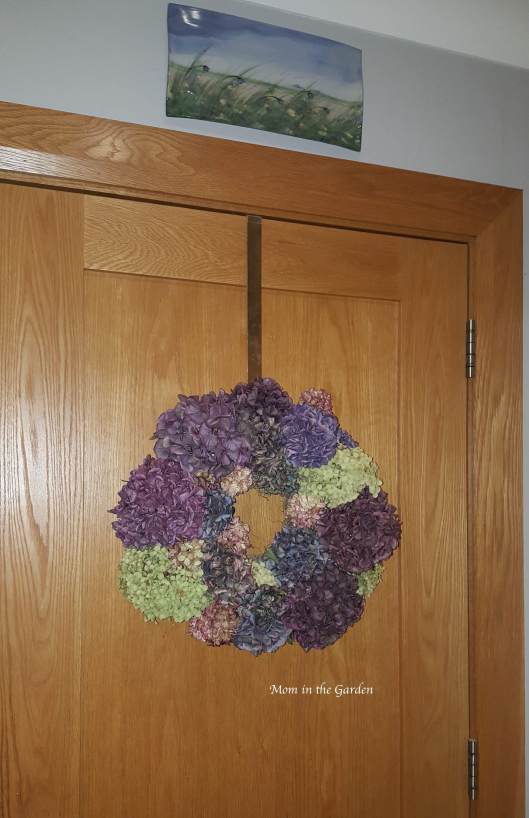
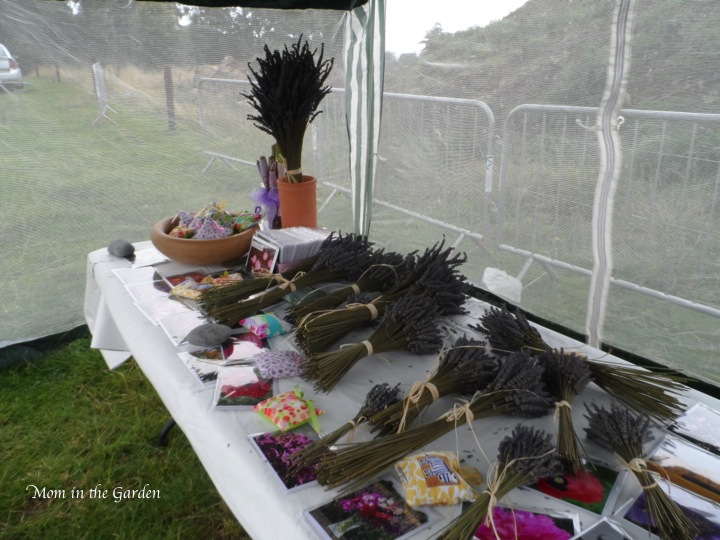
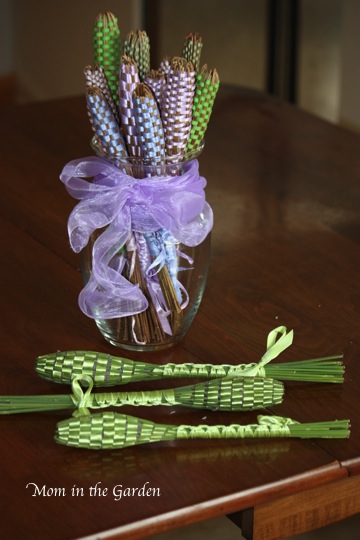
There are a few things I do with the lavender. If I have time when I cut it, I will make lavender wands (the stems must be fresh though, so they don’t break while bending). I also make lavender sachets, which involves taking the lavender off of the stems after they are dried, and then sewing up little pouches. You can click here to read and see more about wands and sachets. But my favorite craft to do with lavender is to make wreaths.

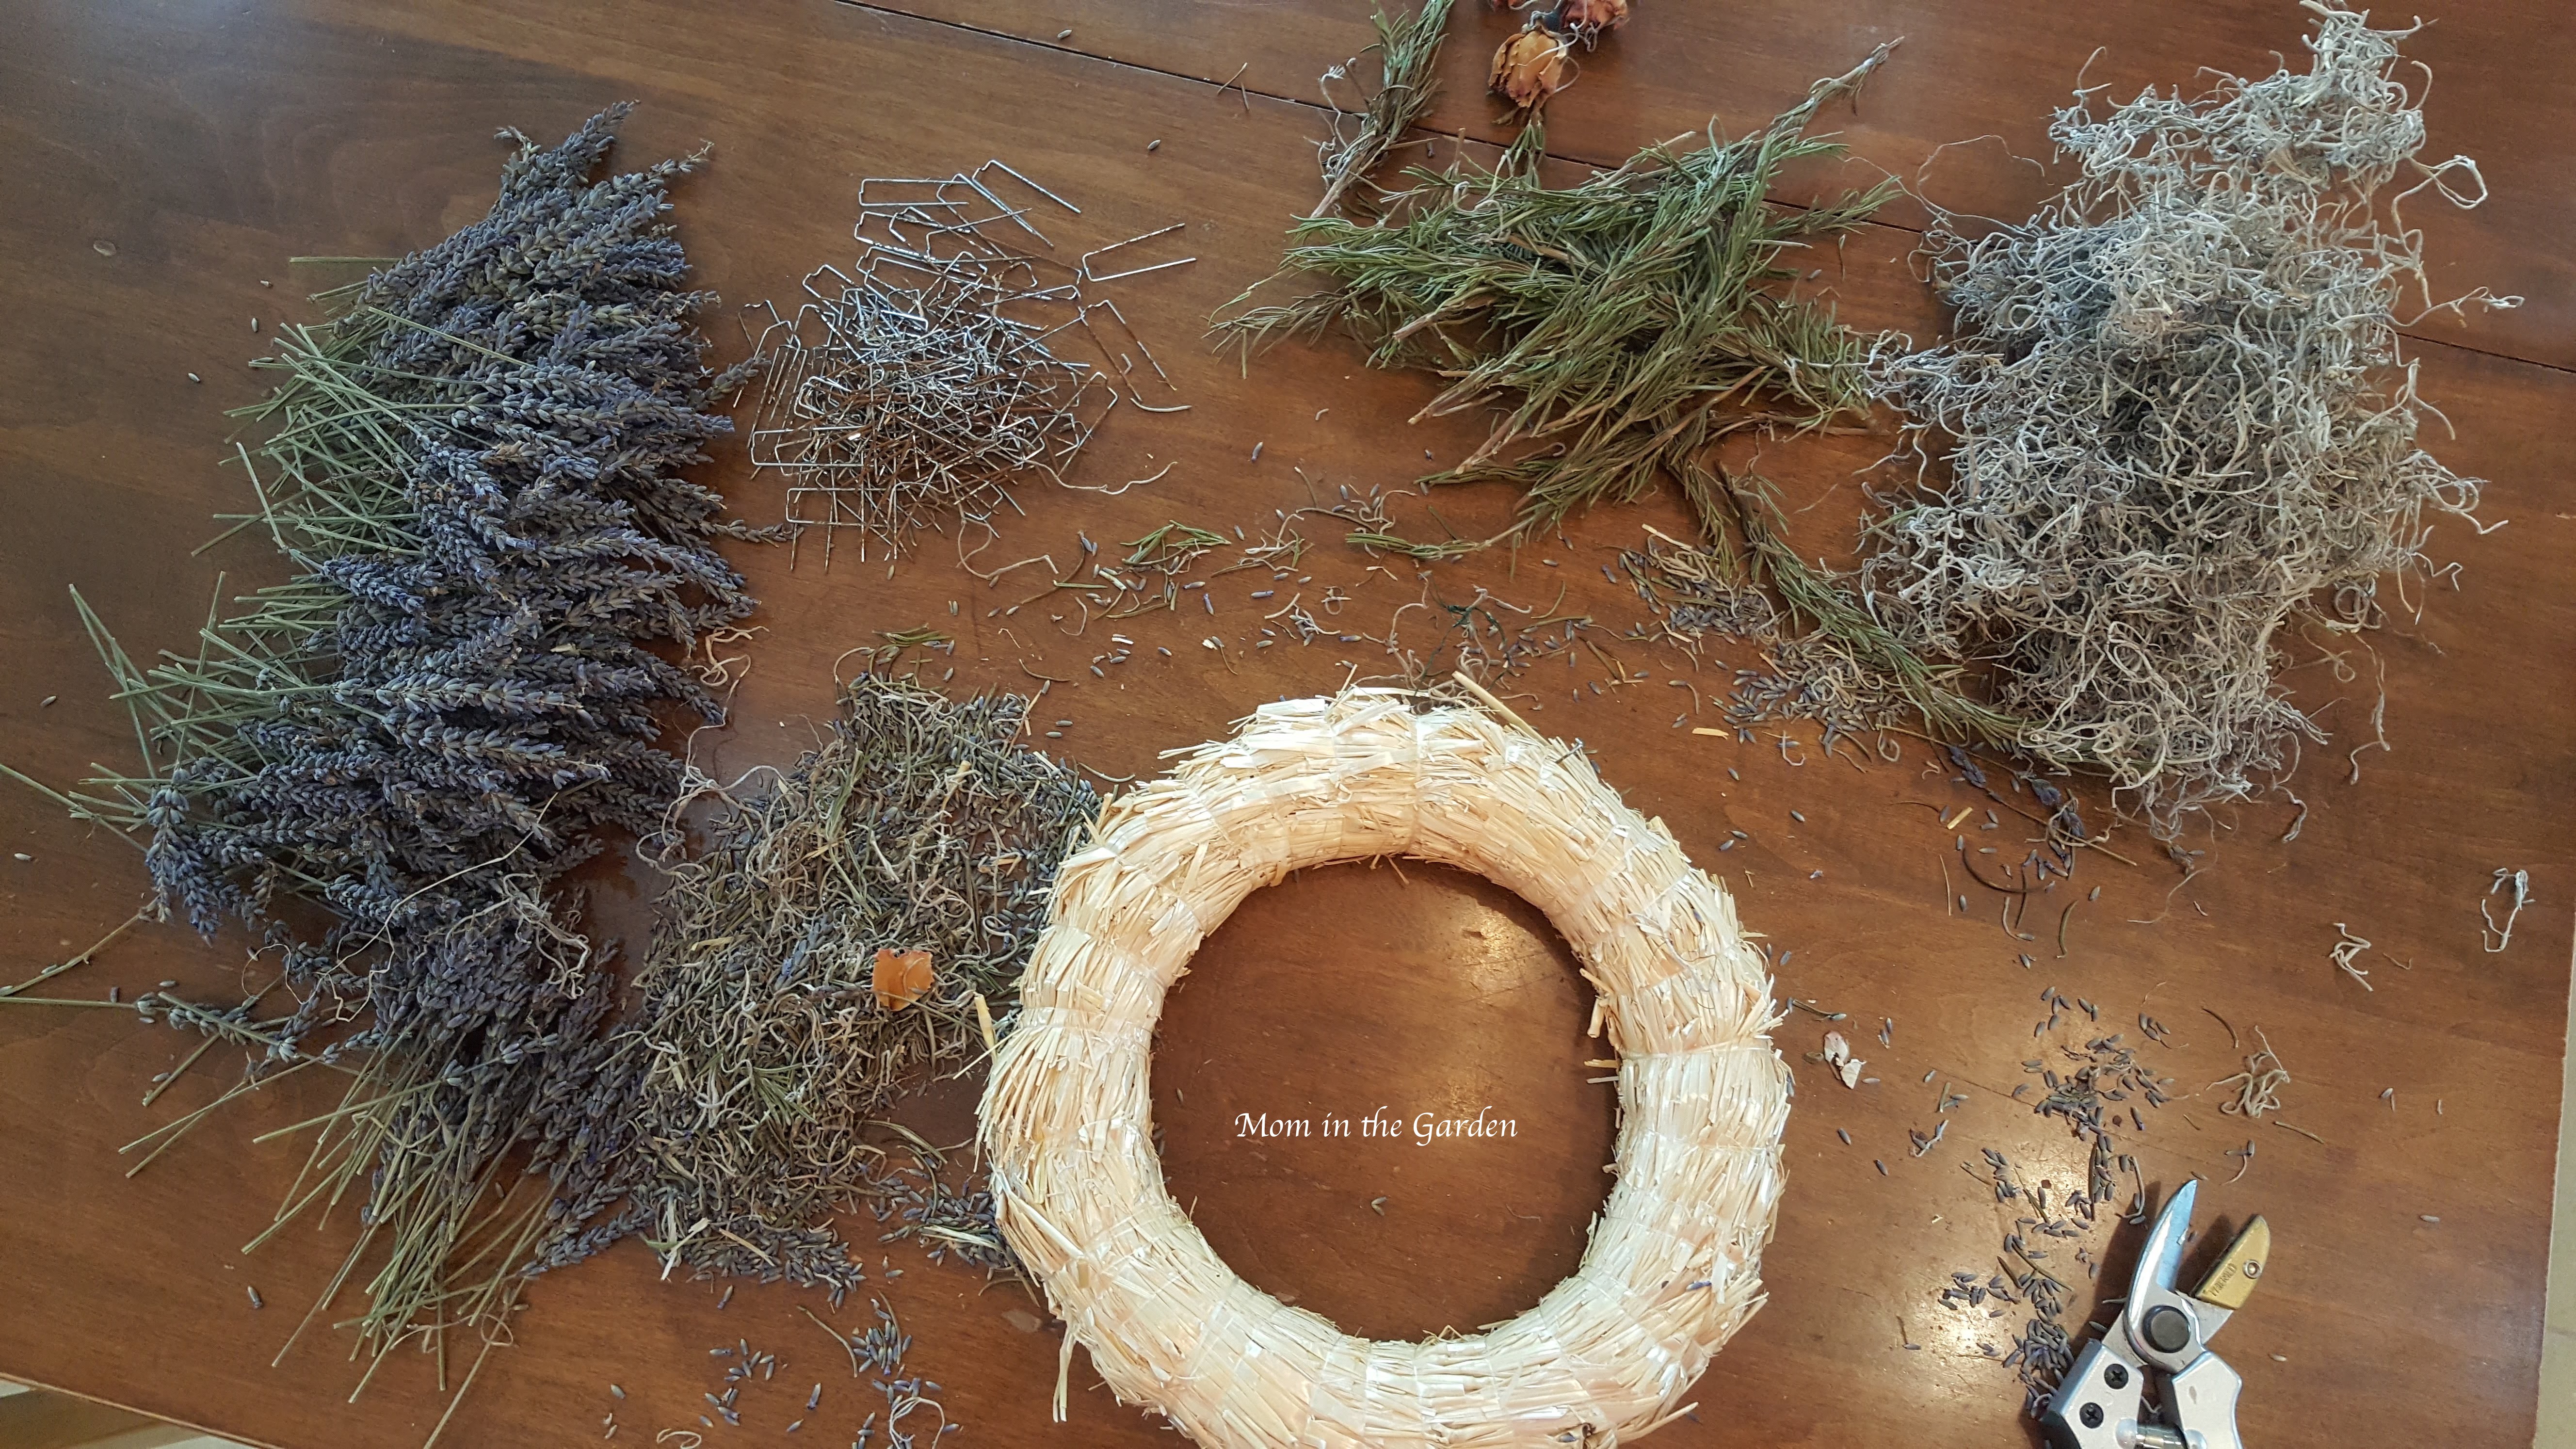
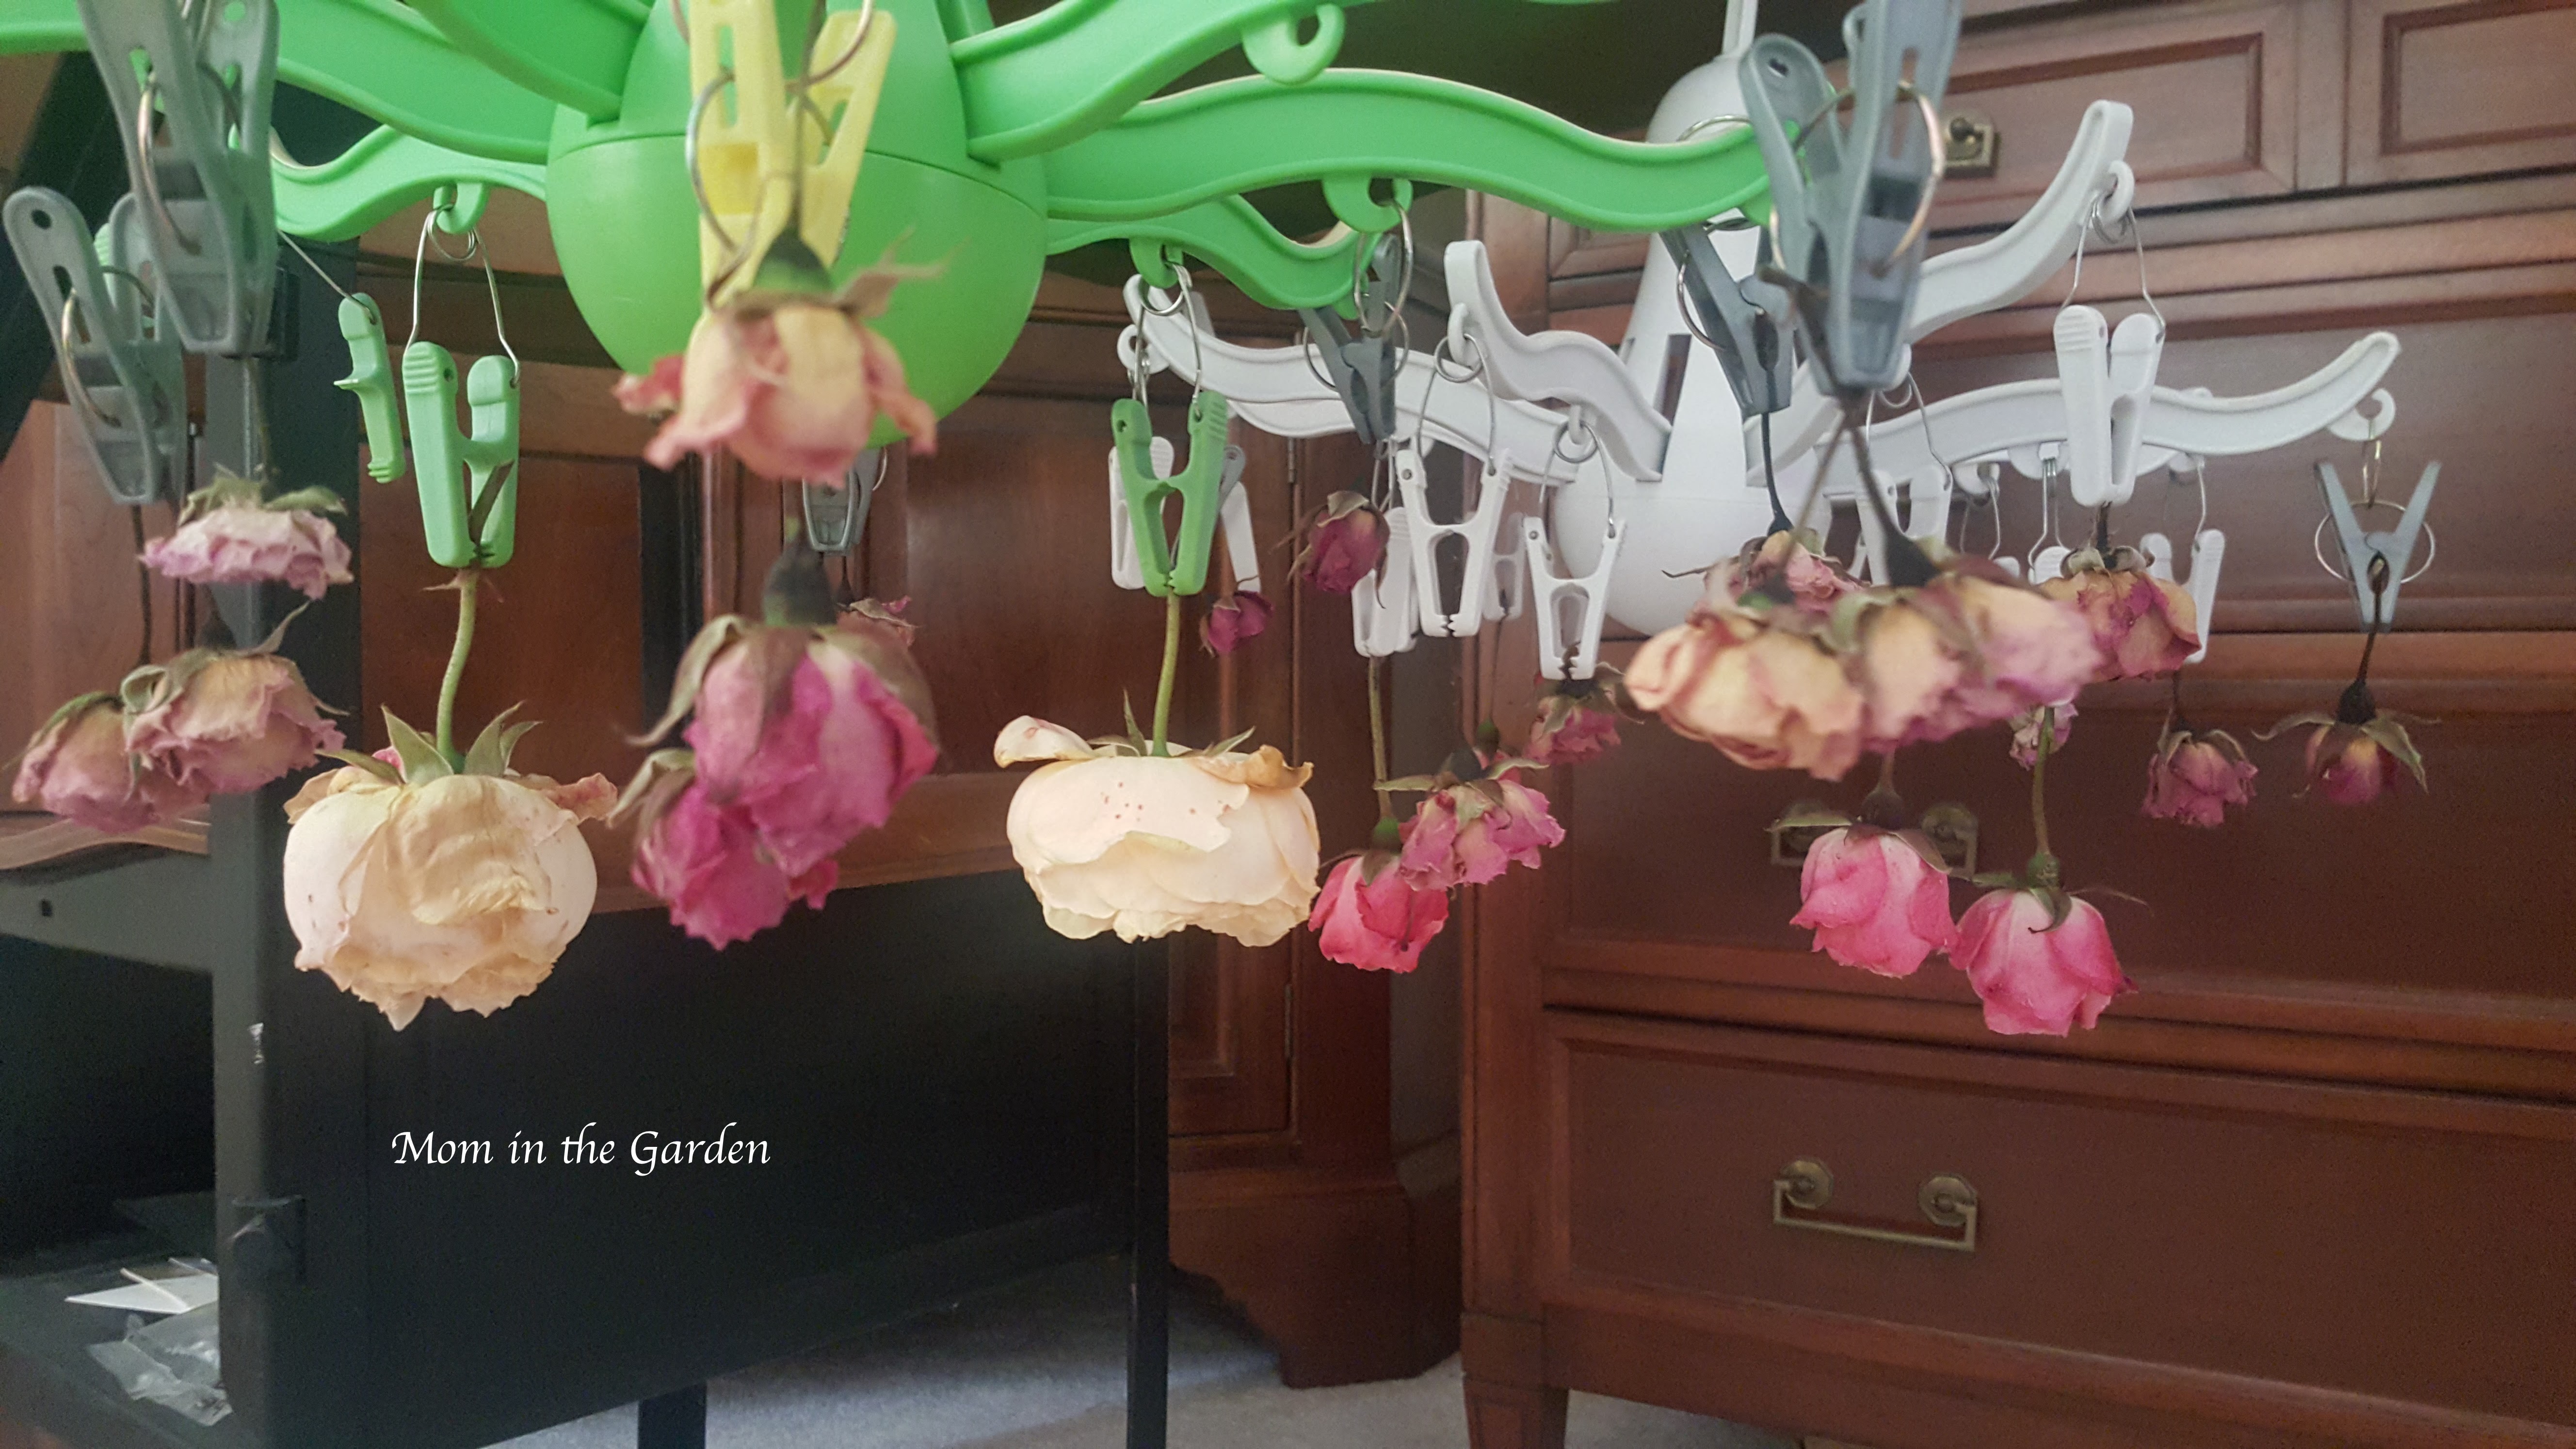
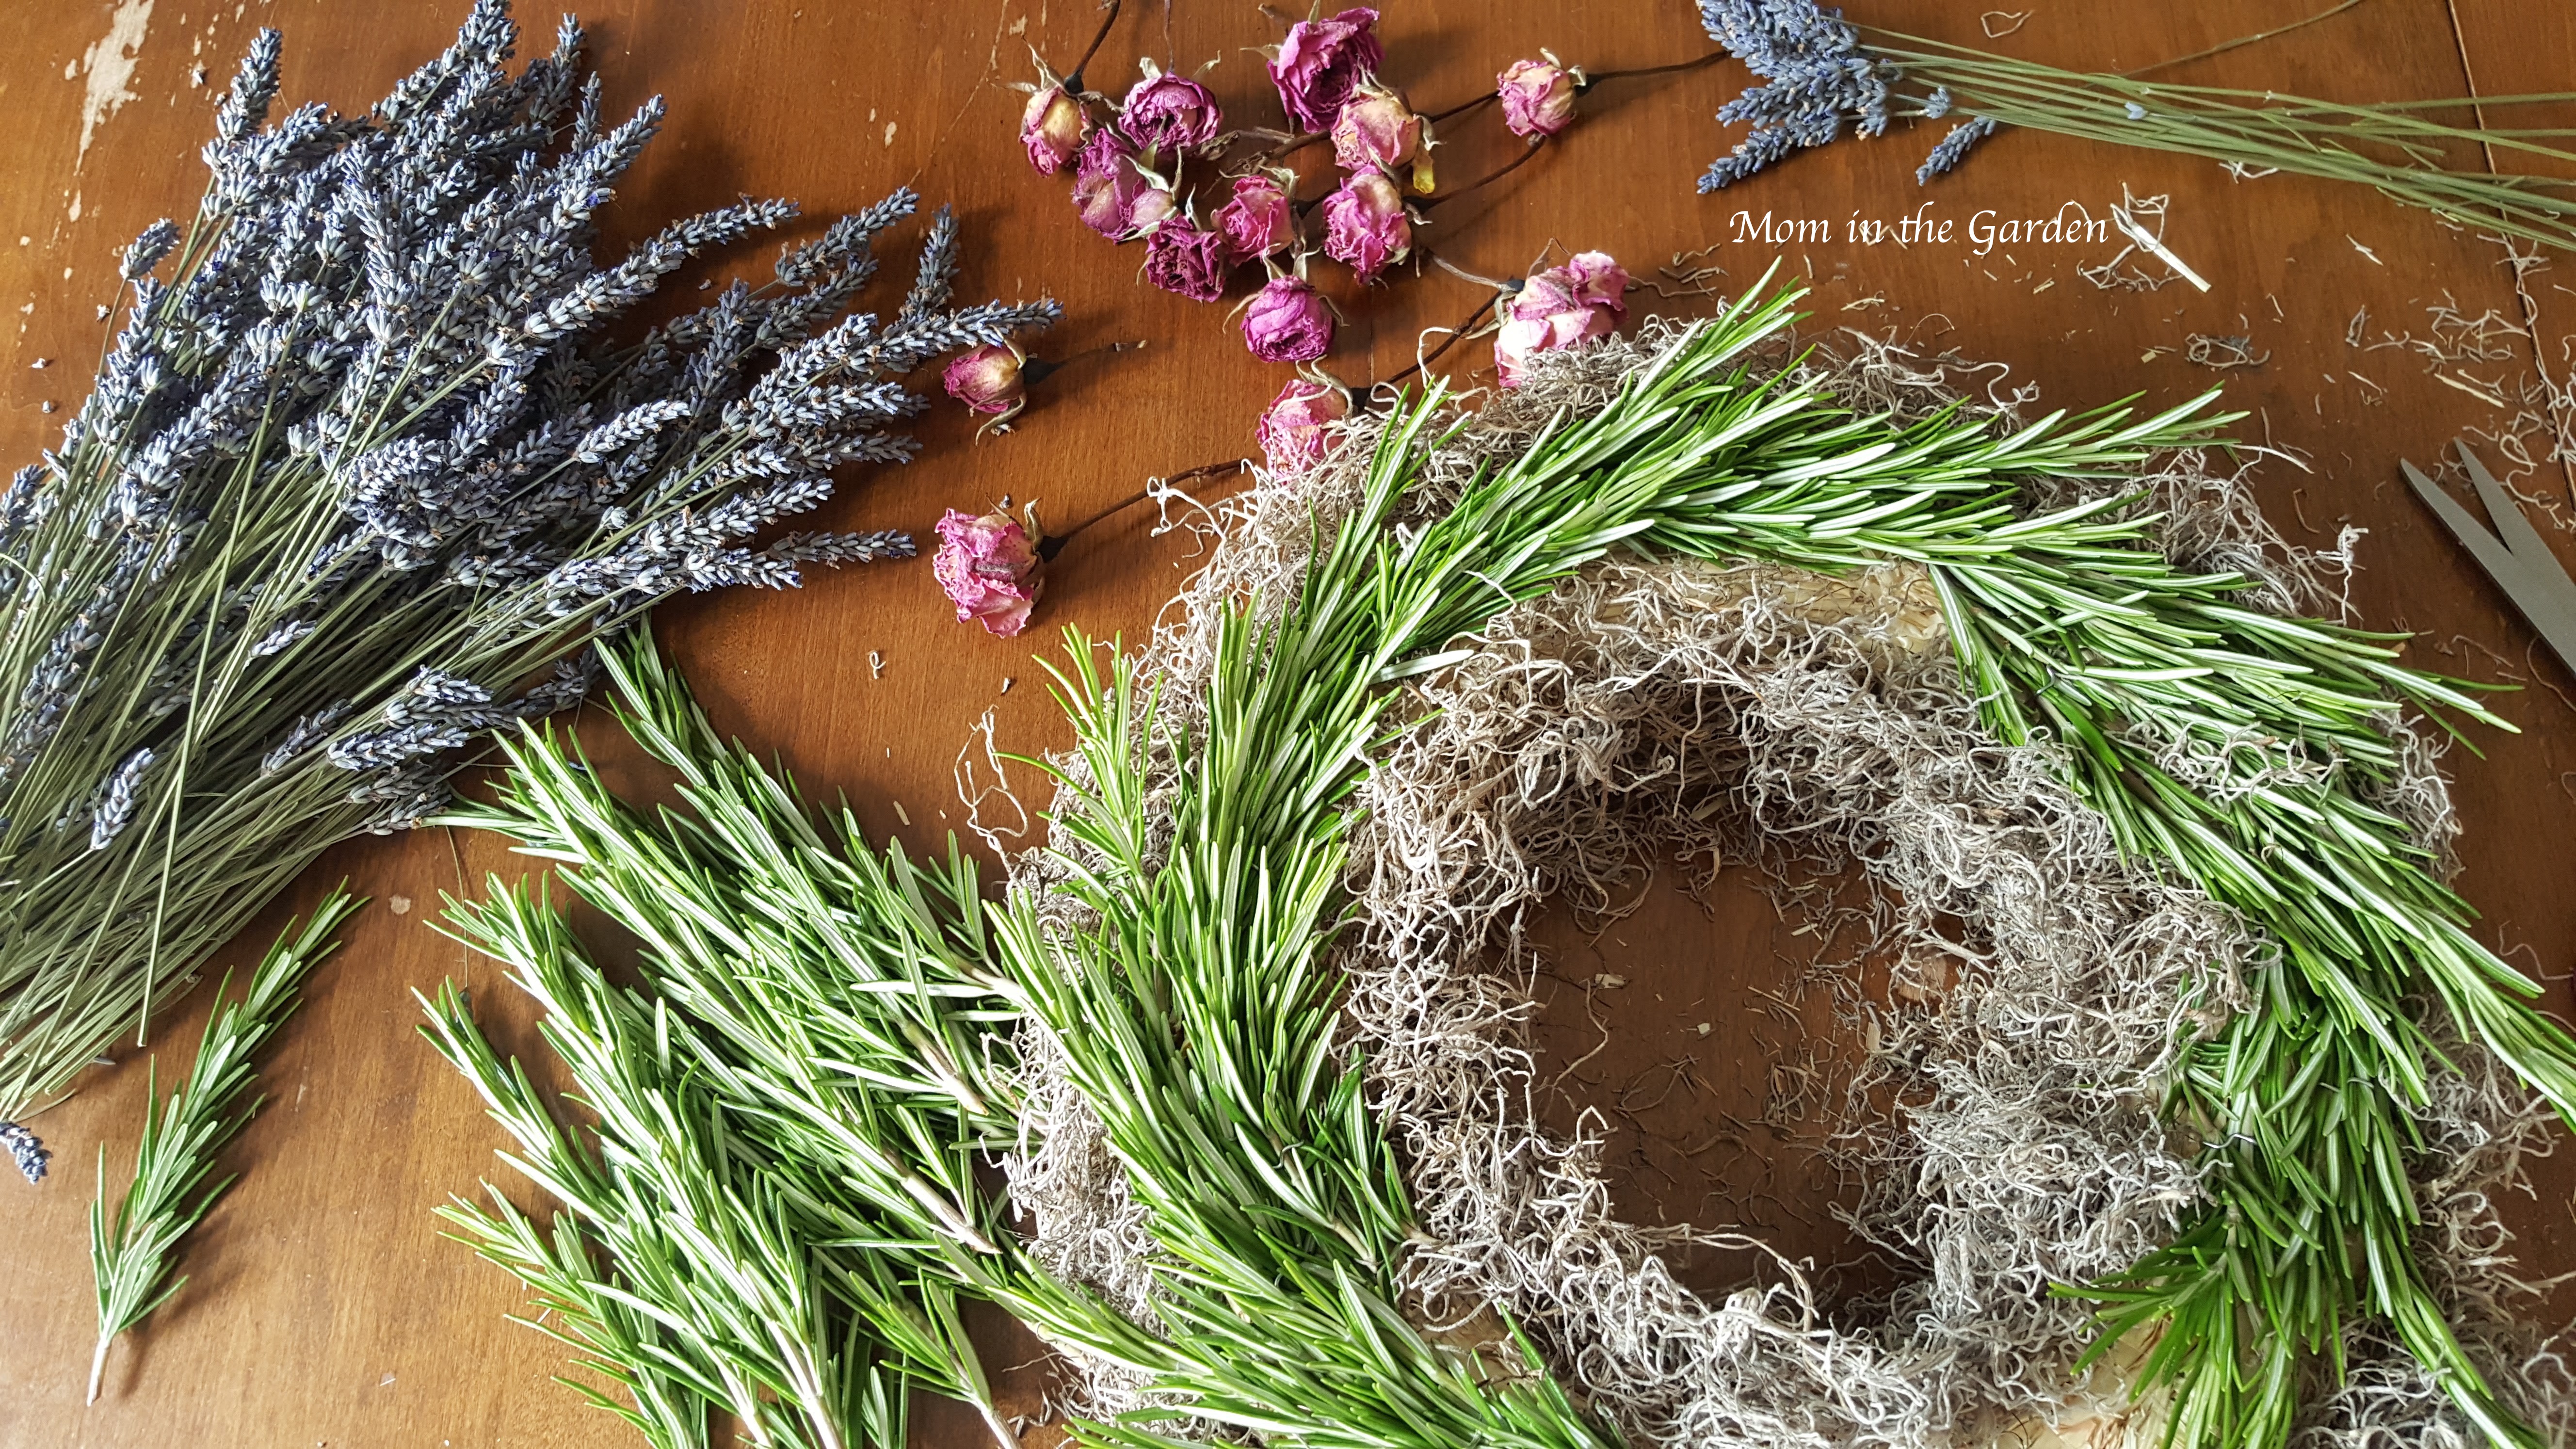
I took apart one of last year’s lavender wreaths. Here’s what came off of it! (Lavender, Rosemary, Roses, Spanish moss)

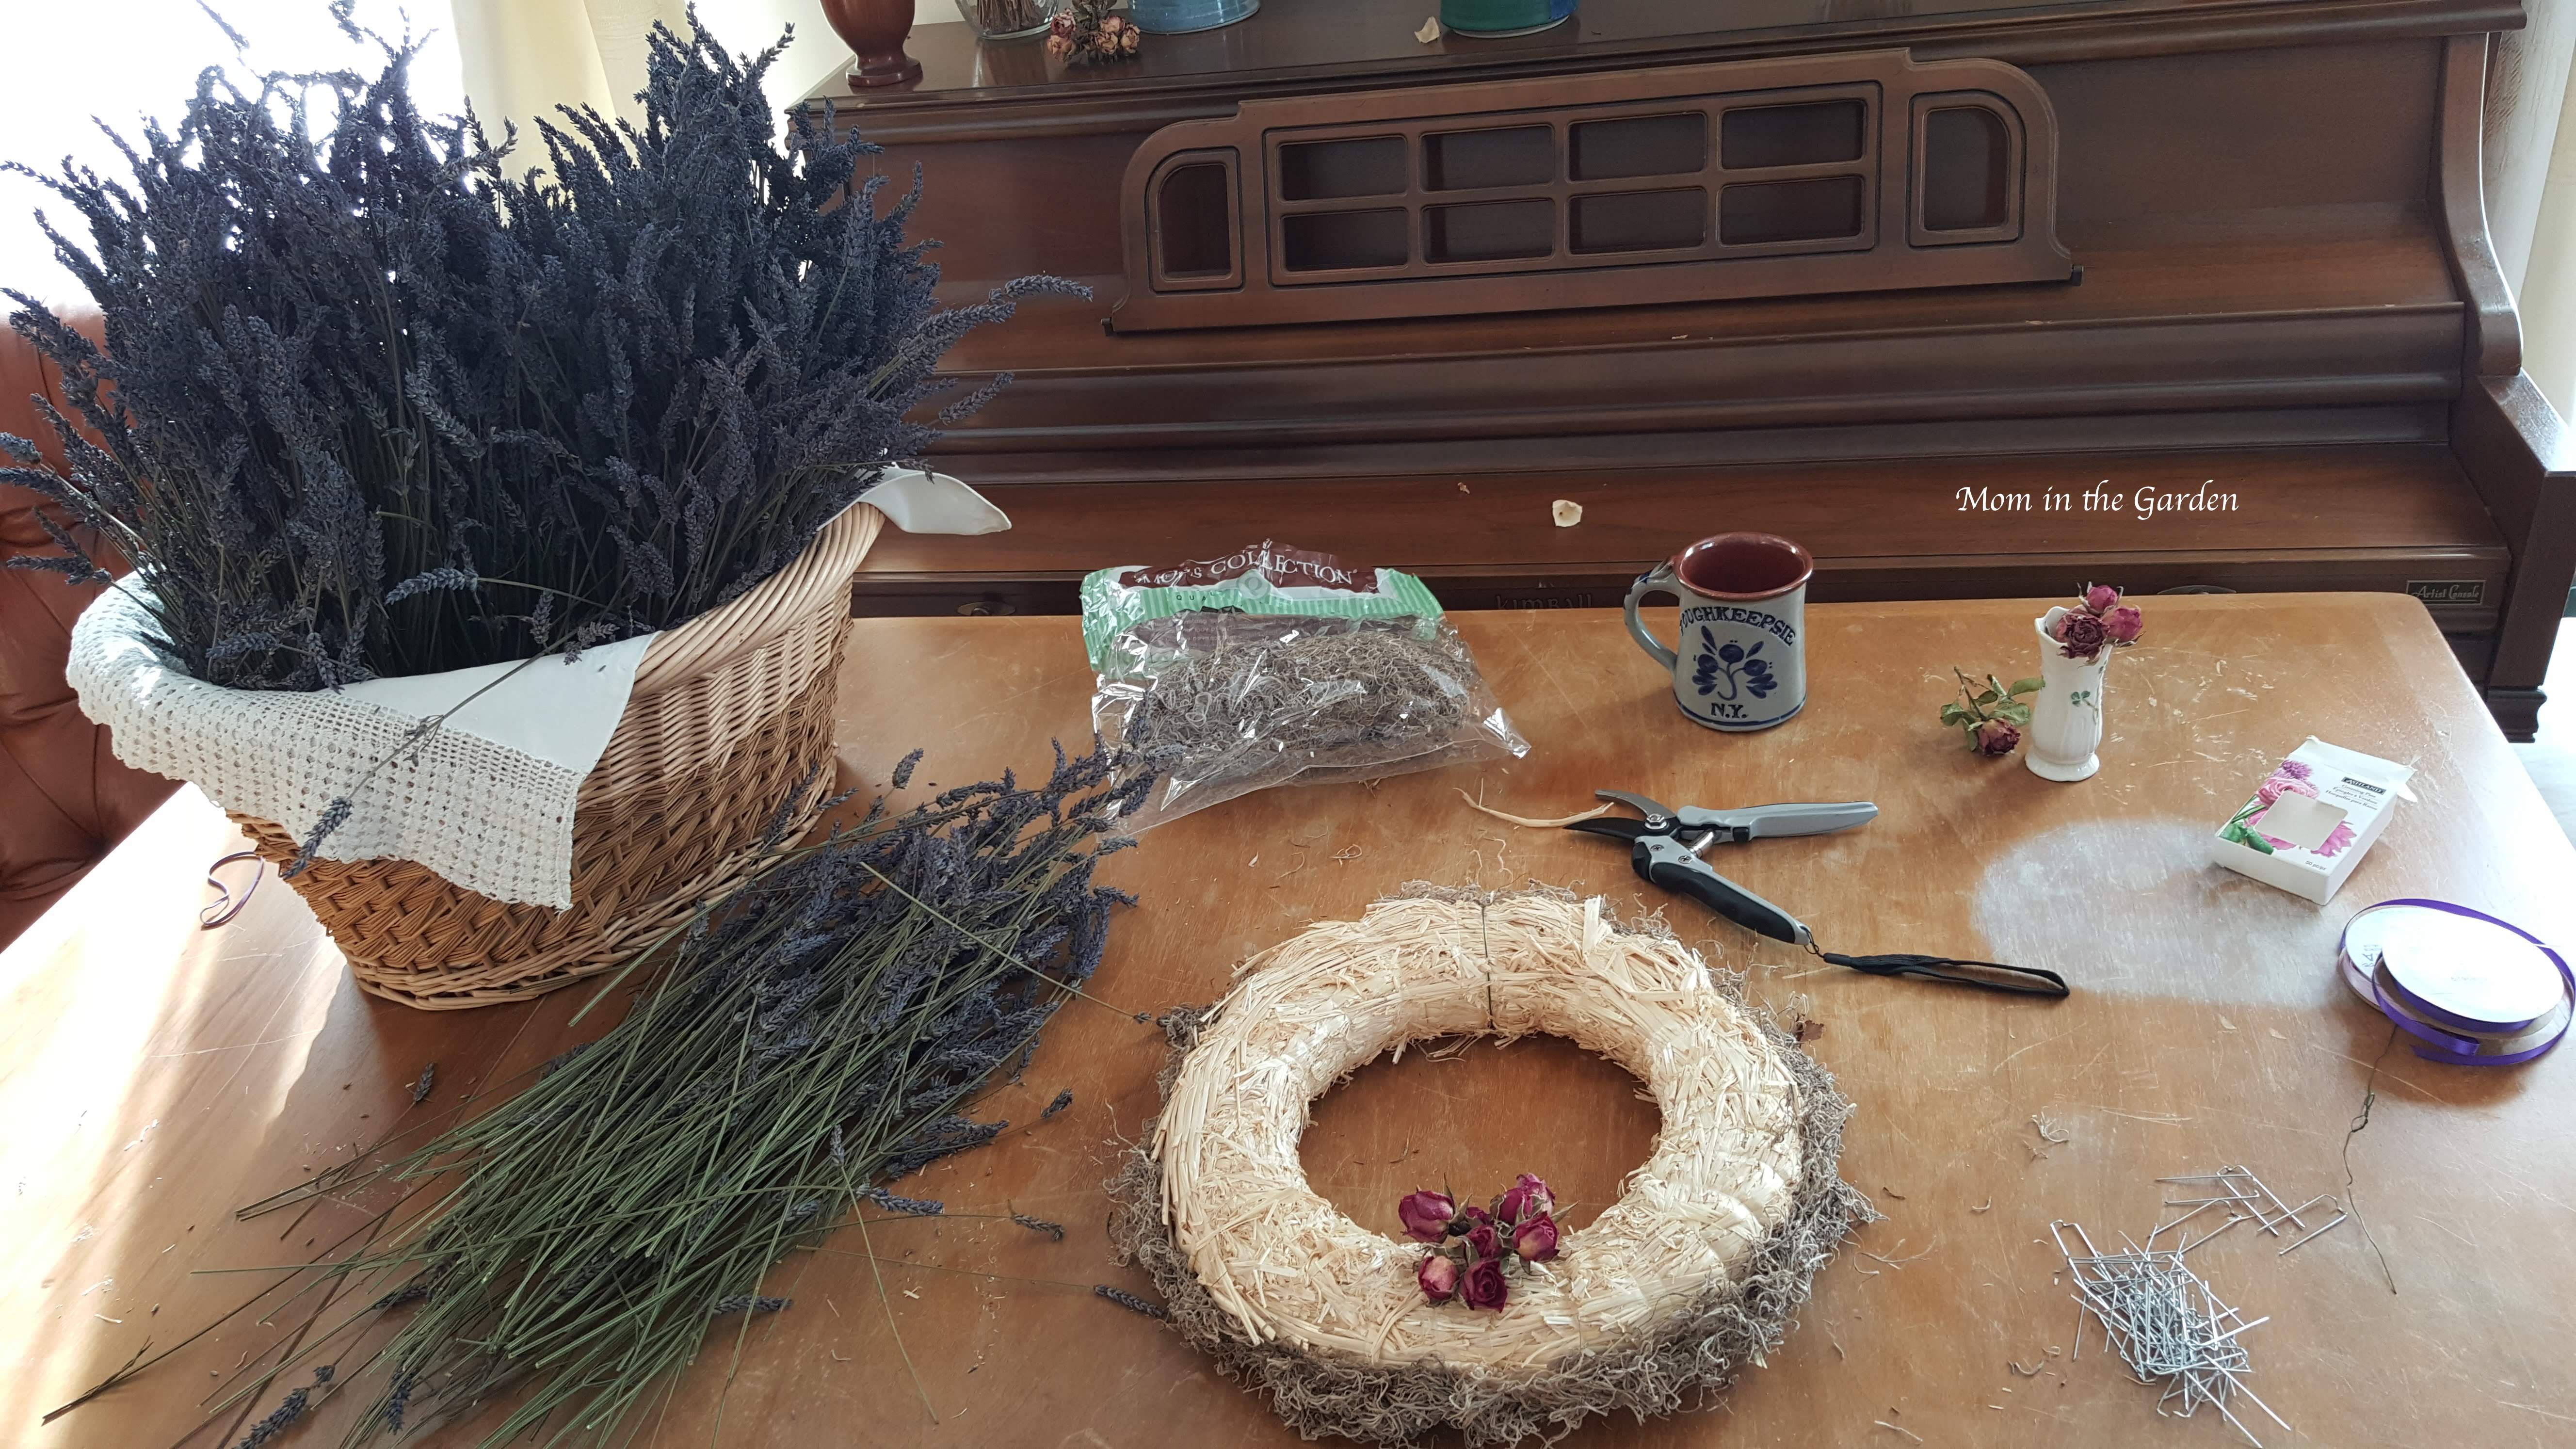
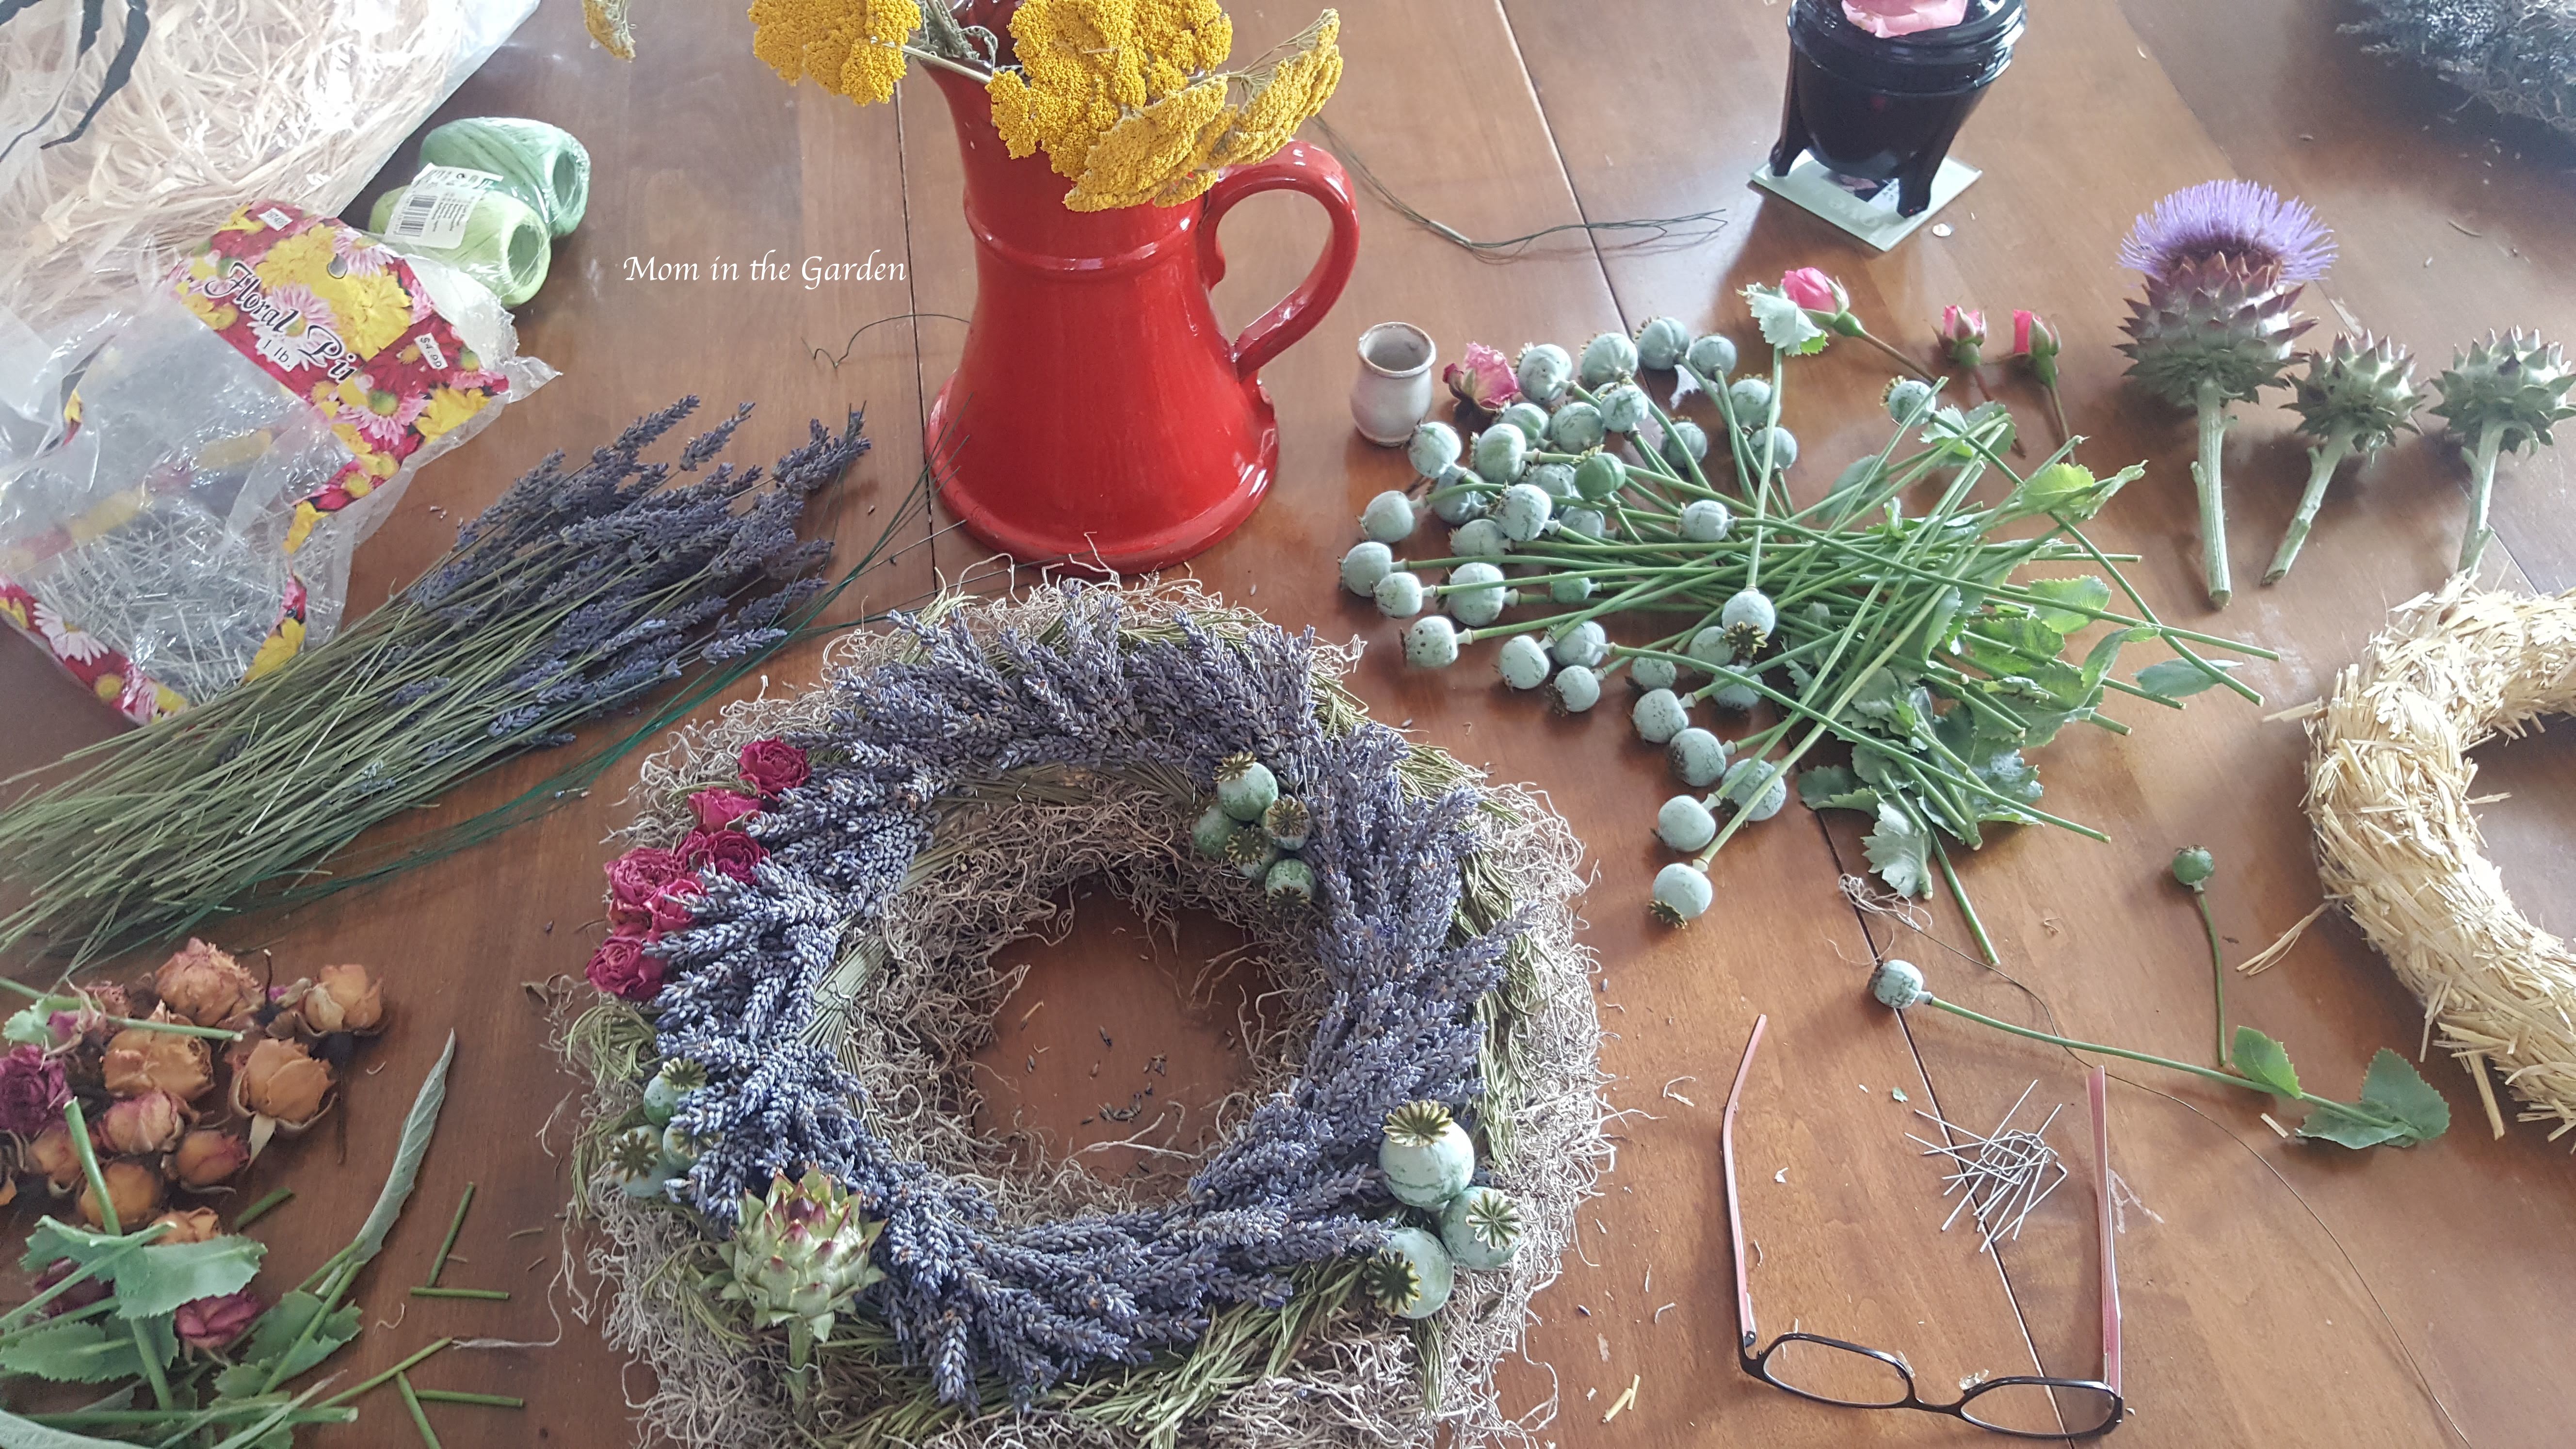
It is a time when I can be creative, work with my hands and just have fun.  I love it! Depending on the wreath, it takes about two hours to make, give or take. Aside from the plant materials, the main items which I use are: floral straw wreath form, floral “u” pins, and secateurs. I try and use some kind of different plant material every year, and this year I used poppy seed pods, and an artichoke. I made three different wreaths, each a bit different. Here’s a look at what I did!

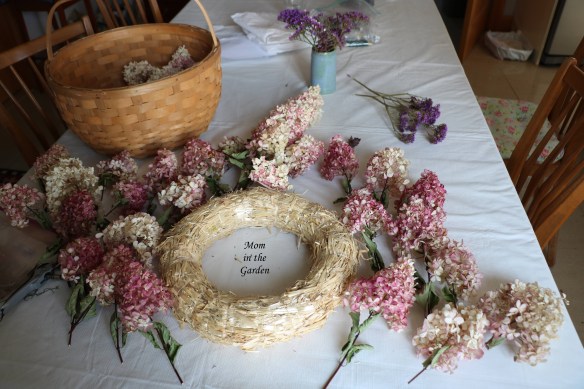
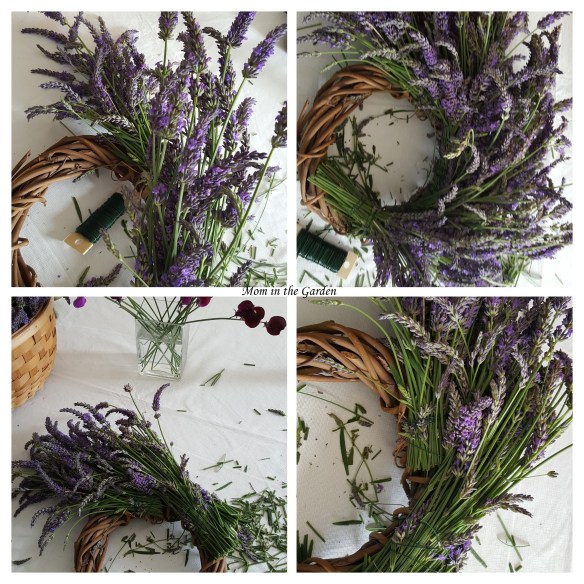
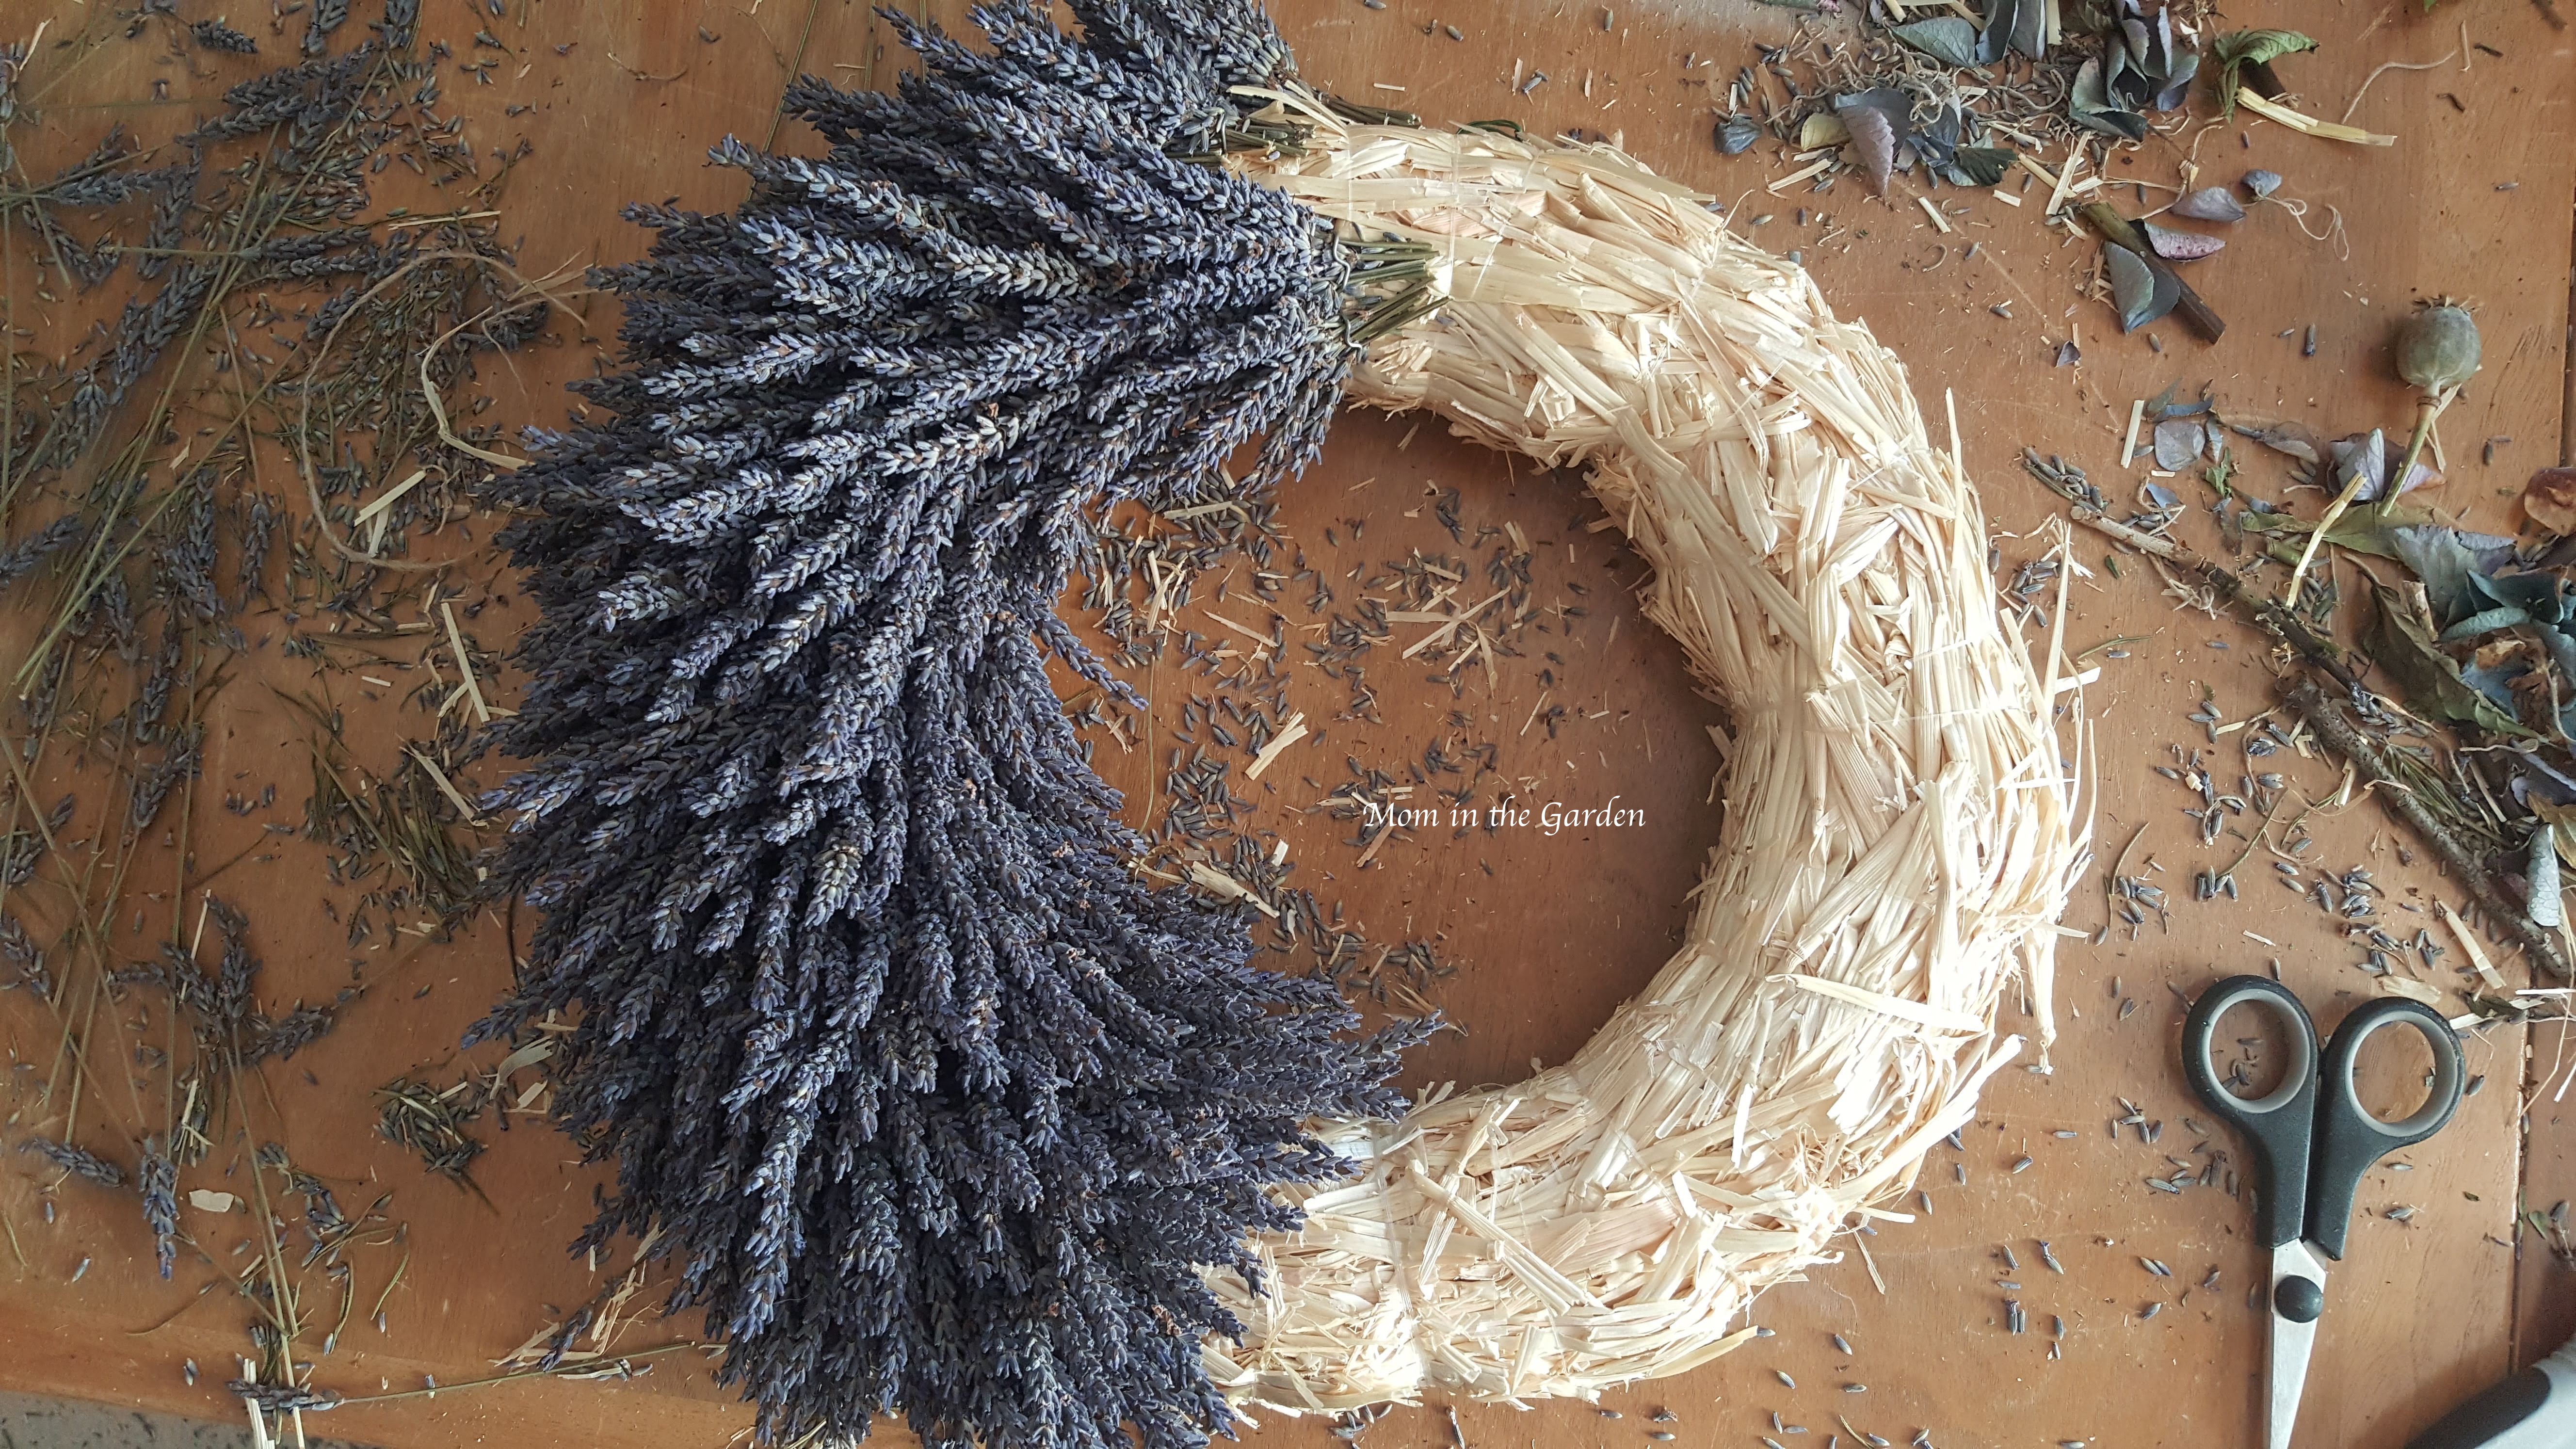
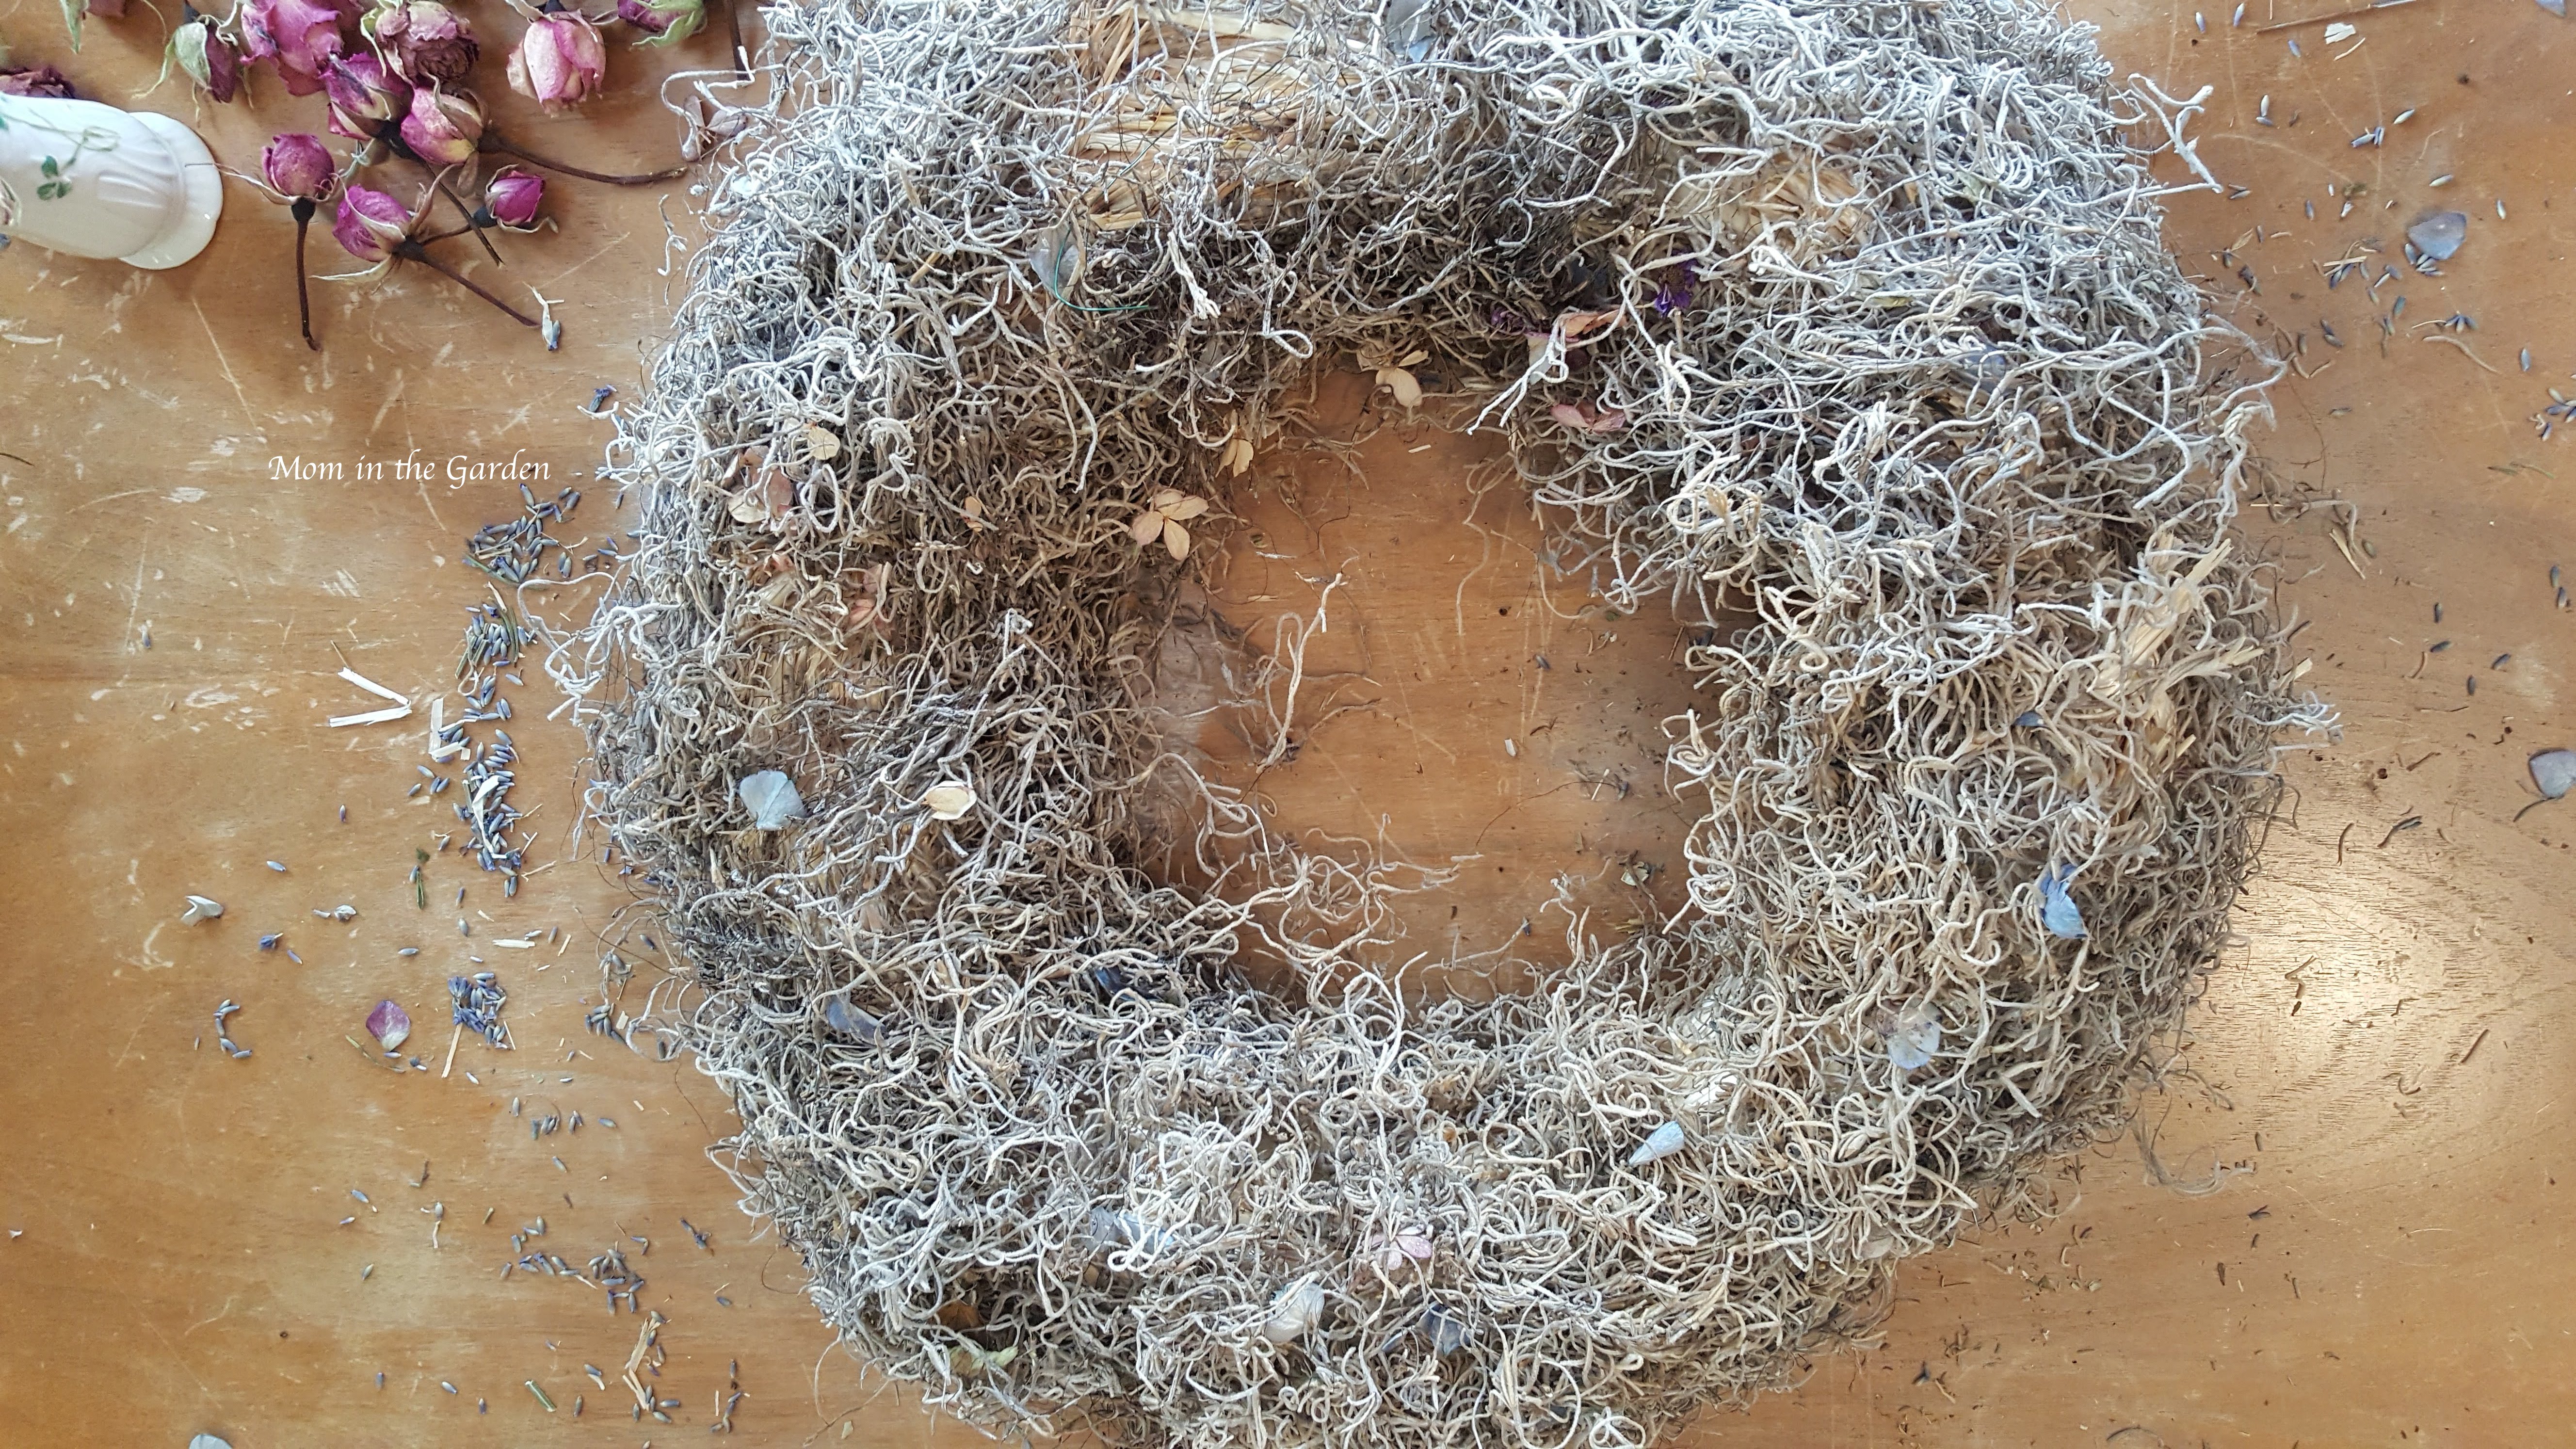
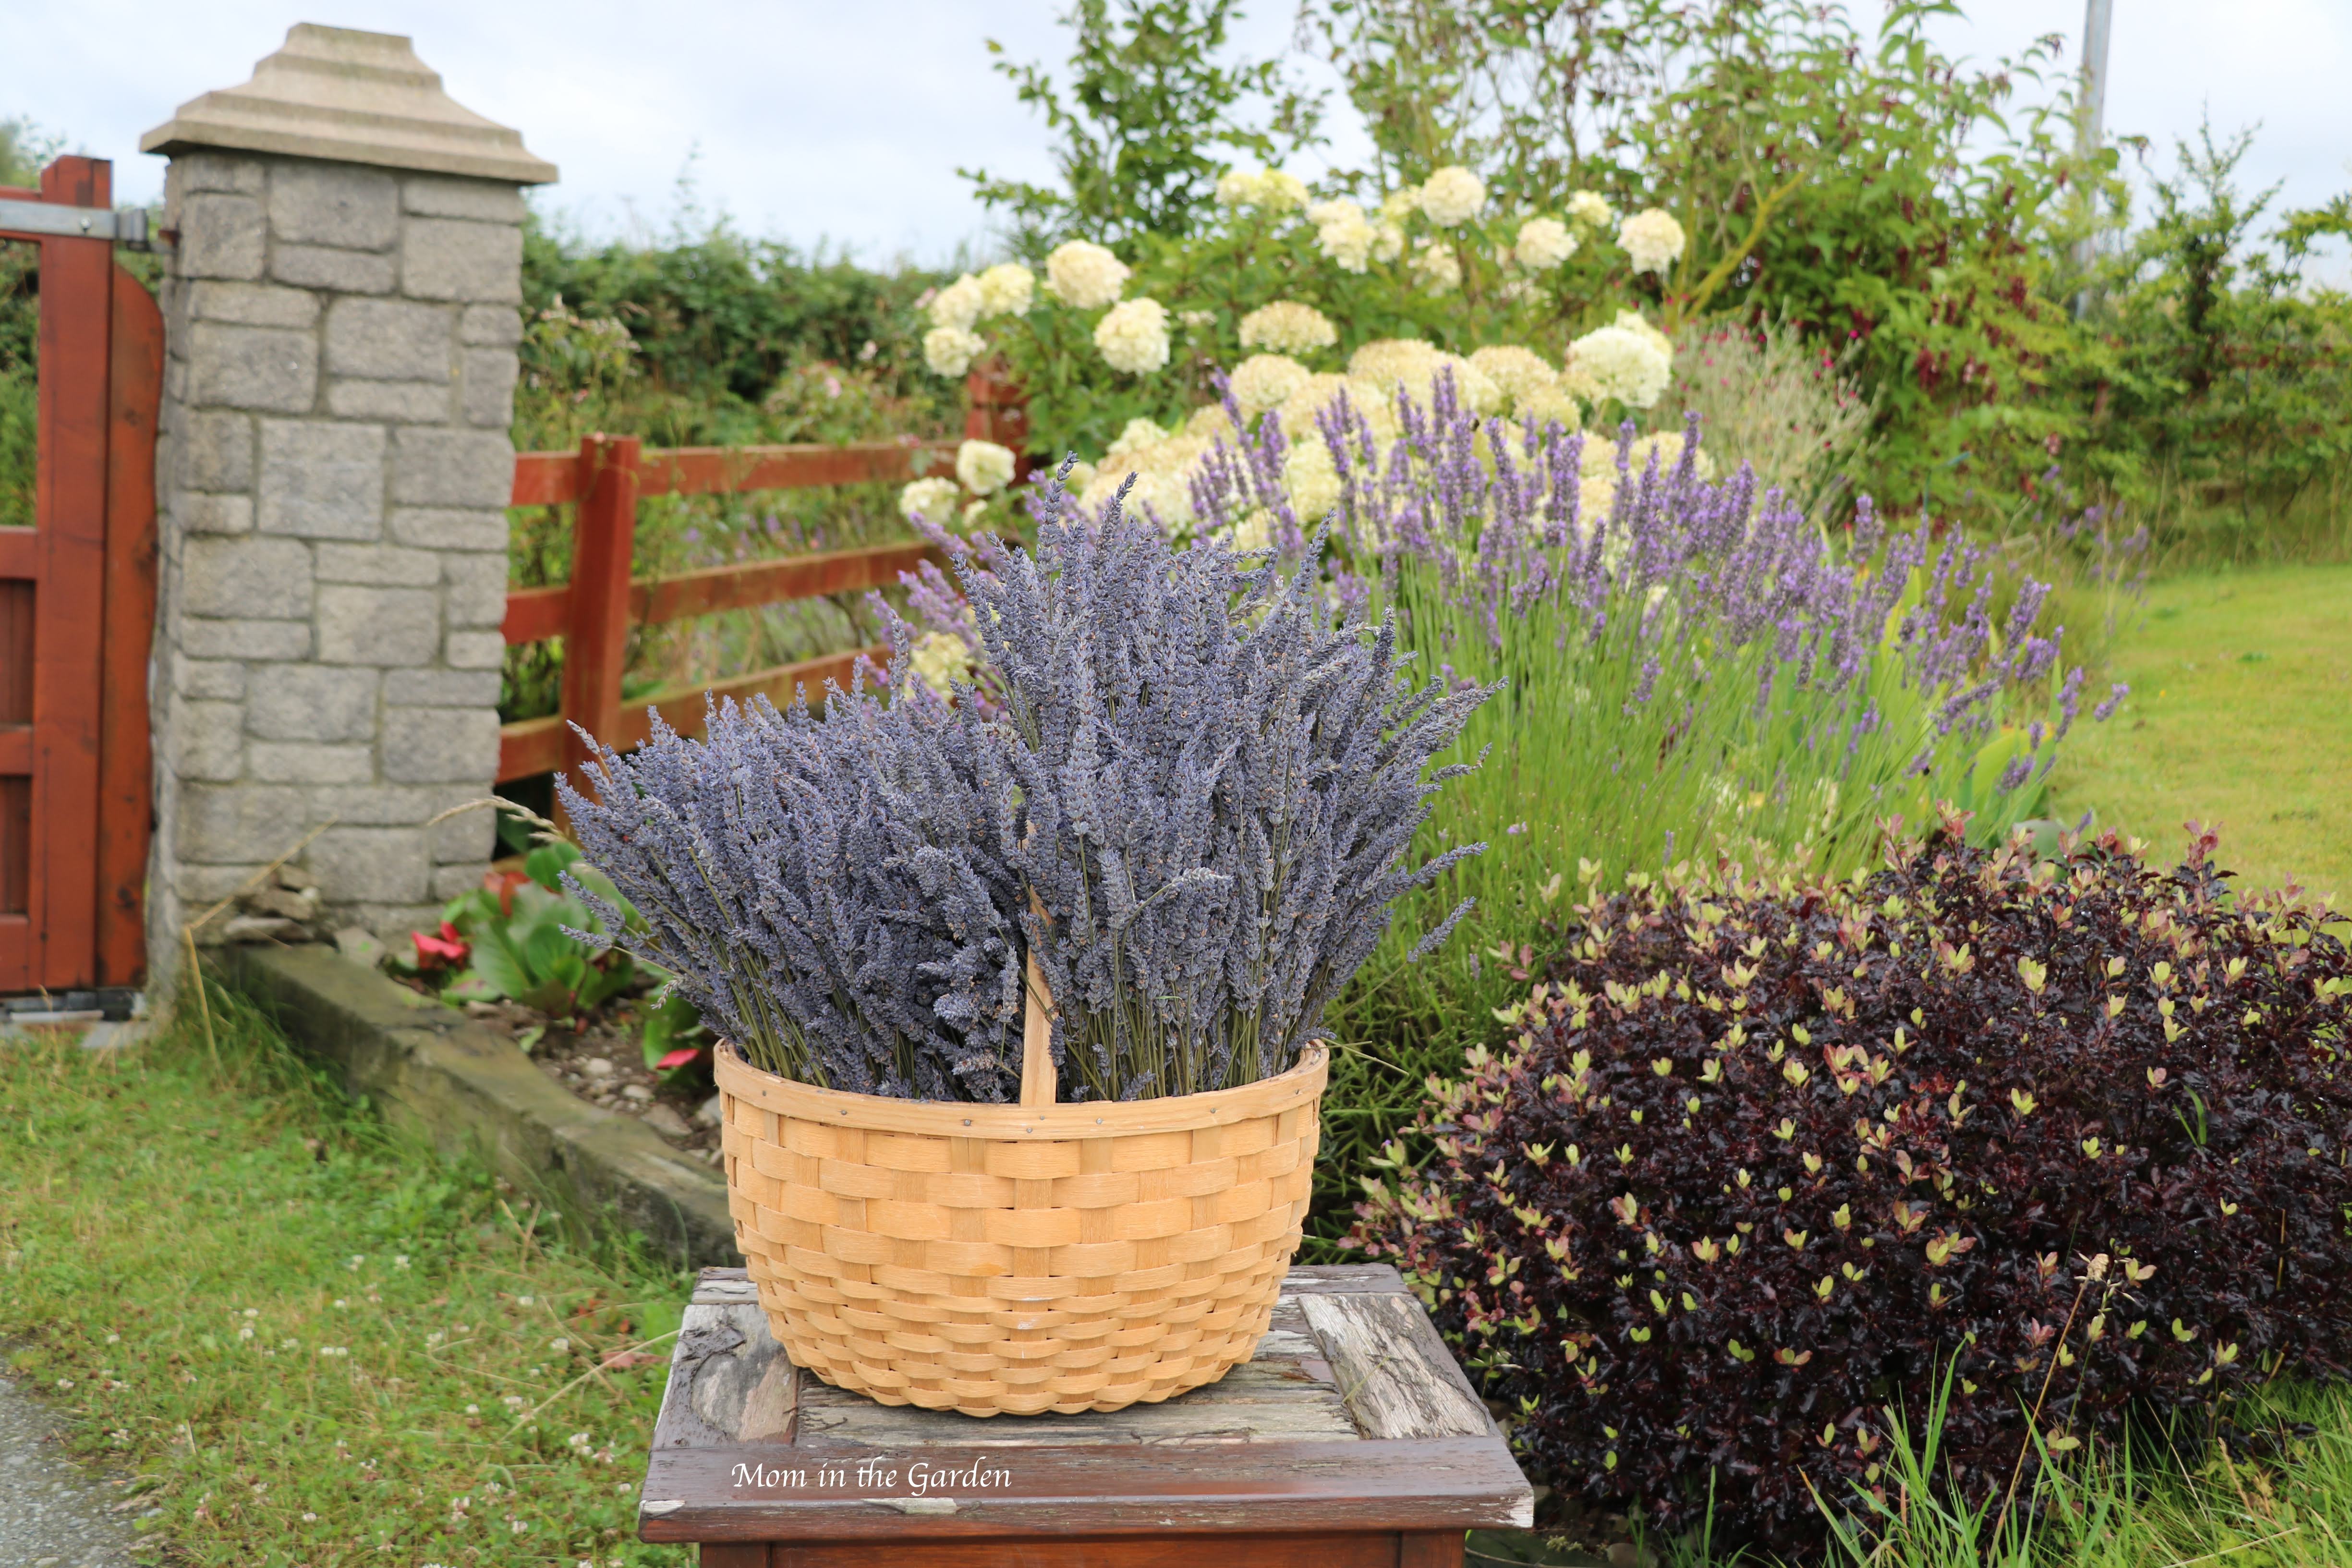
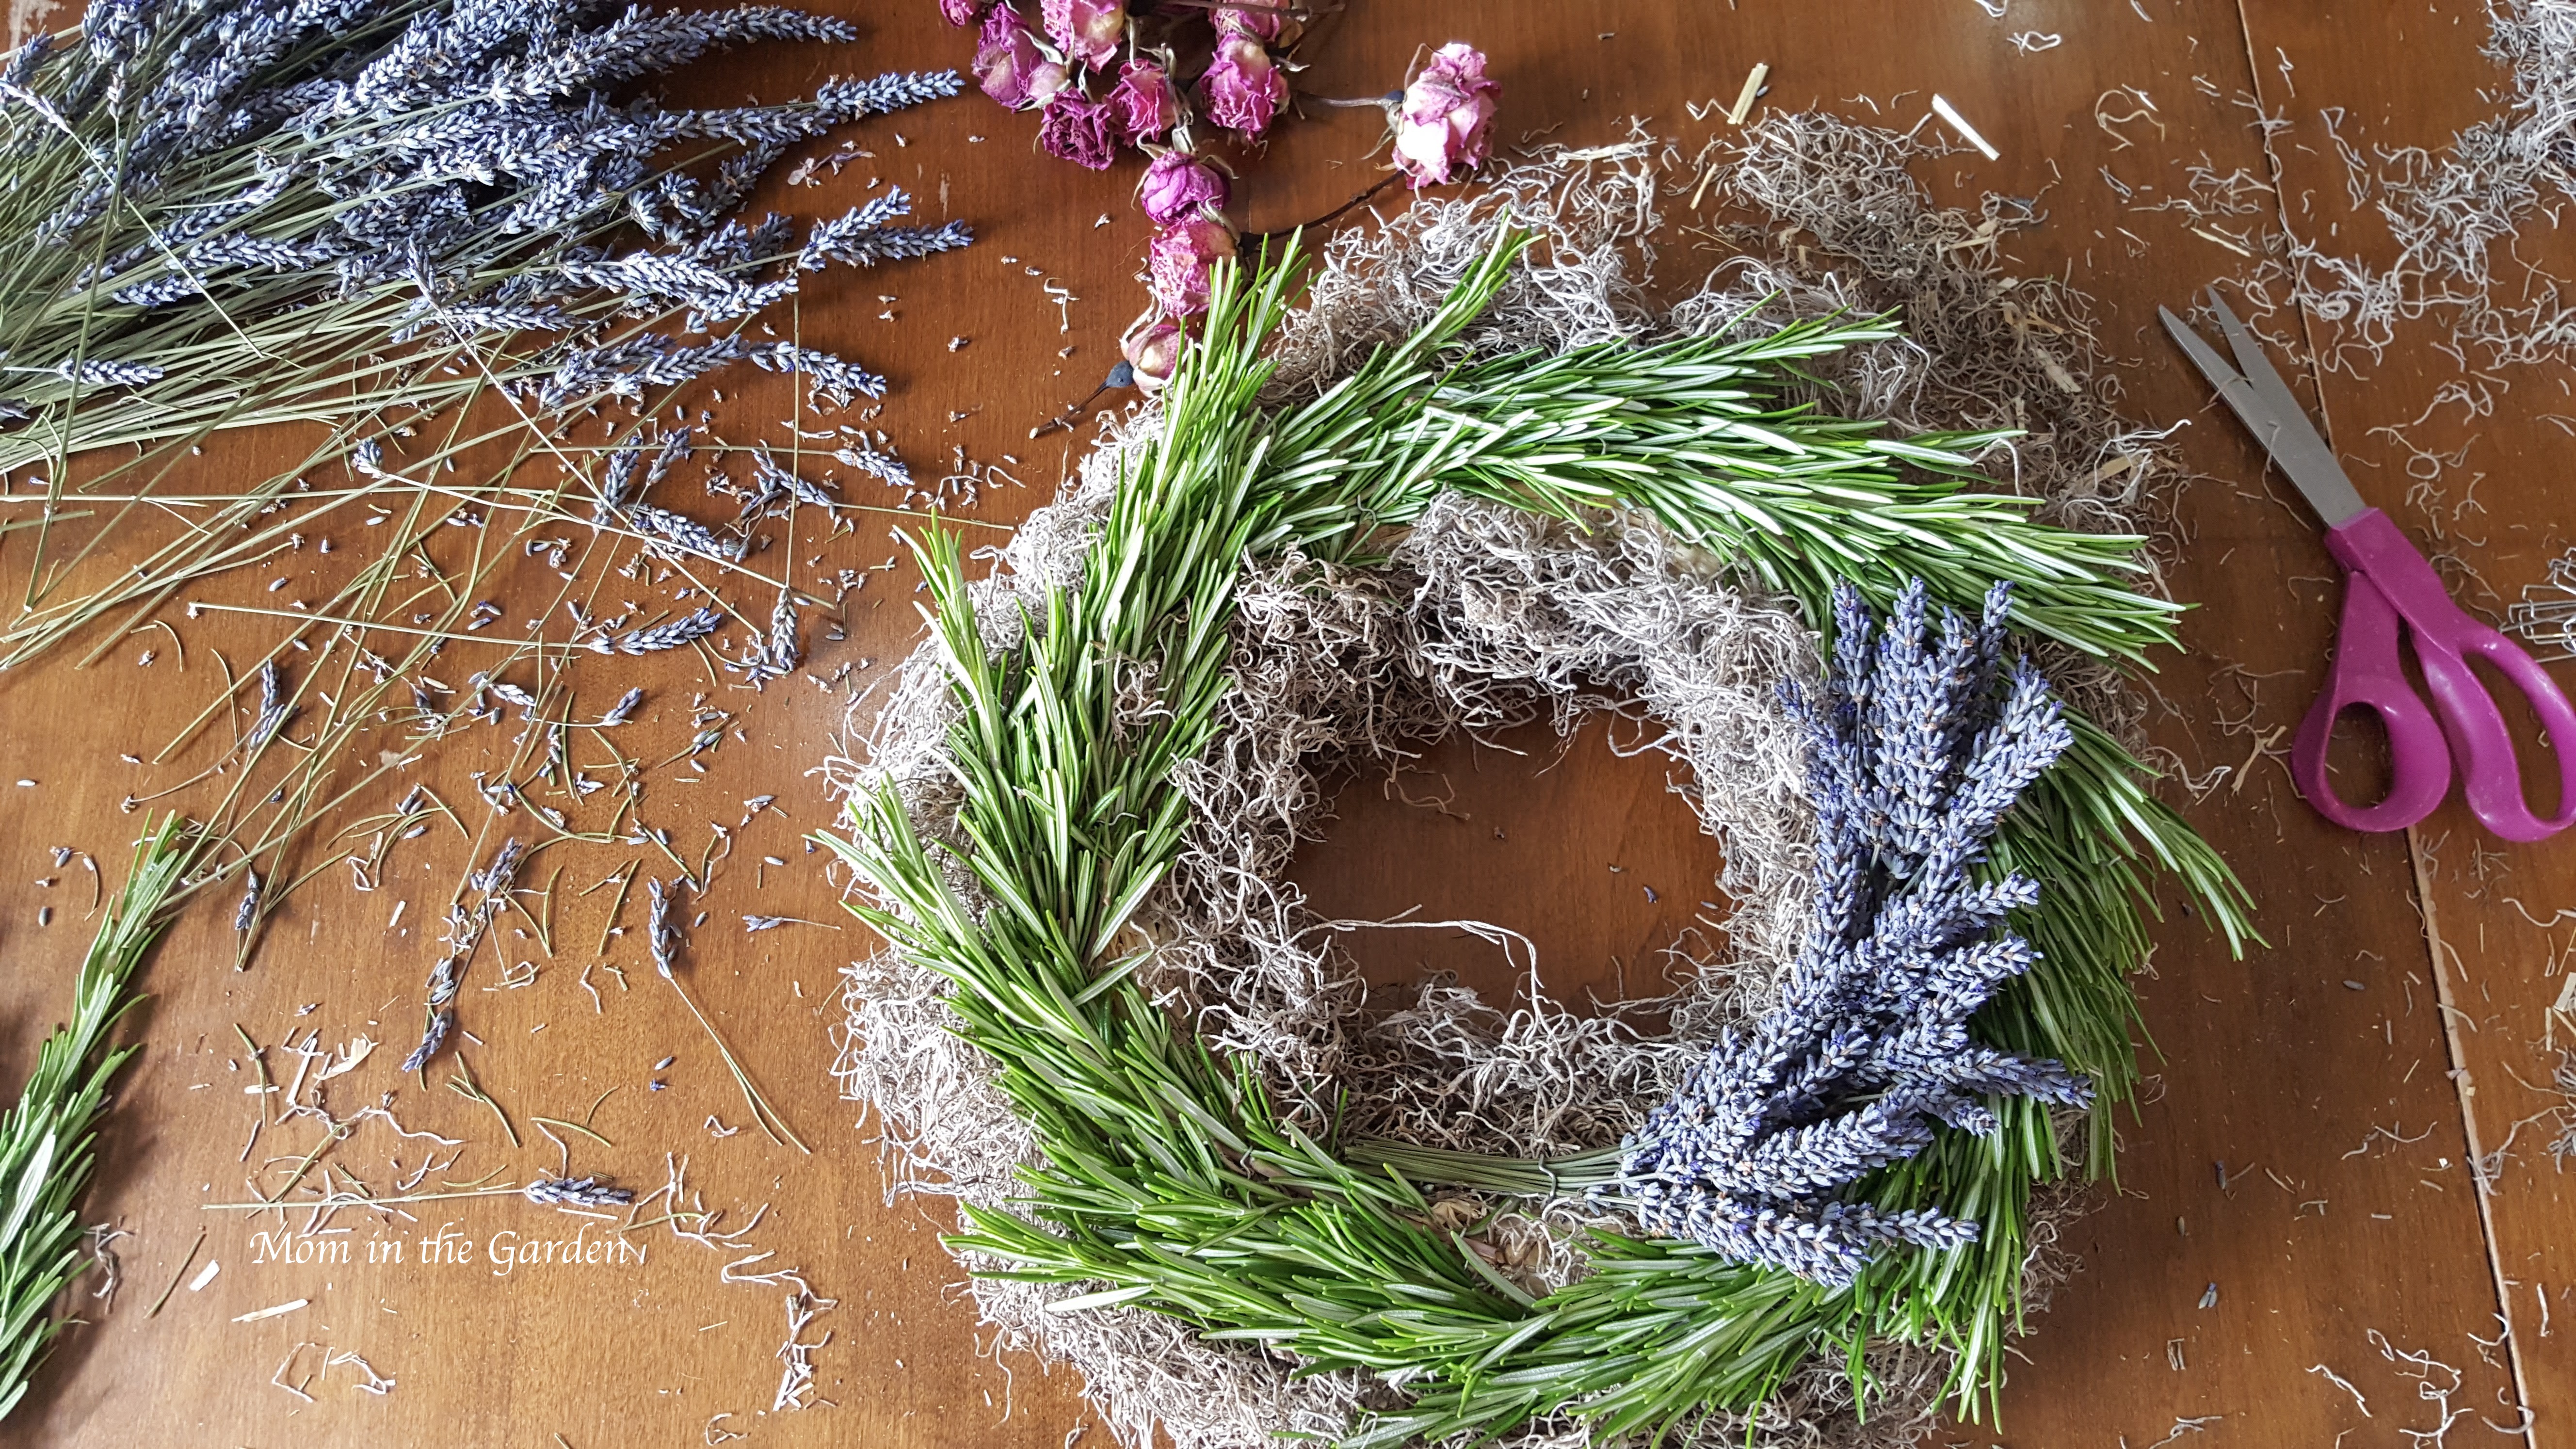
This is how it begins: a bunch of lavender, and a wreath form!

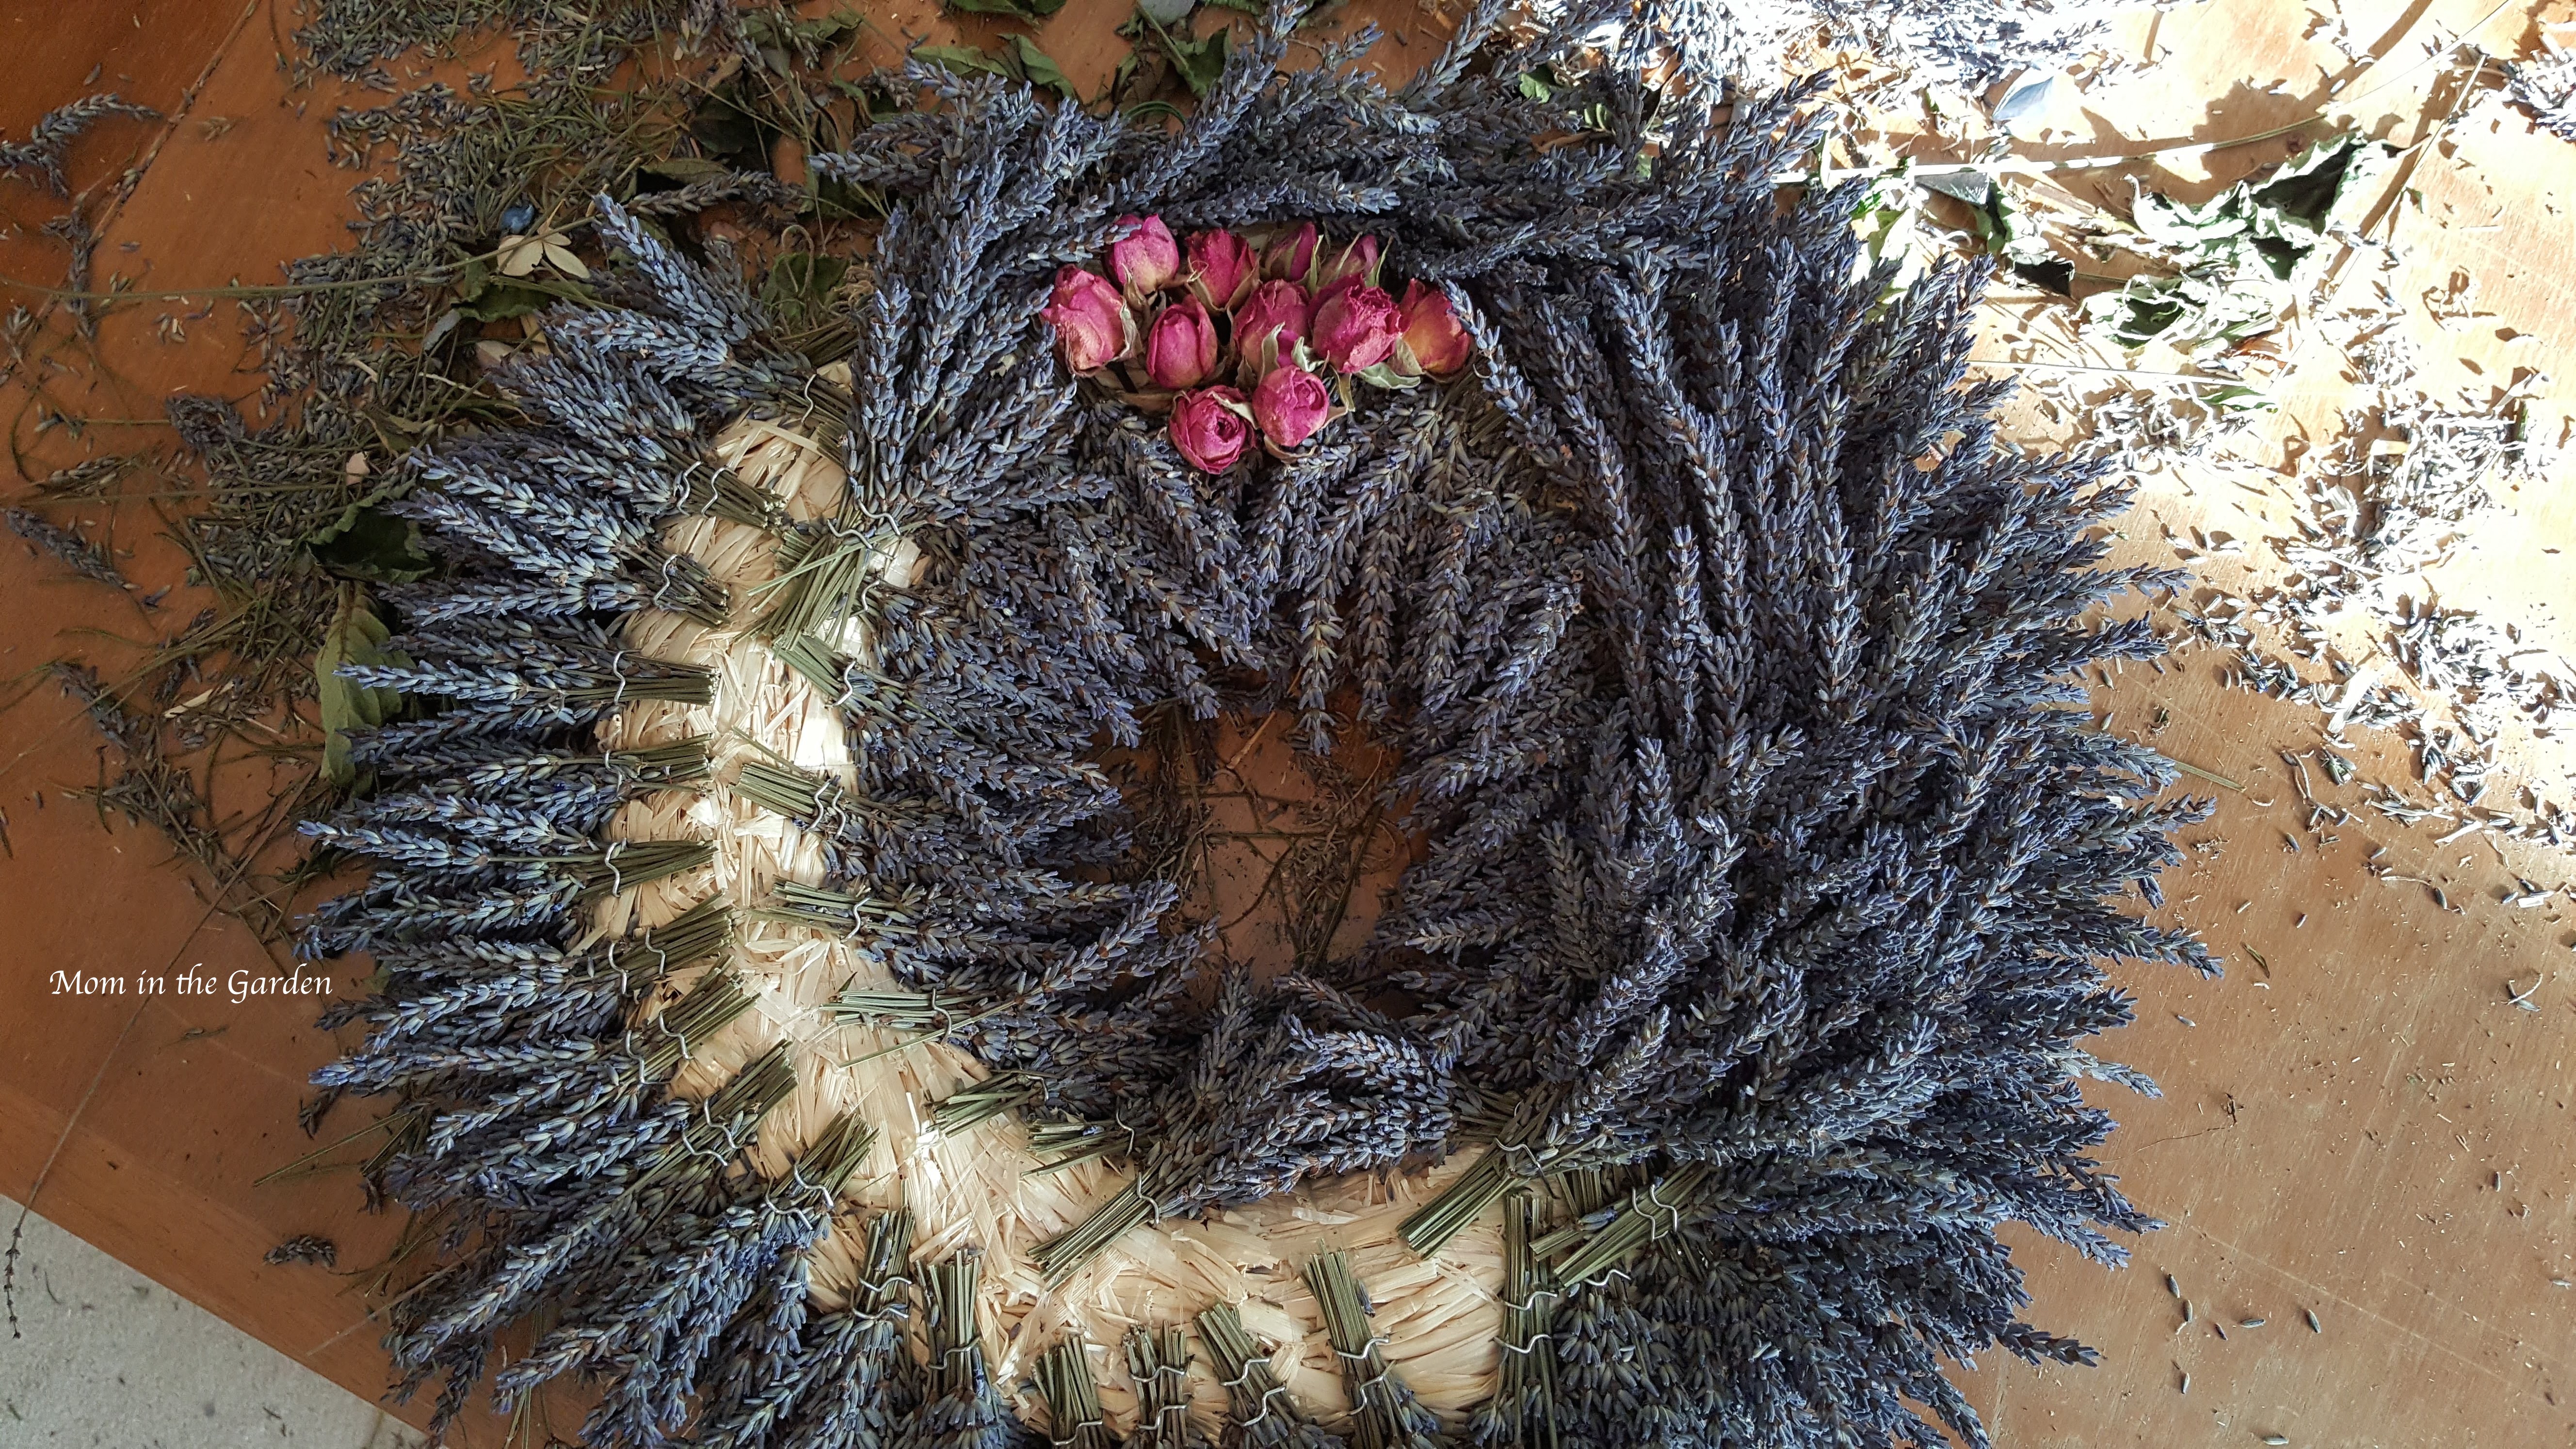
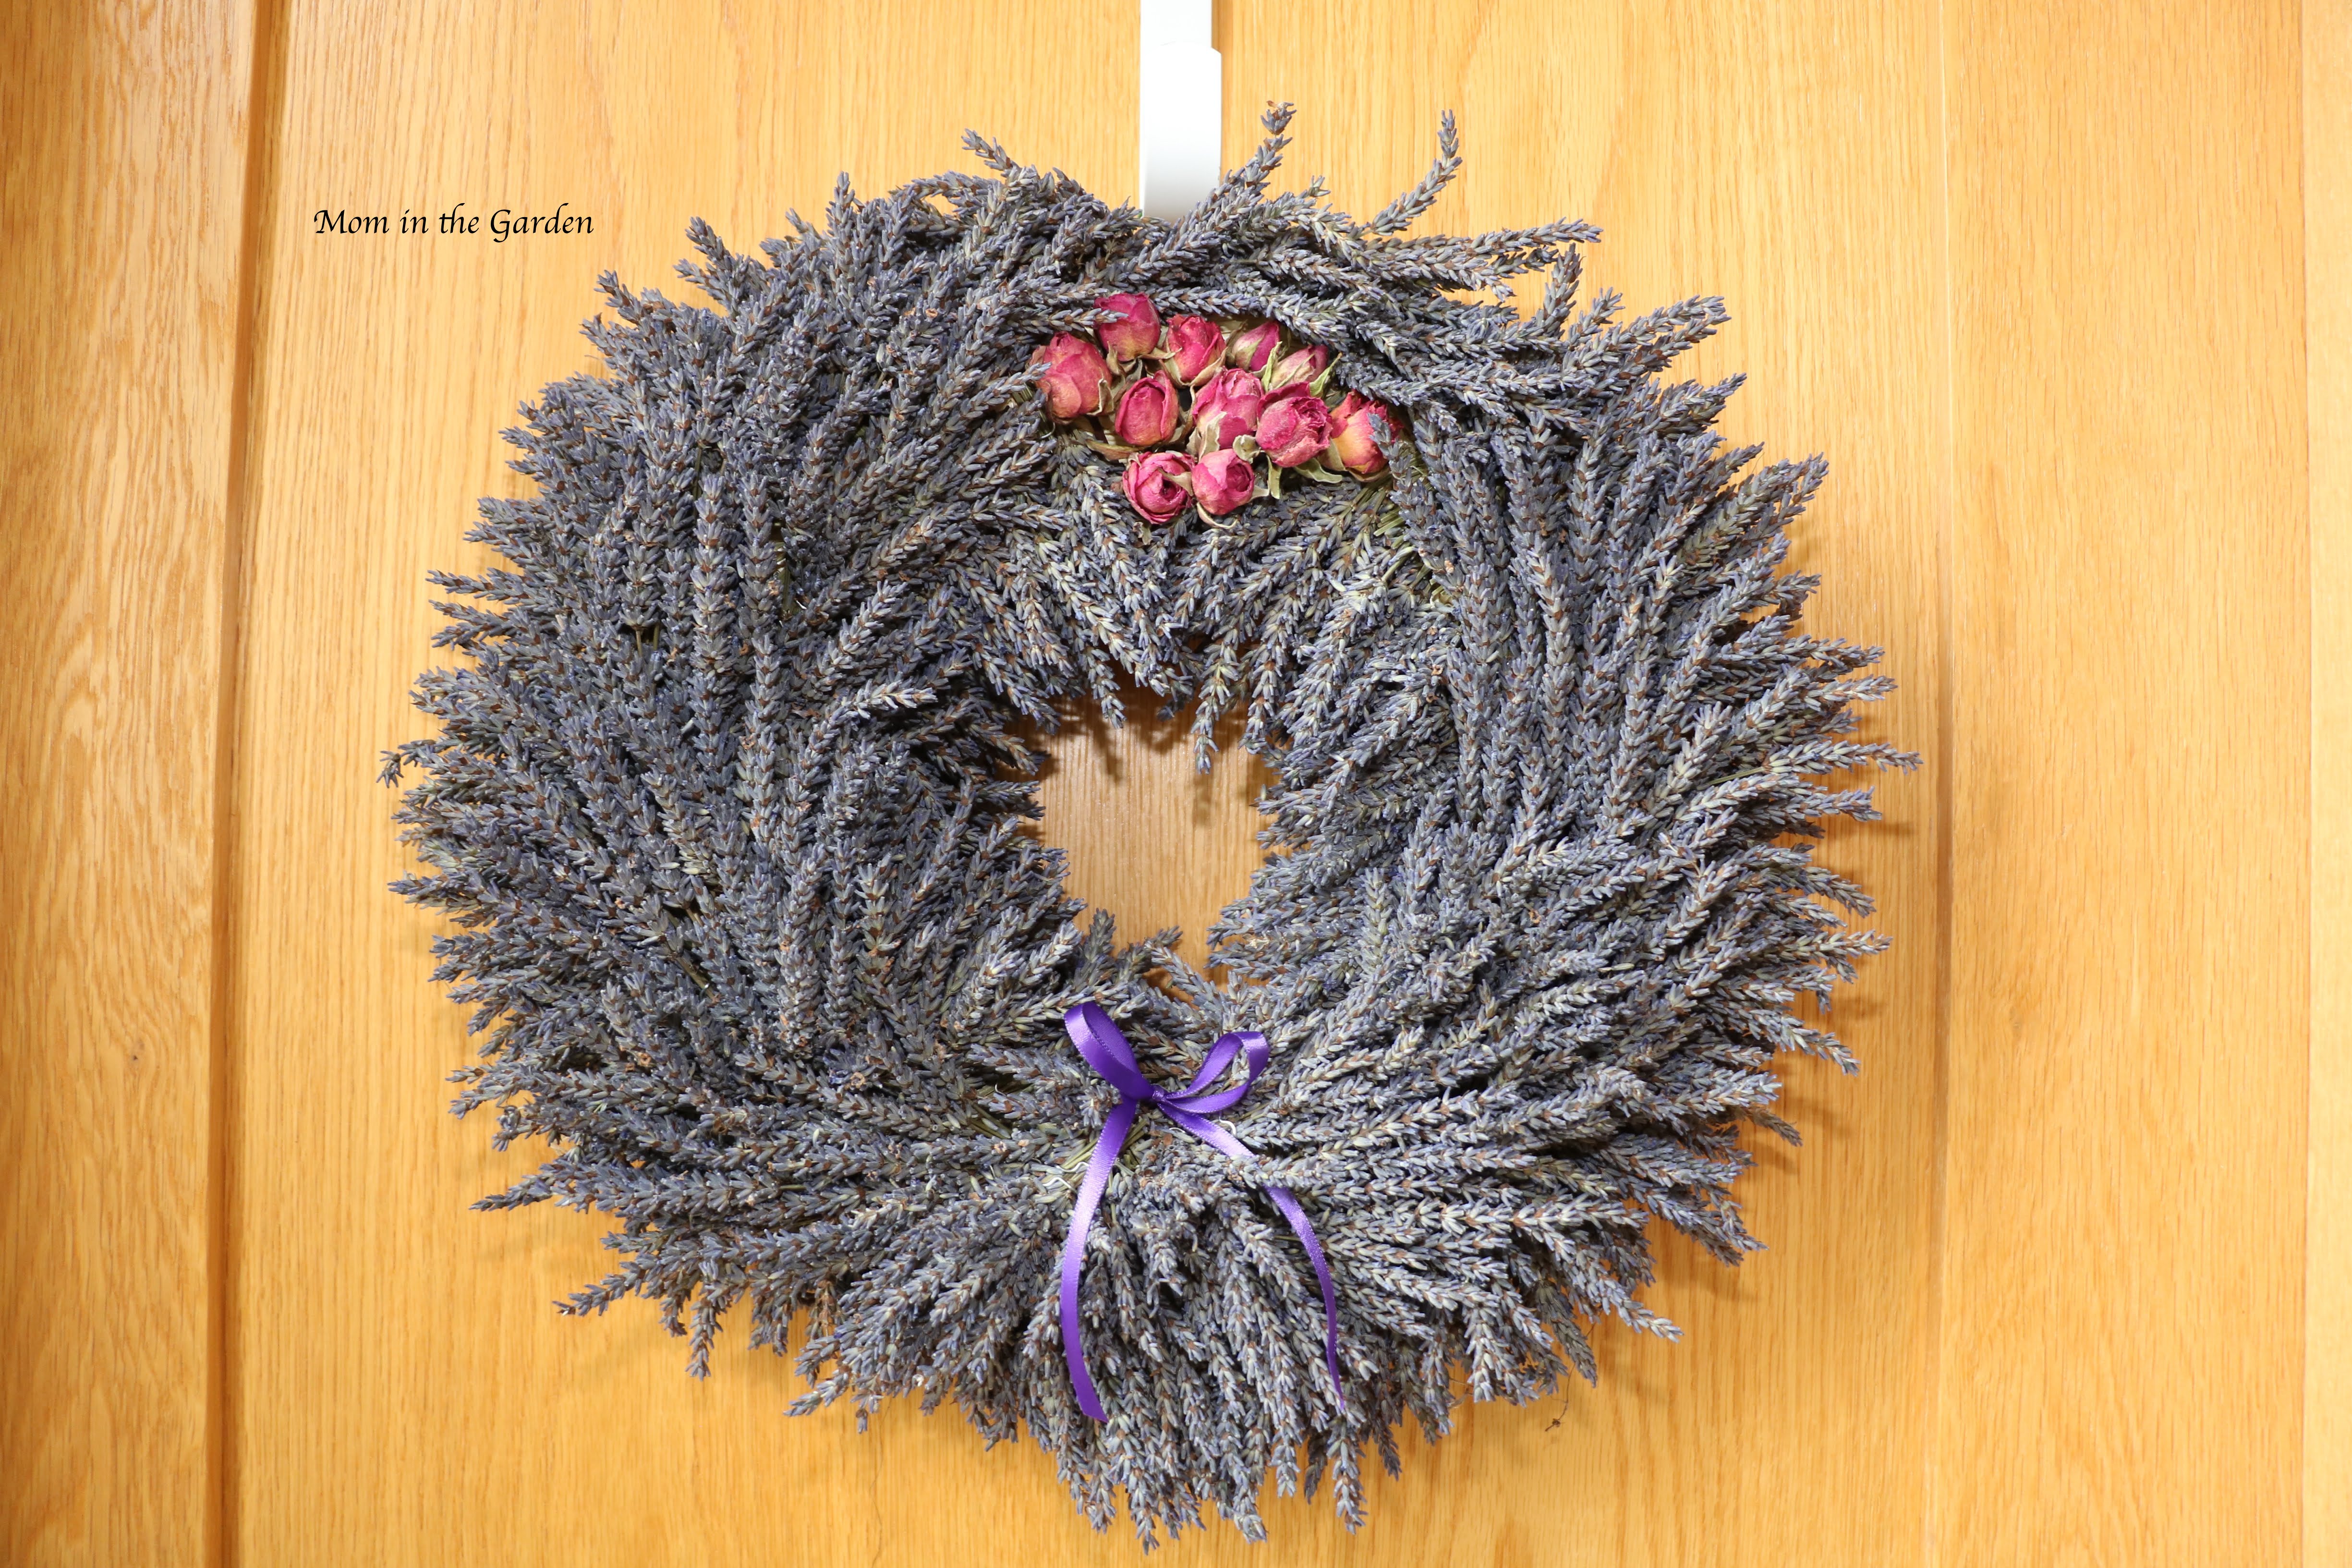
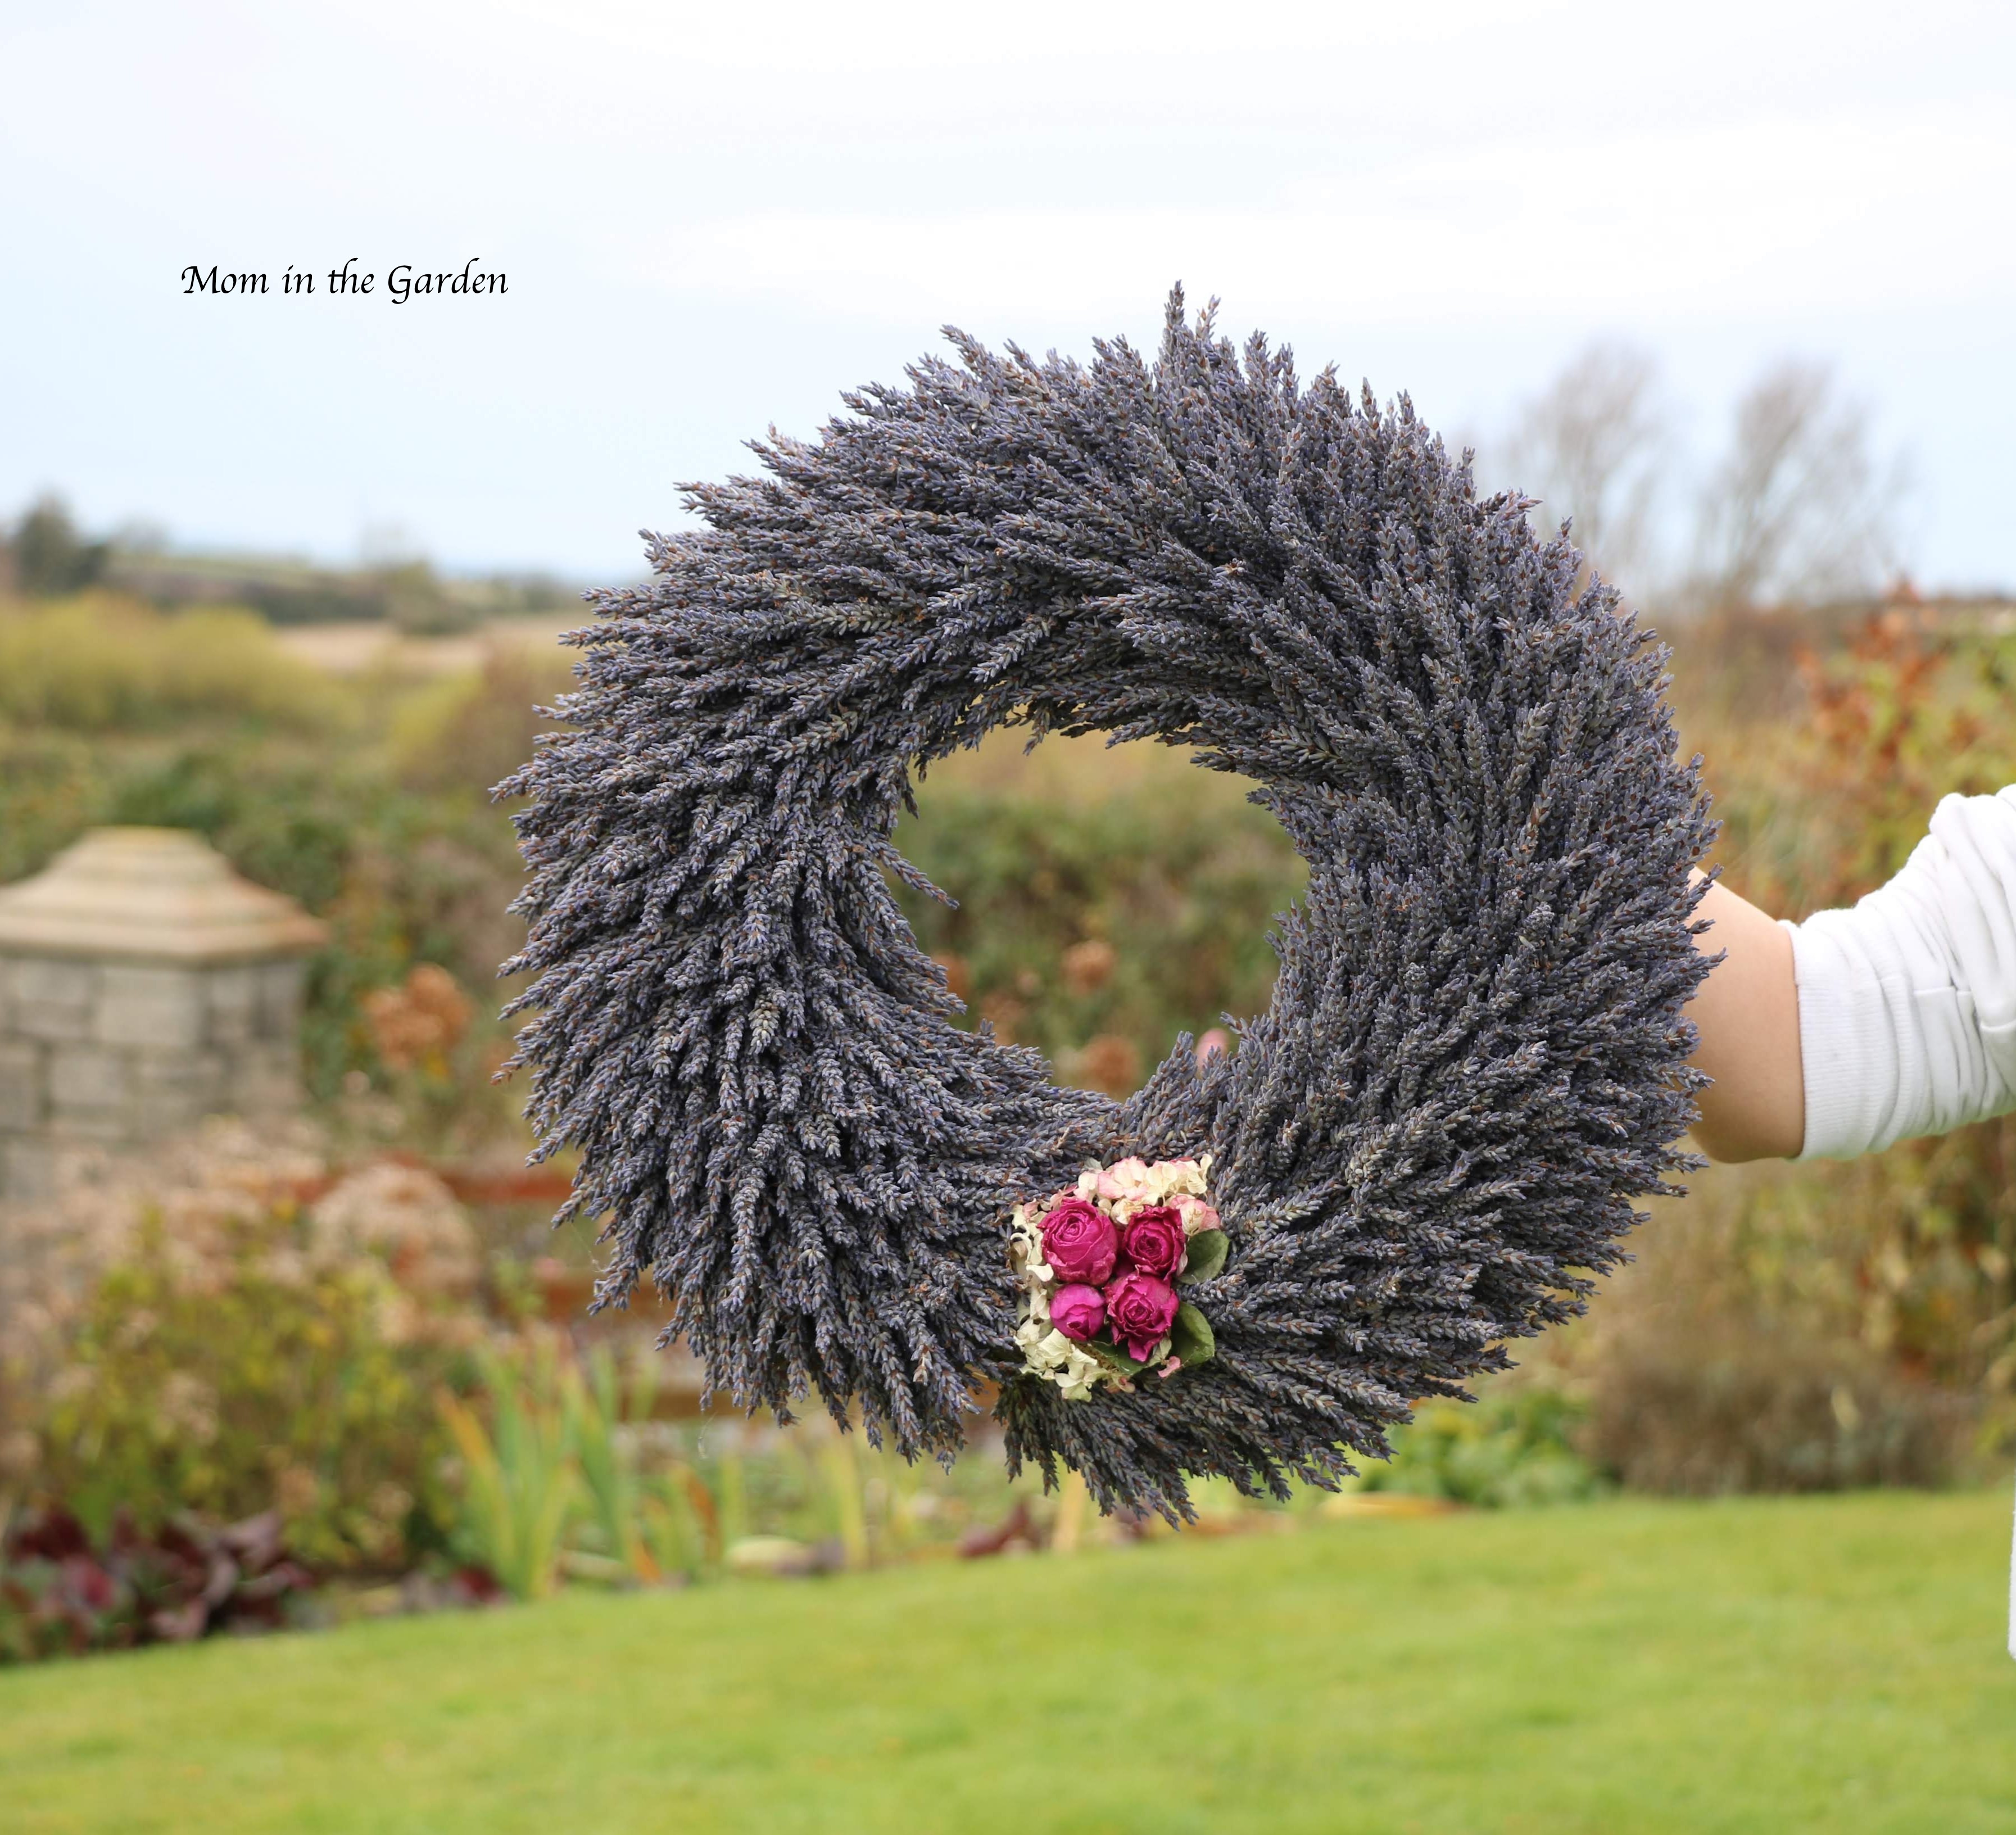
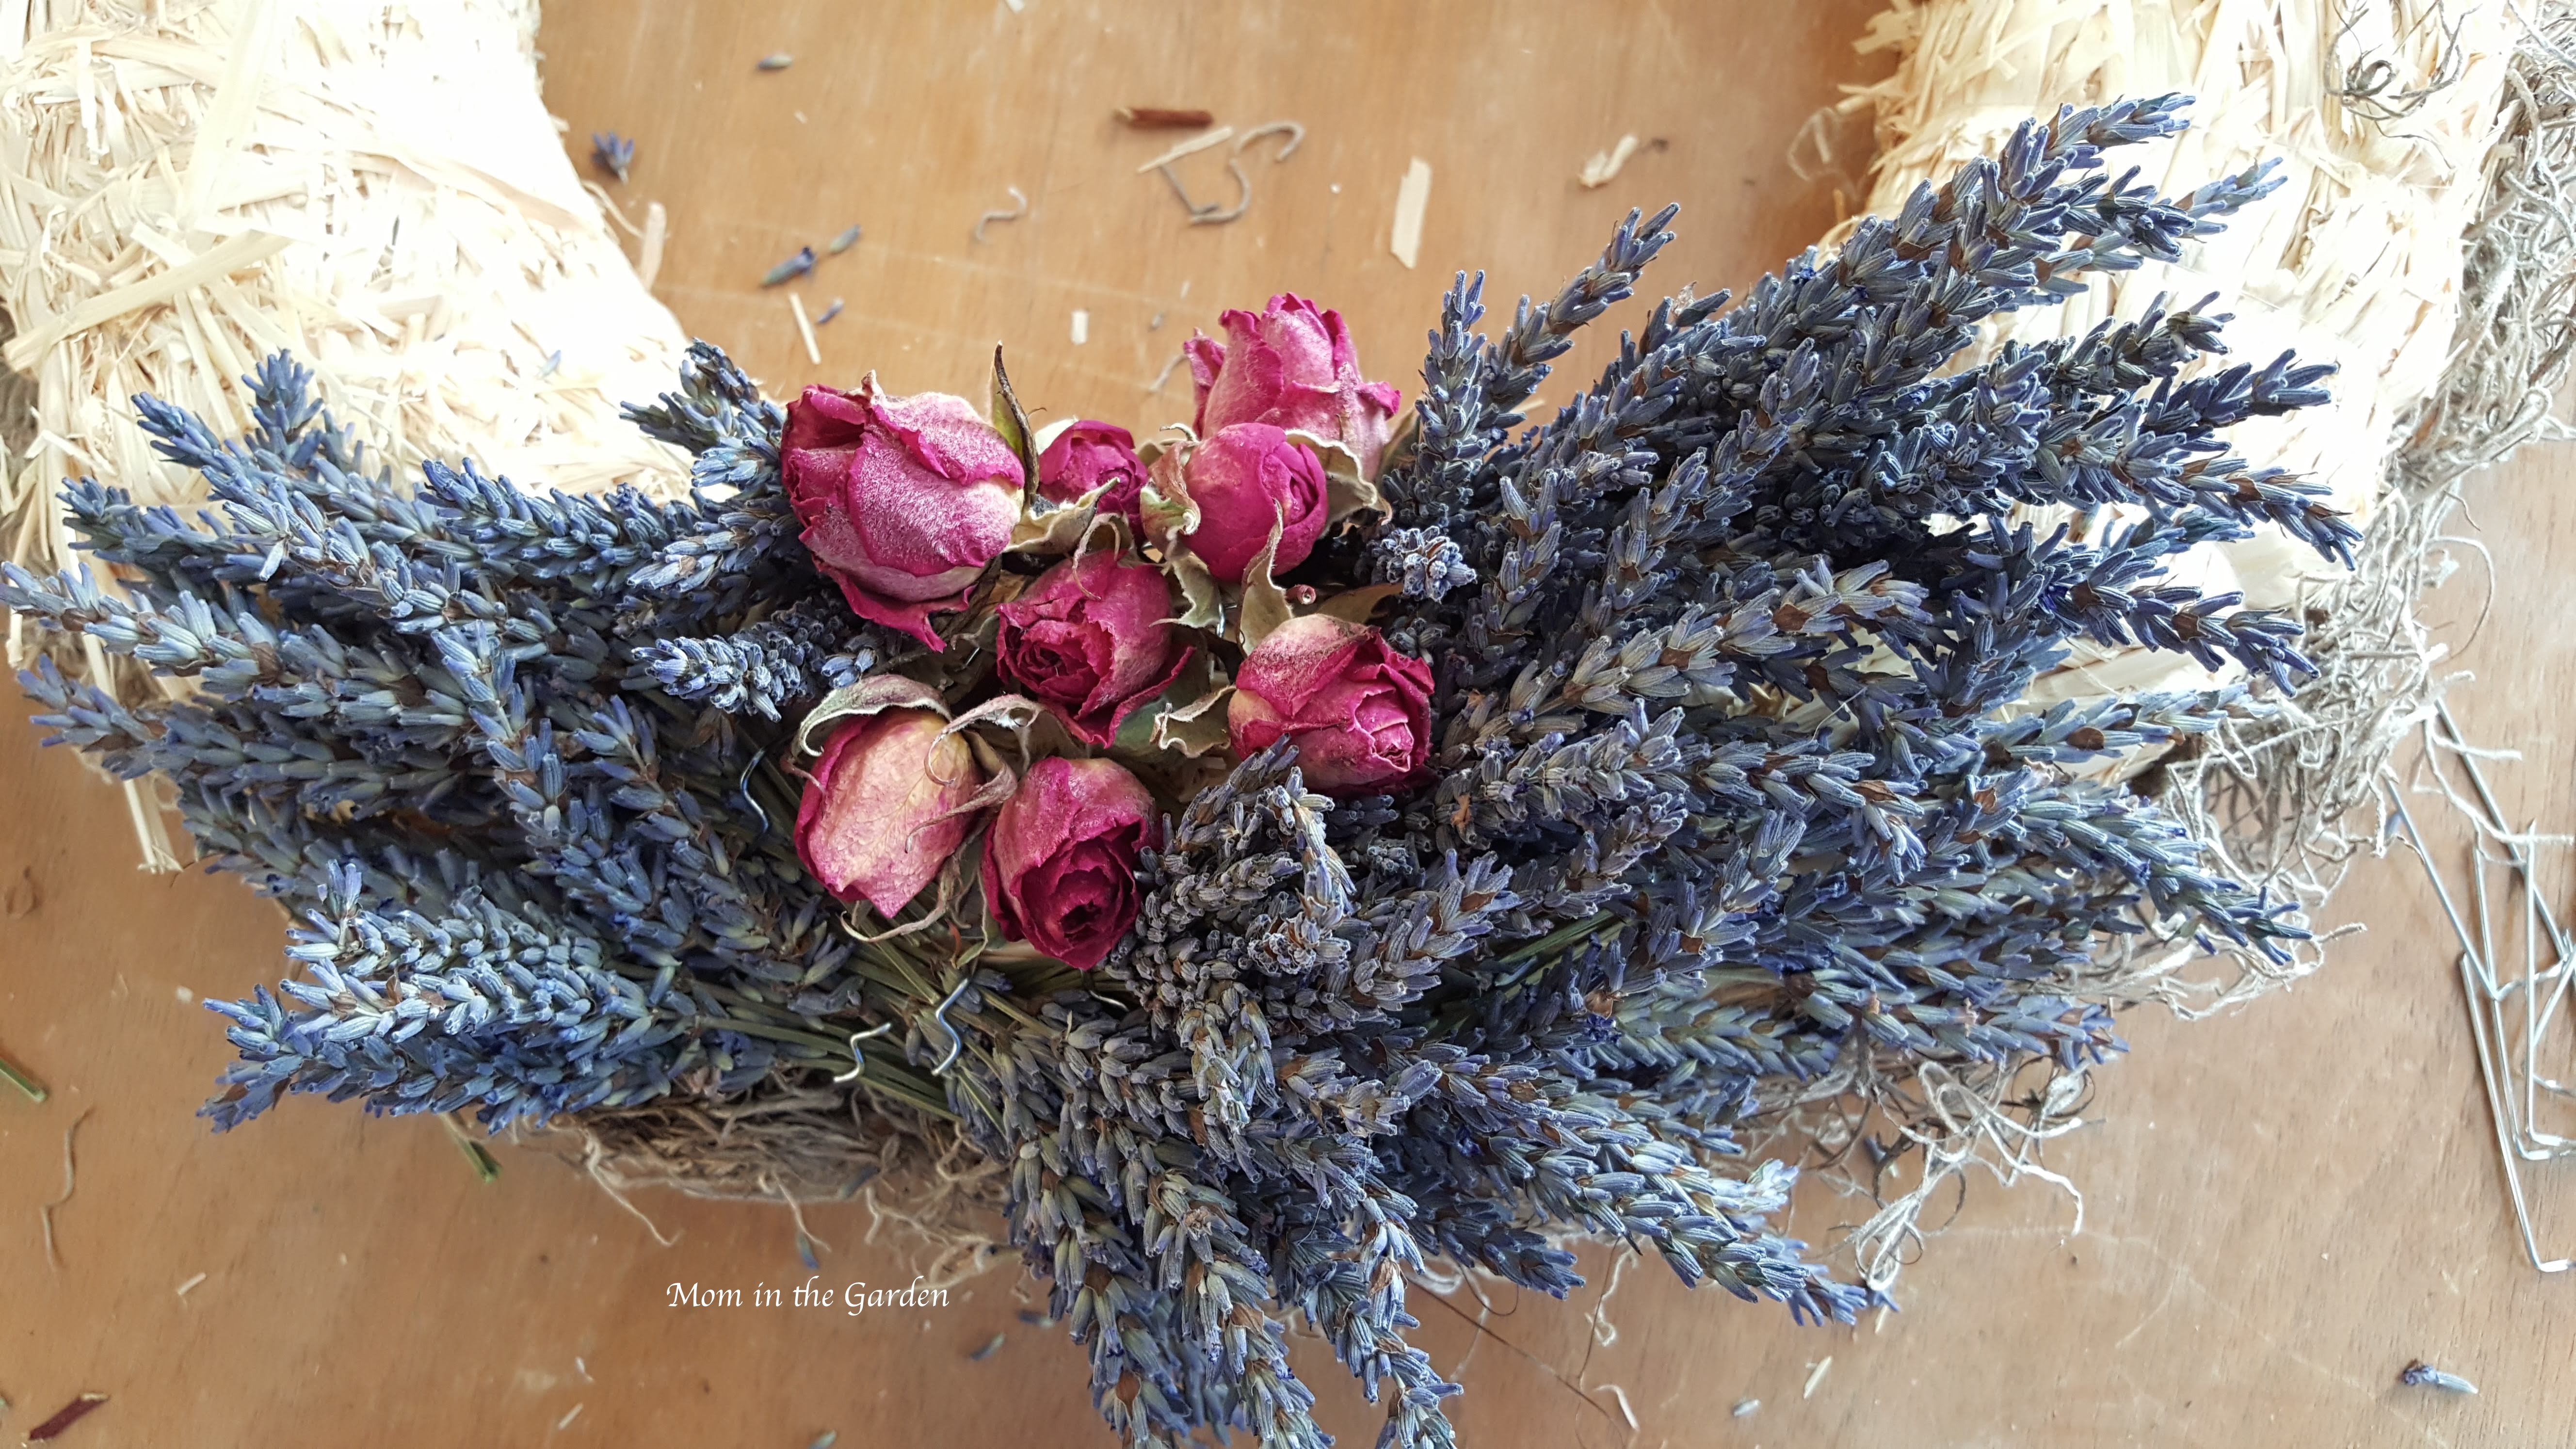
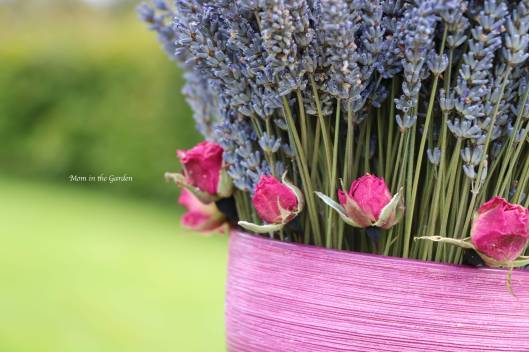
I start with grabbing a bunch of dried lavender and any other plant materials I’m going to use. The above wreath is only going to have those four roses with the lavender. I attached the roses first and then worked around them, starting on the top right. I tend to work out from the top, first going right half way around, and then working from the top again and going left.

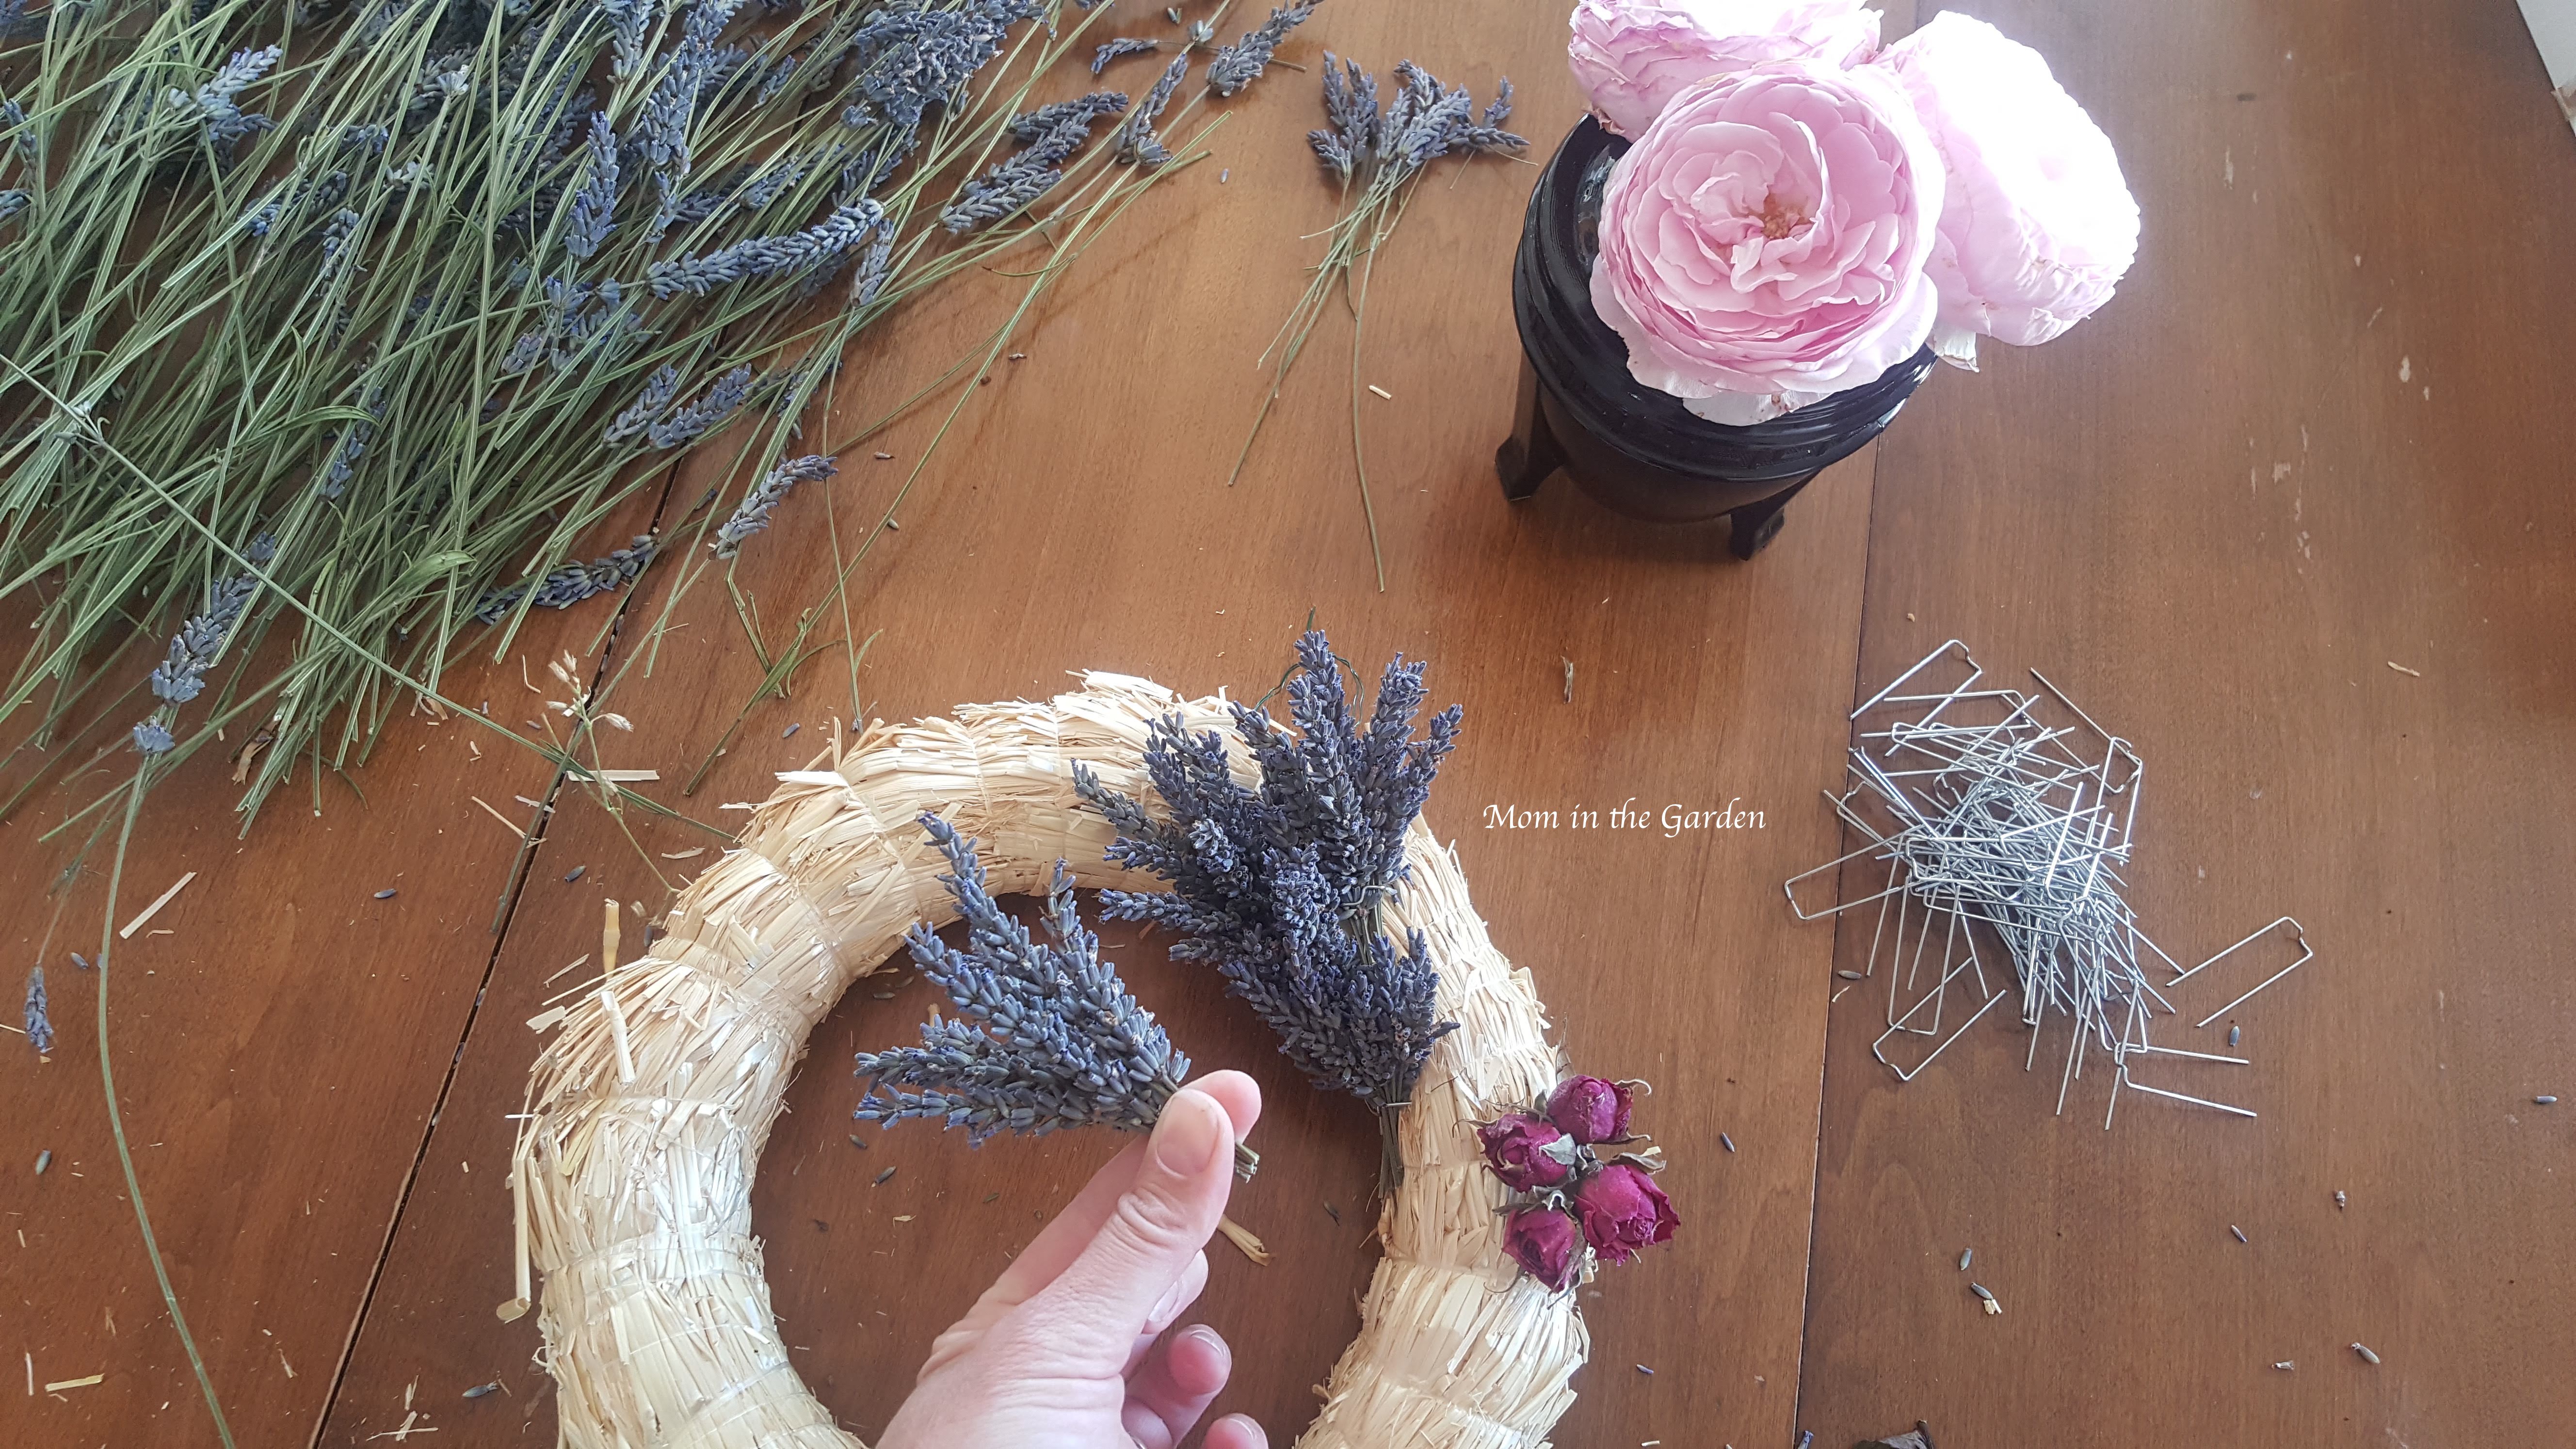
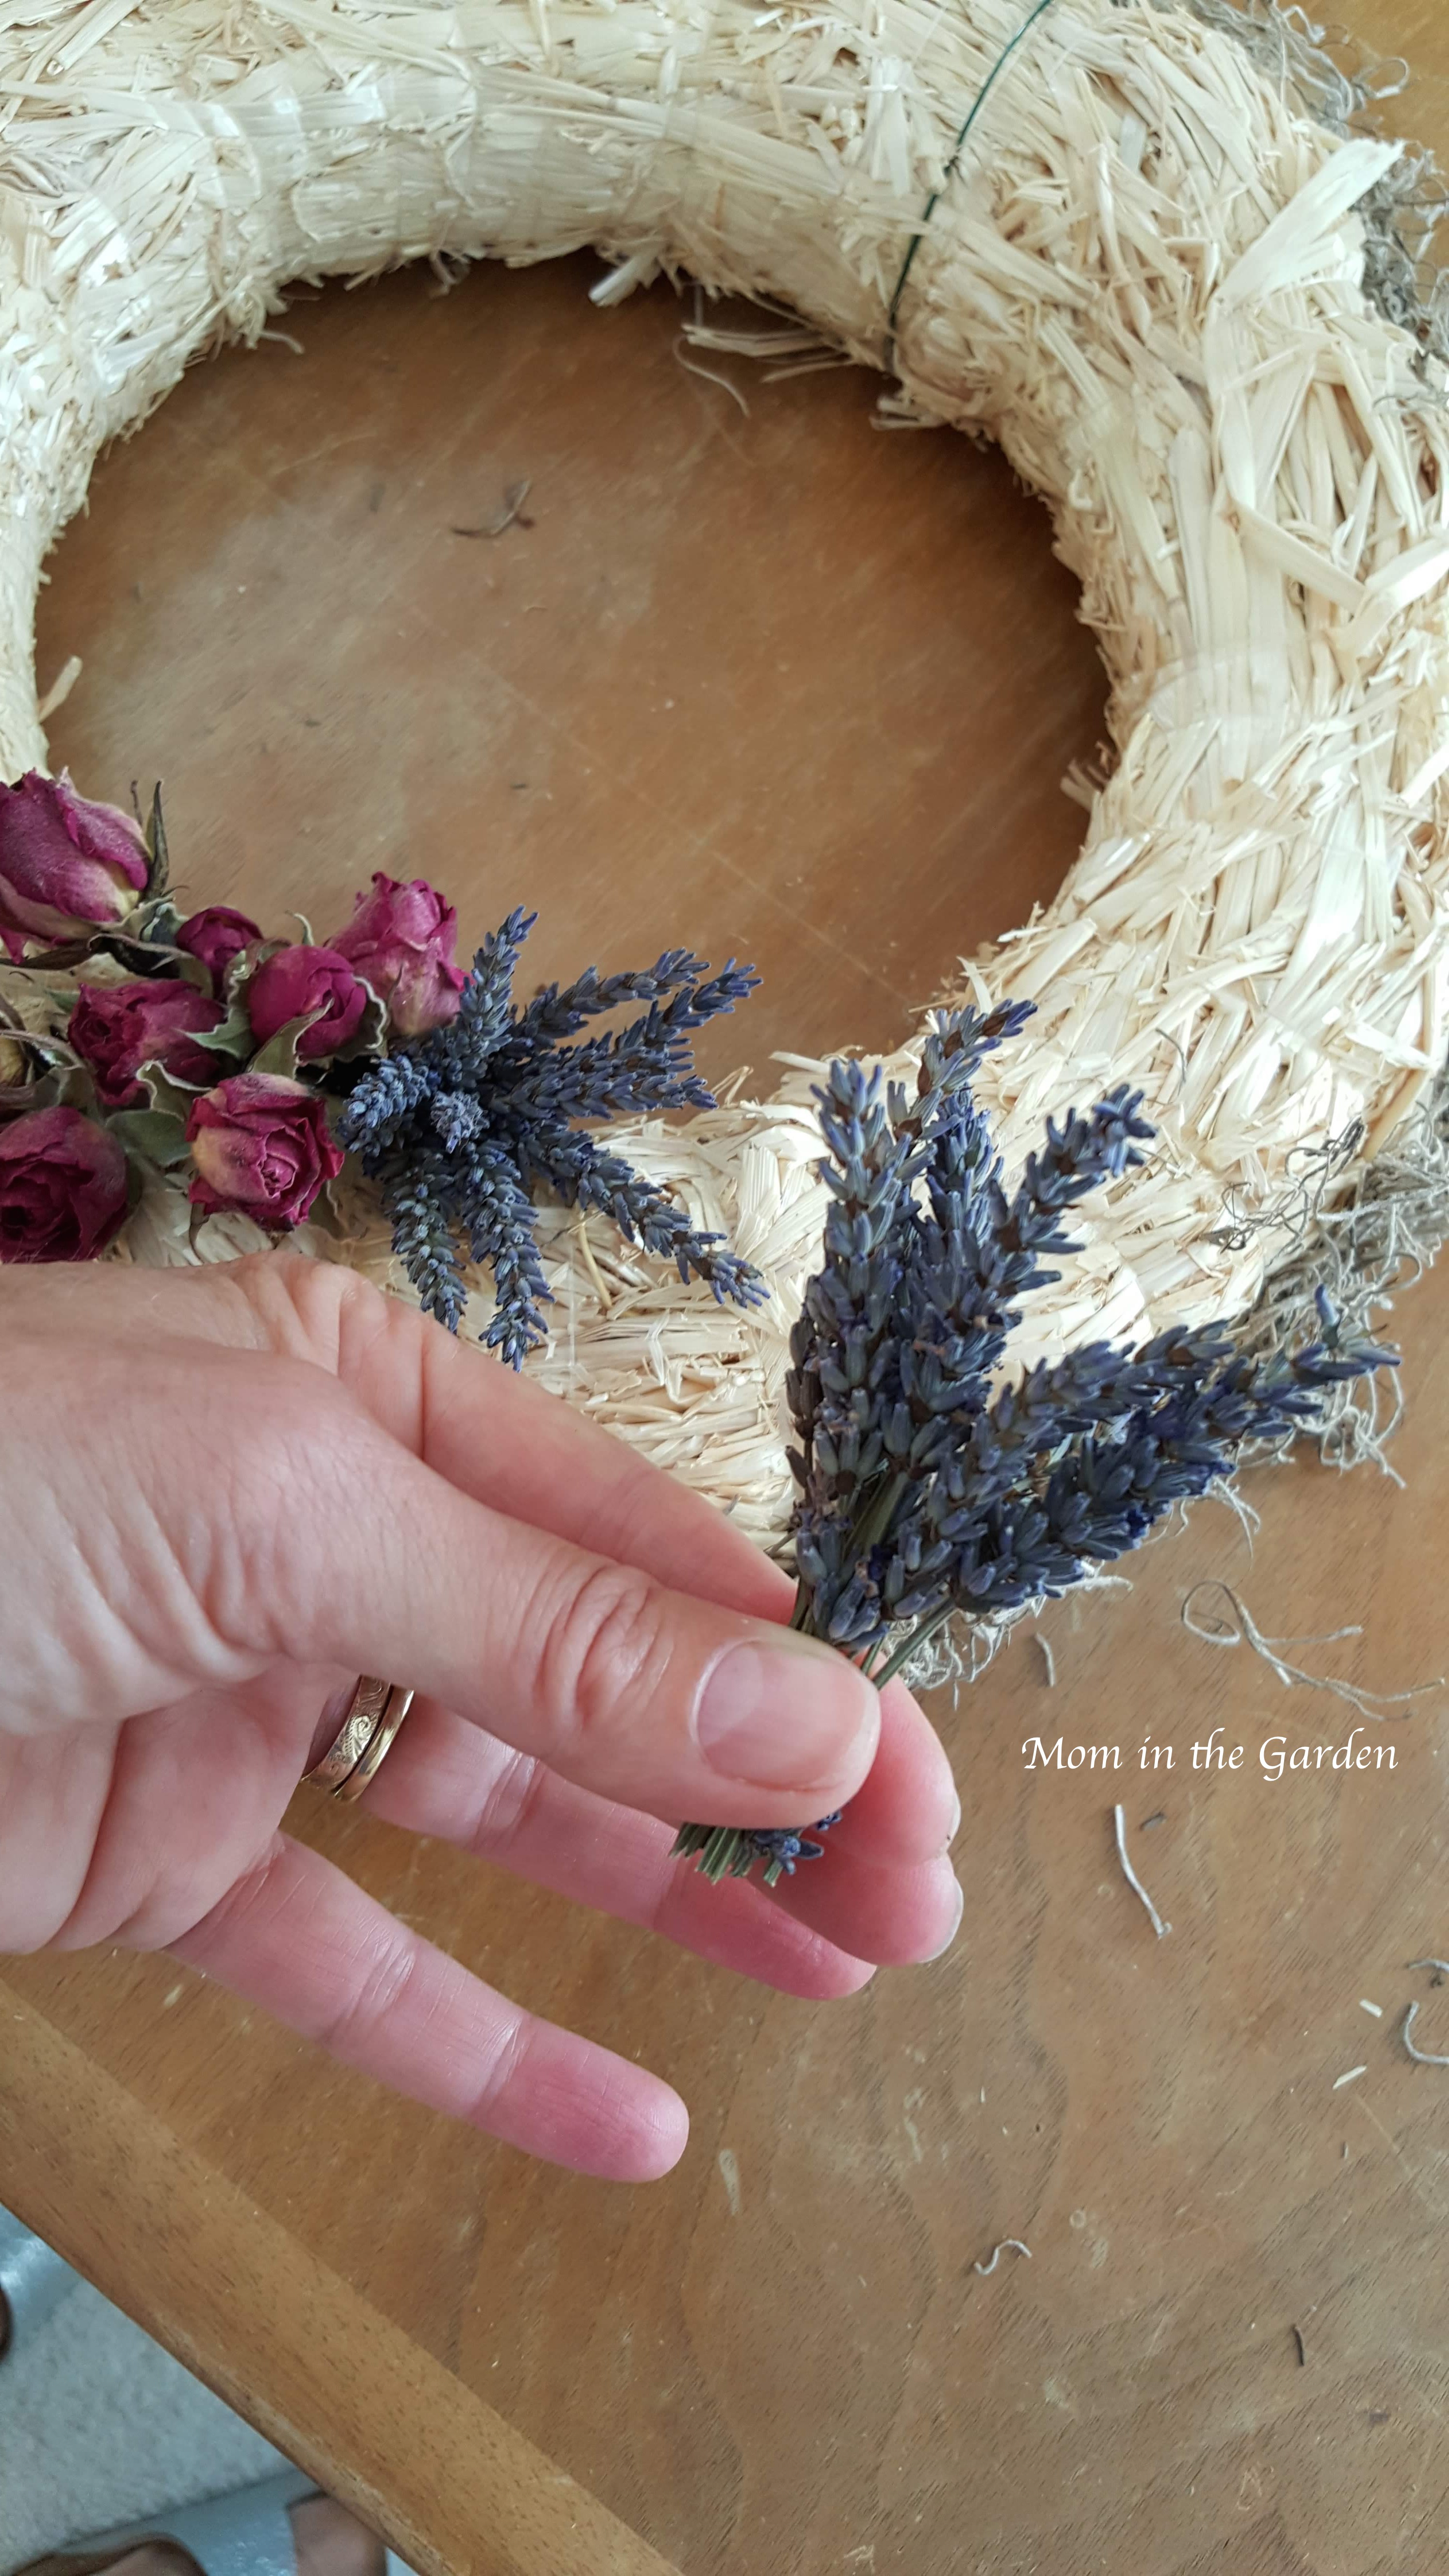
I cut the lavender a bit more than one width of my finger space from the flower.

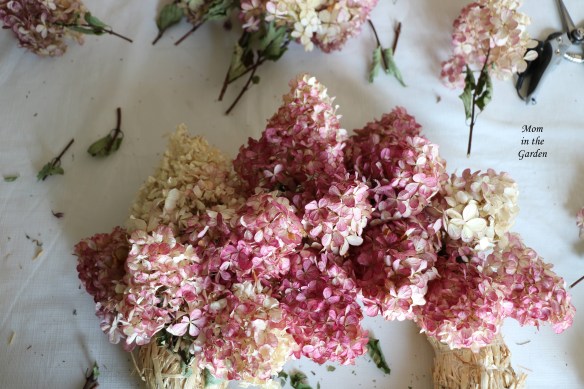
It can be a tedious task, as it takes many, many bunches of lavender to fill the wreath! The up-side is that the room smells wonderful while working with the lavender!

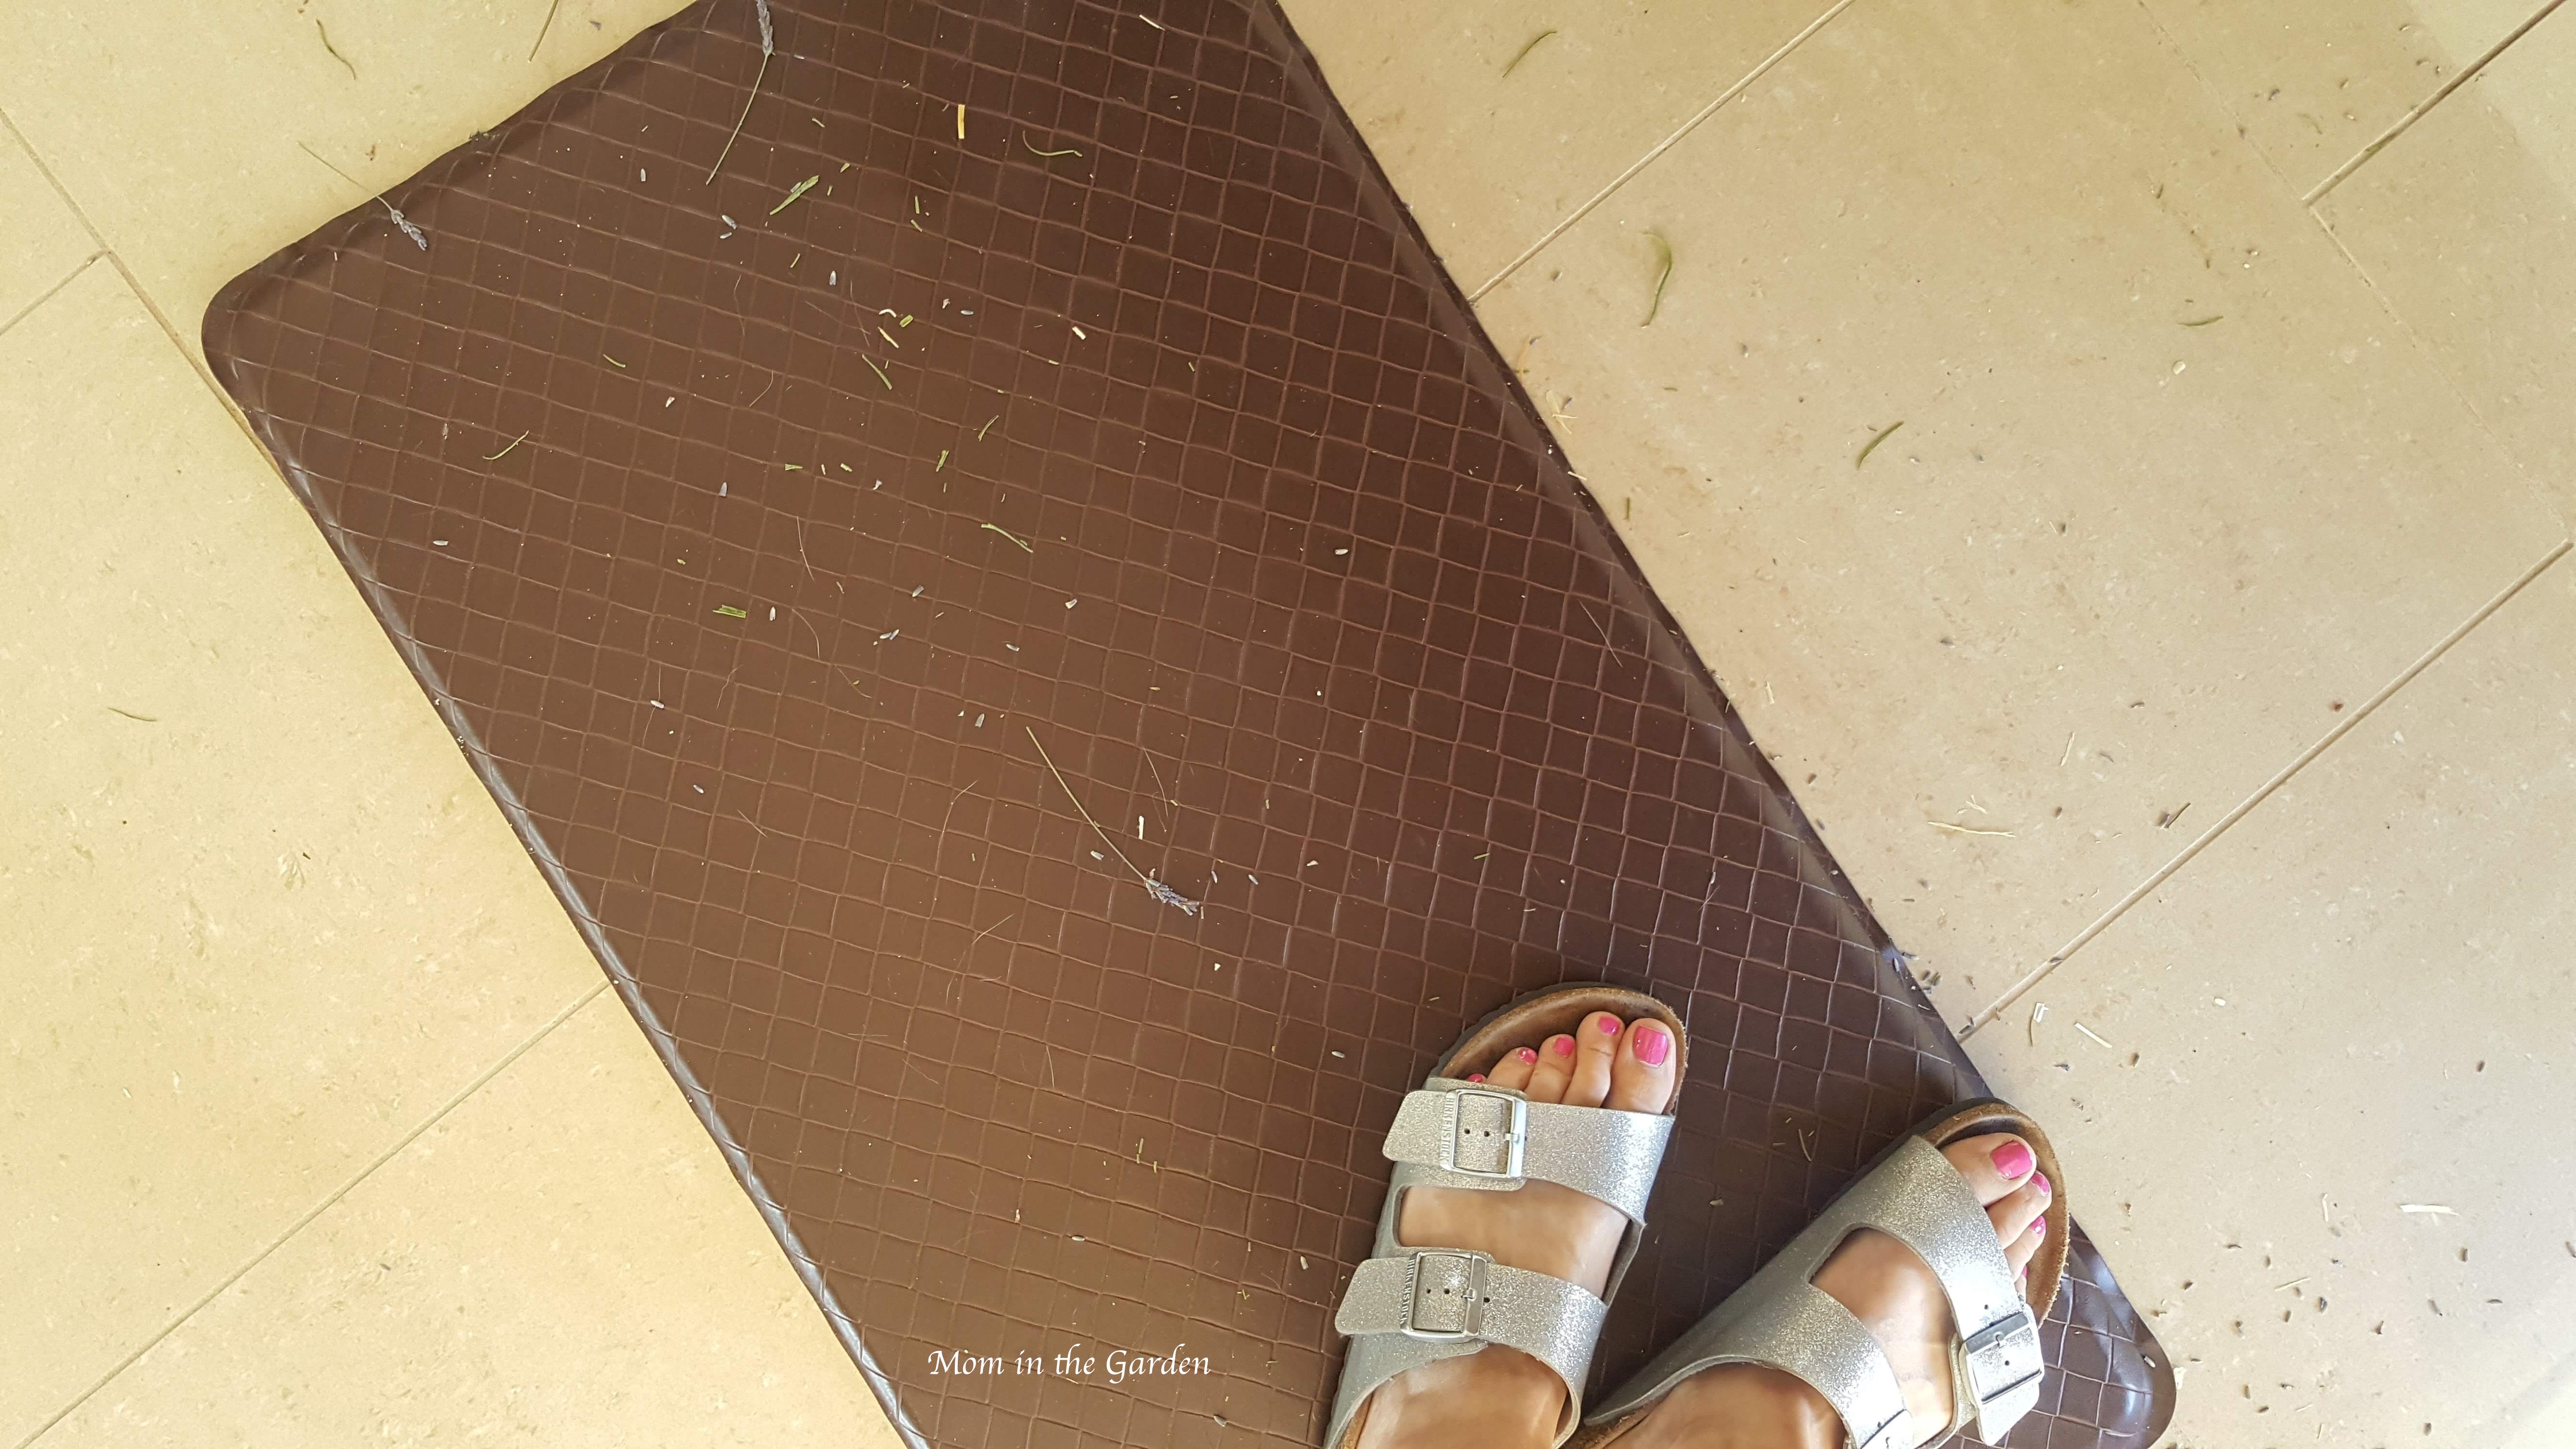
I love my GelPro classic gel mat, especially when standing on tiles for so long! (I also love my sparkle Birkenstocks)

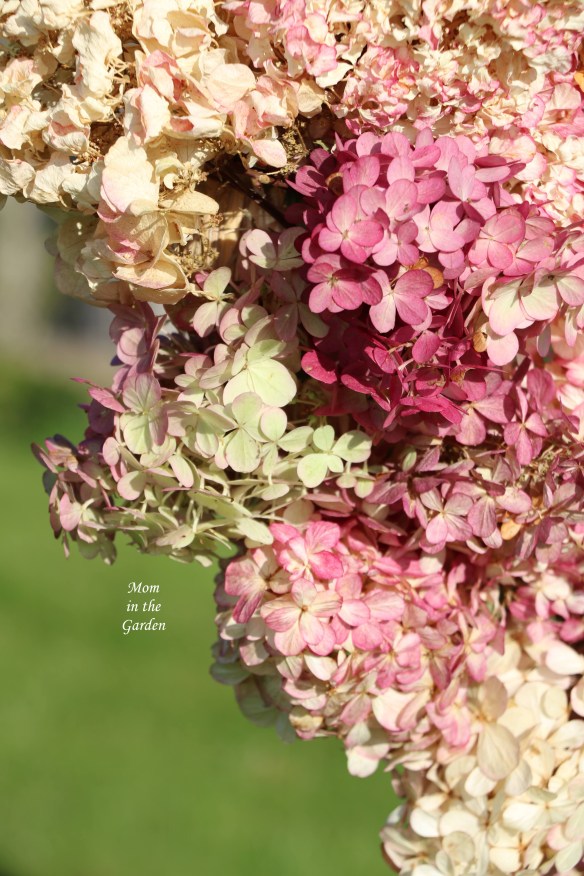
It takes patience, but it is lovely to see how it fills in and of course the smell is wonderfully relaxing!

One little bunch at a time!

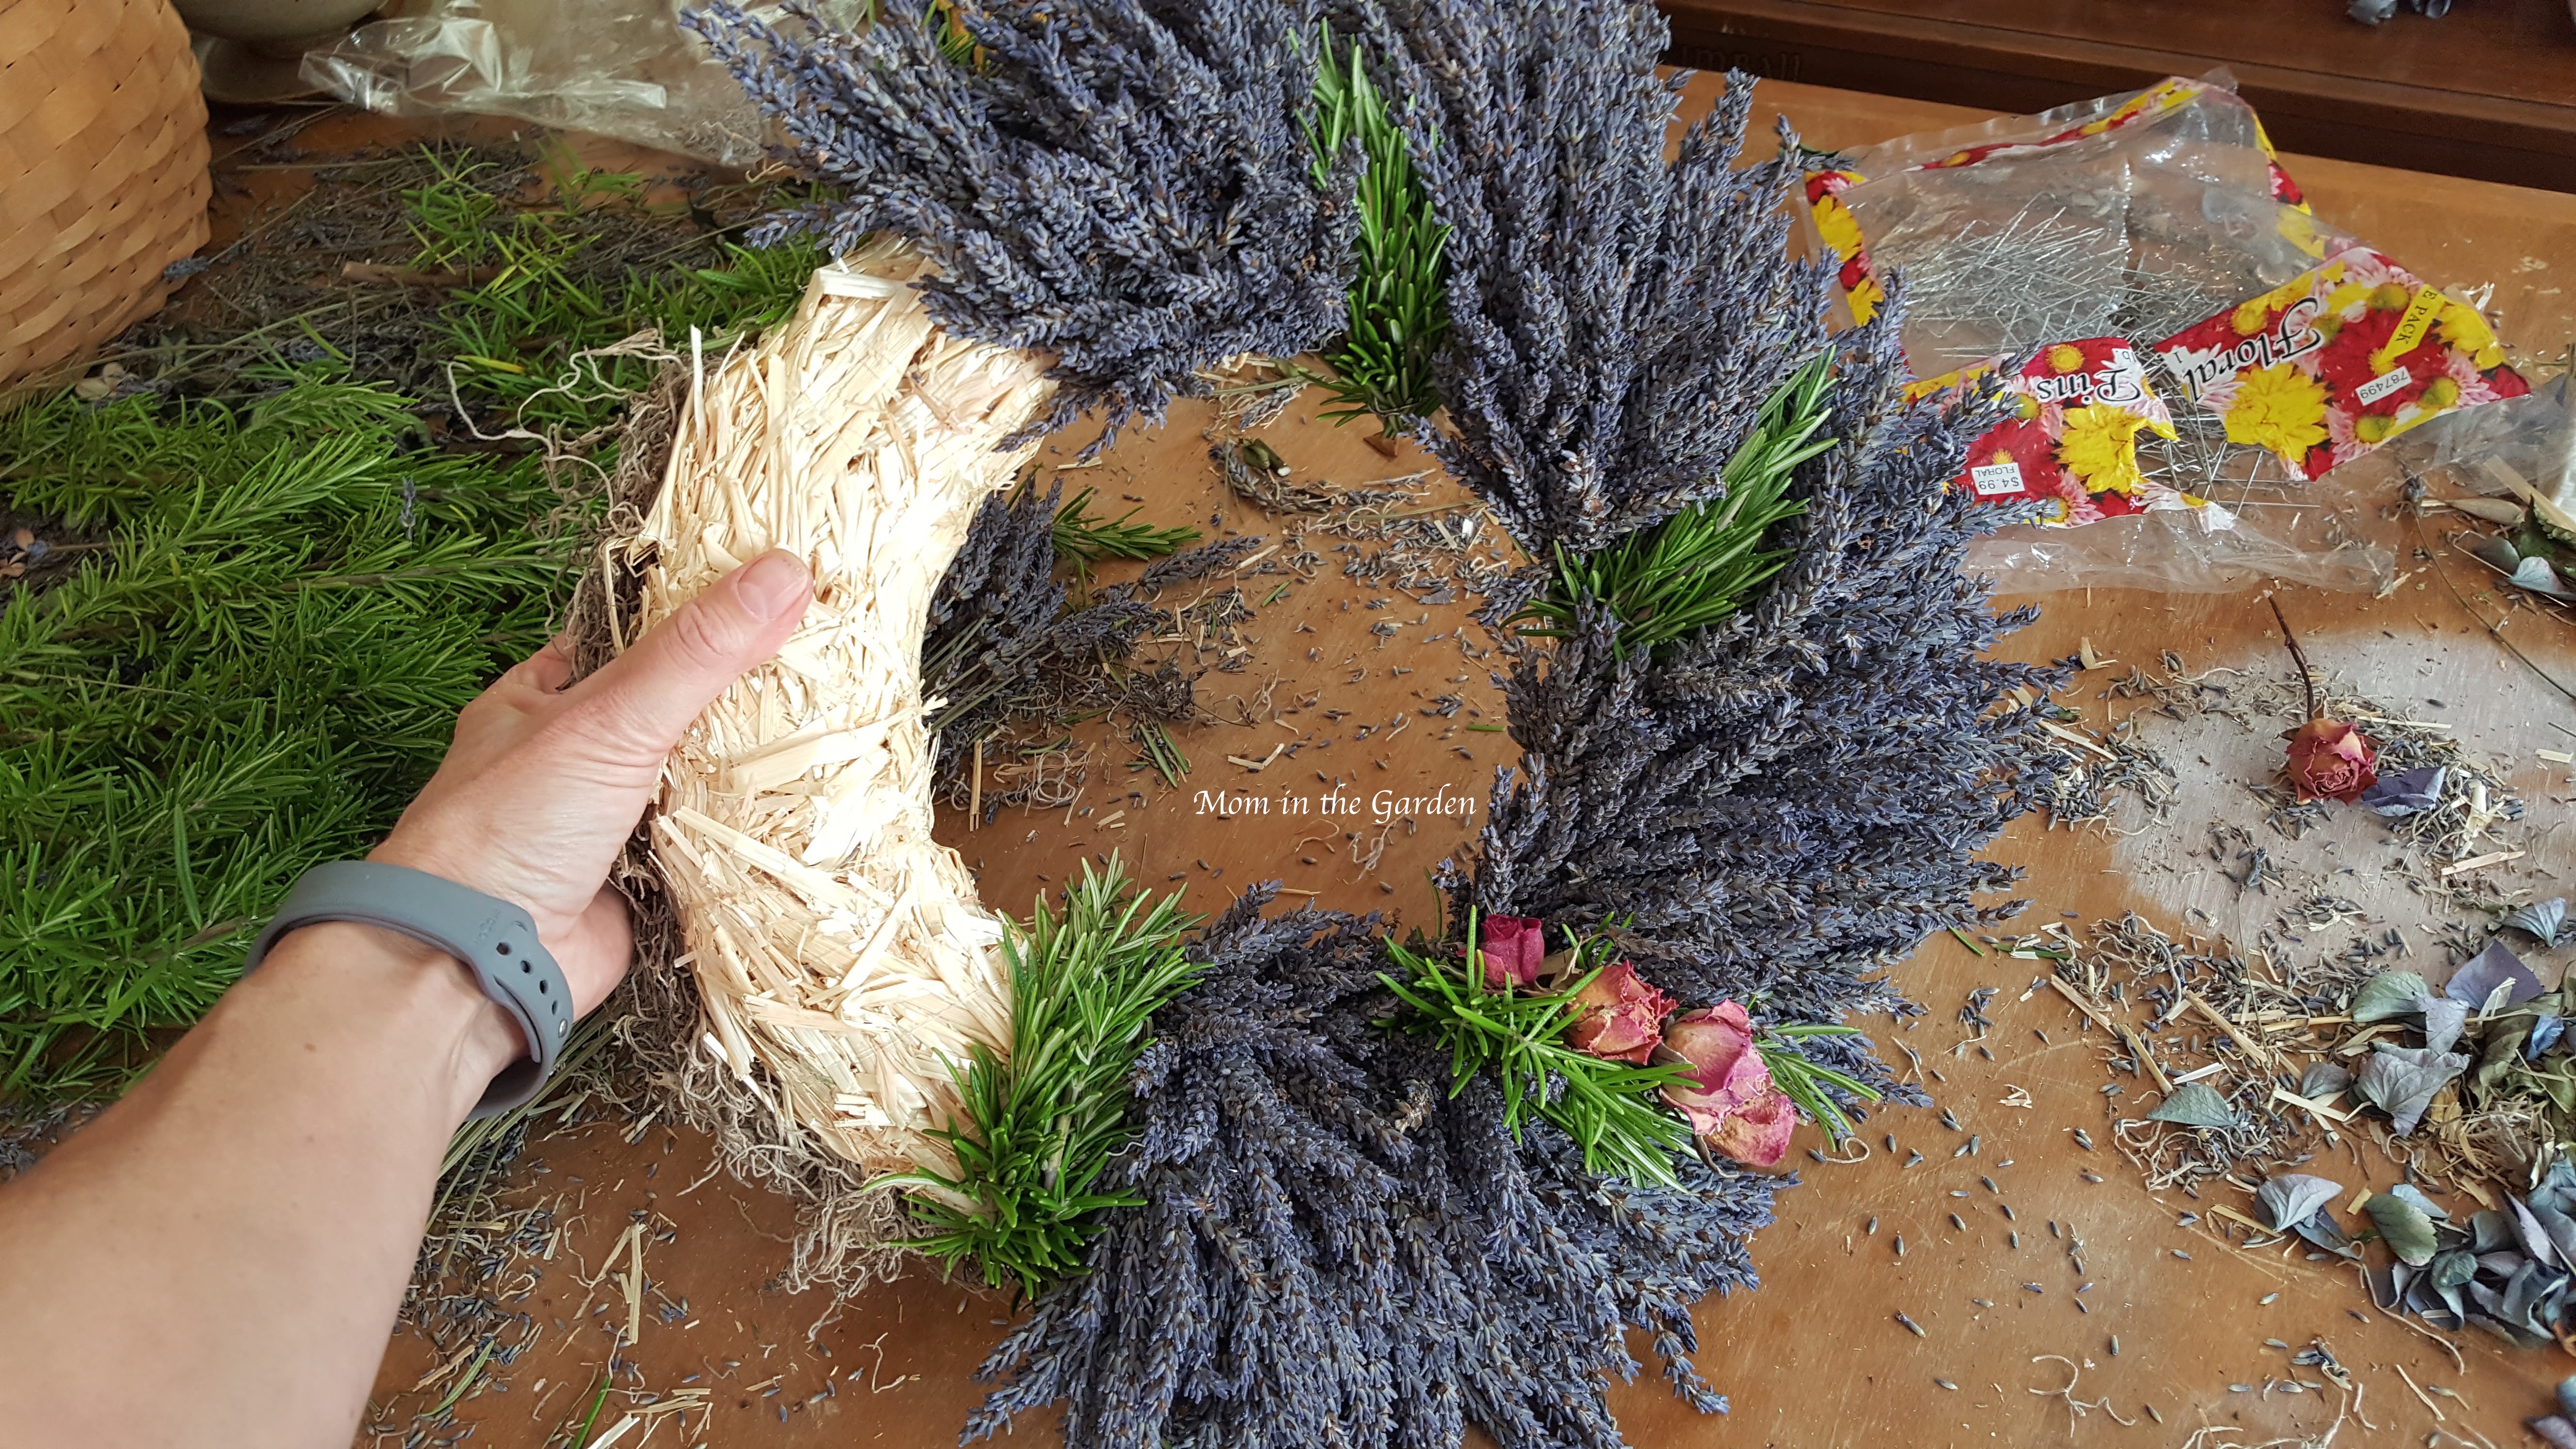
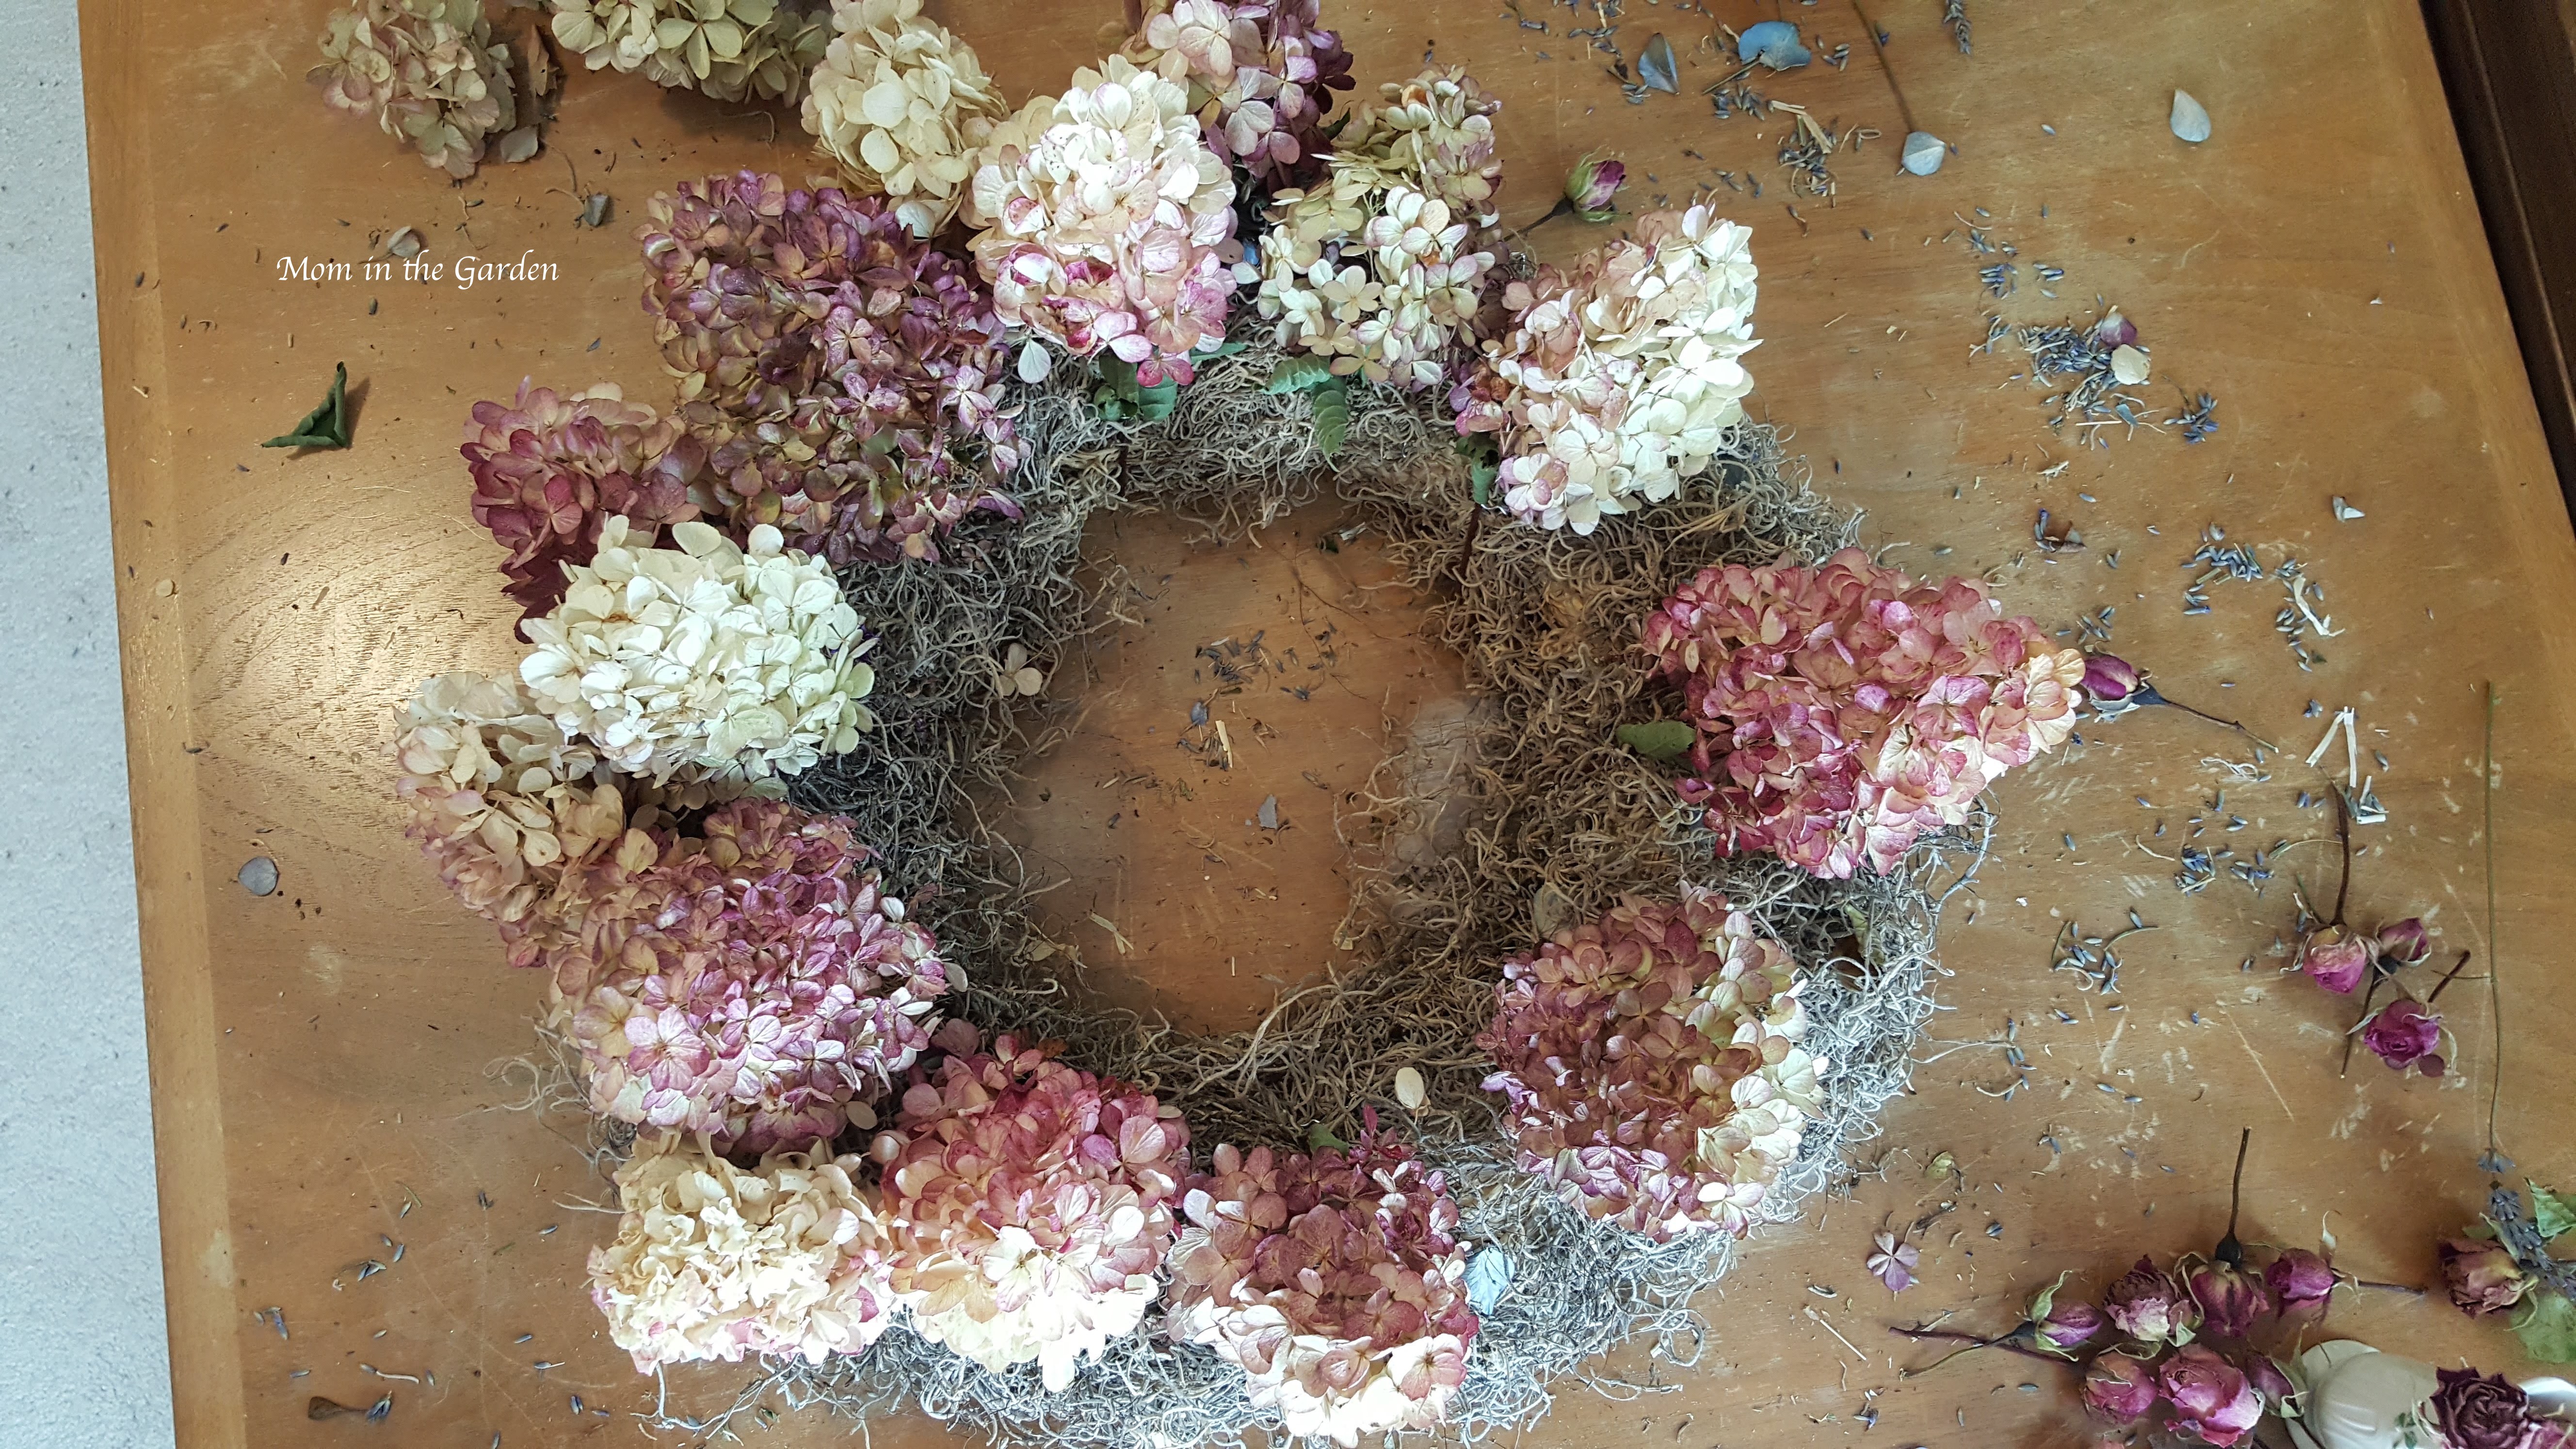
The next wreath had lots more plant material! I didn’t use the artichoke which is in bloom on the table, as it was too big.  I did use a tiny one, though.

The lavender in the center of this wreath is actually from last year. You can see the difference in color when I add the outside layer.

close up of the roses, poppy seed pods, Rosemary and artichoke

It was only after taking the close-up picture above that I realized that the wreath would look better with another layer of lavender. It just looked like it was missing something.

Filling in an outside layer of lavender.

Ah yes, you can see it now, can’t you?  The inside layer is definitely lighter! 🙂 This is where the two plus hours comes in…

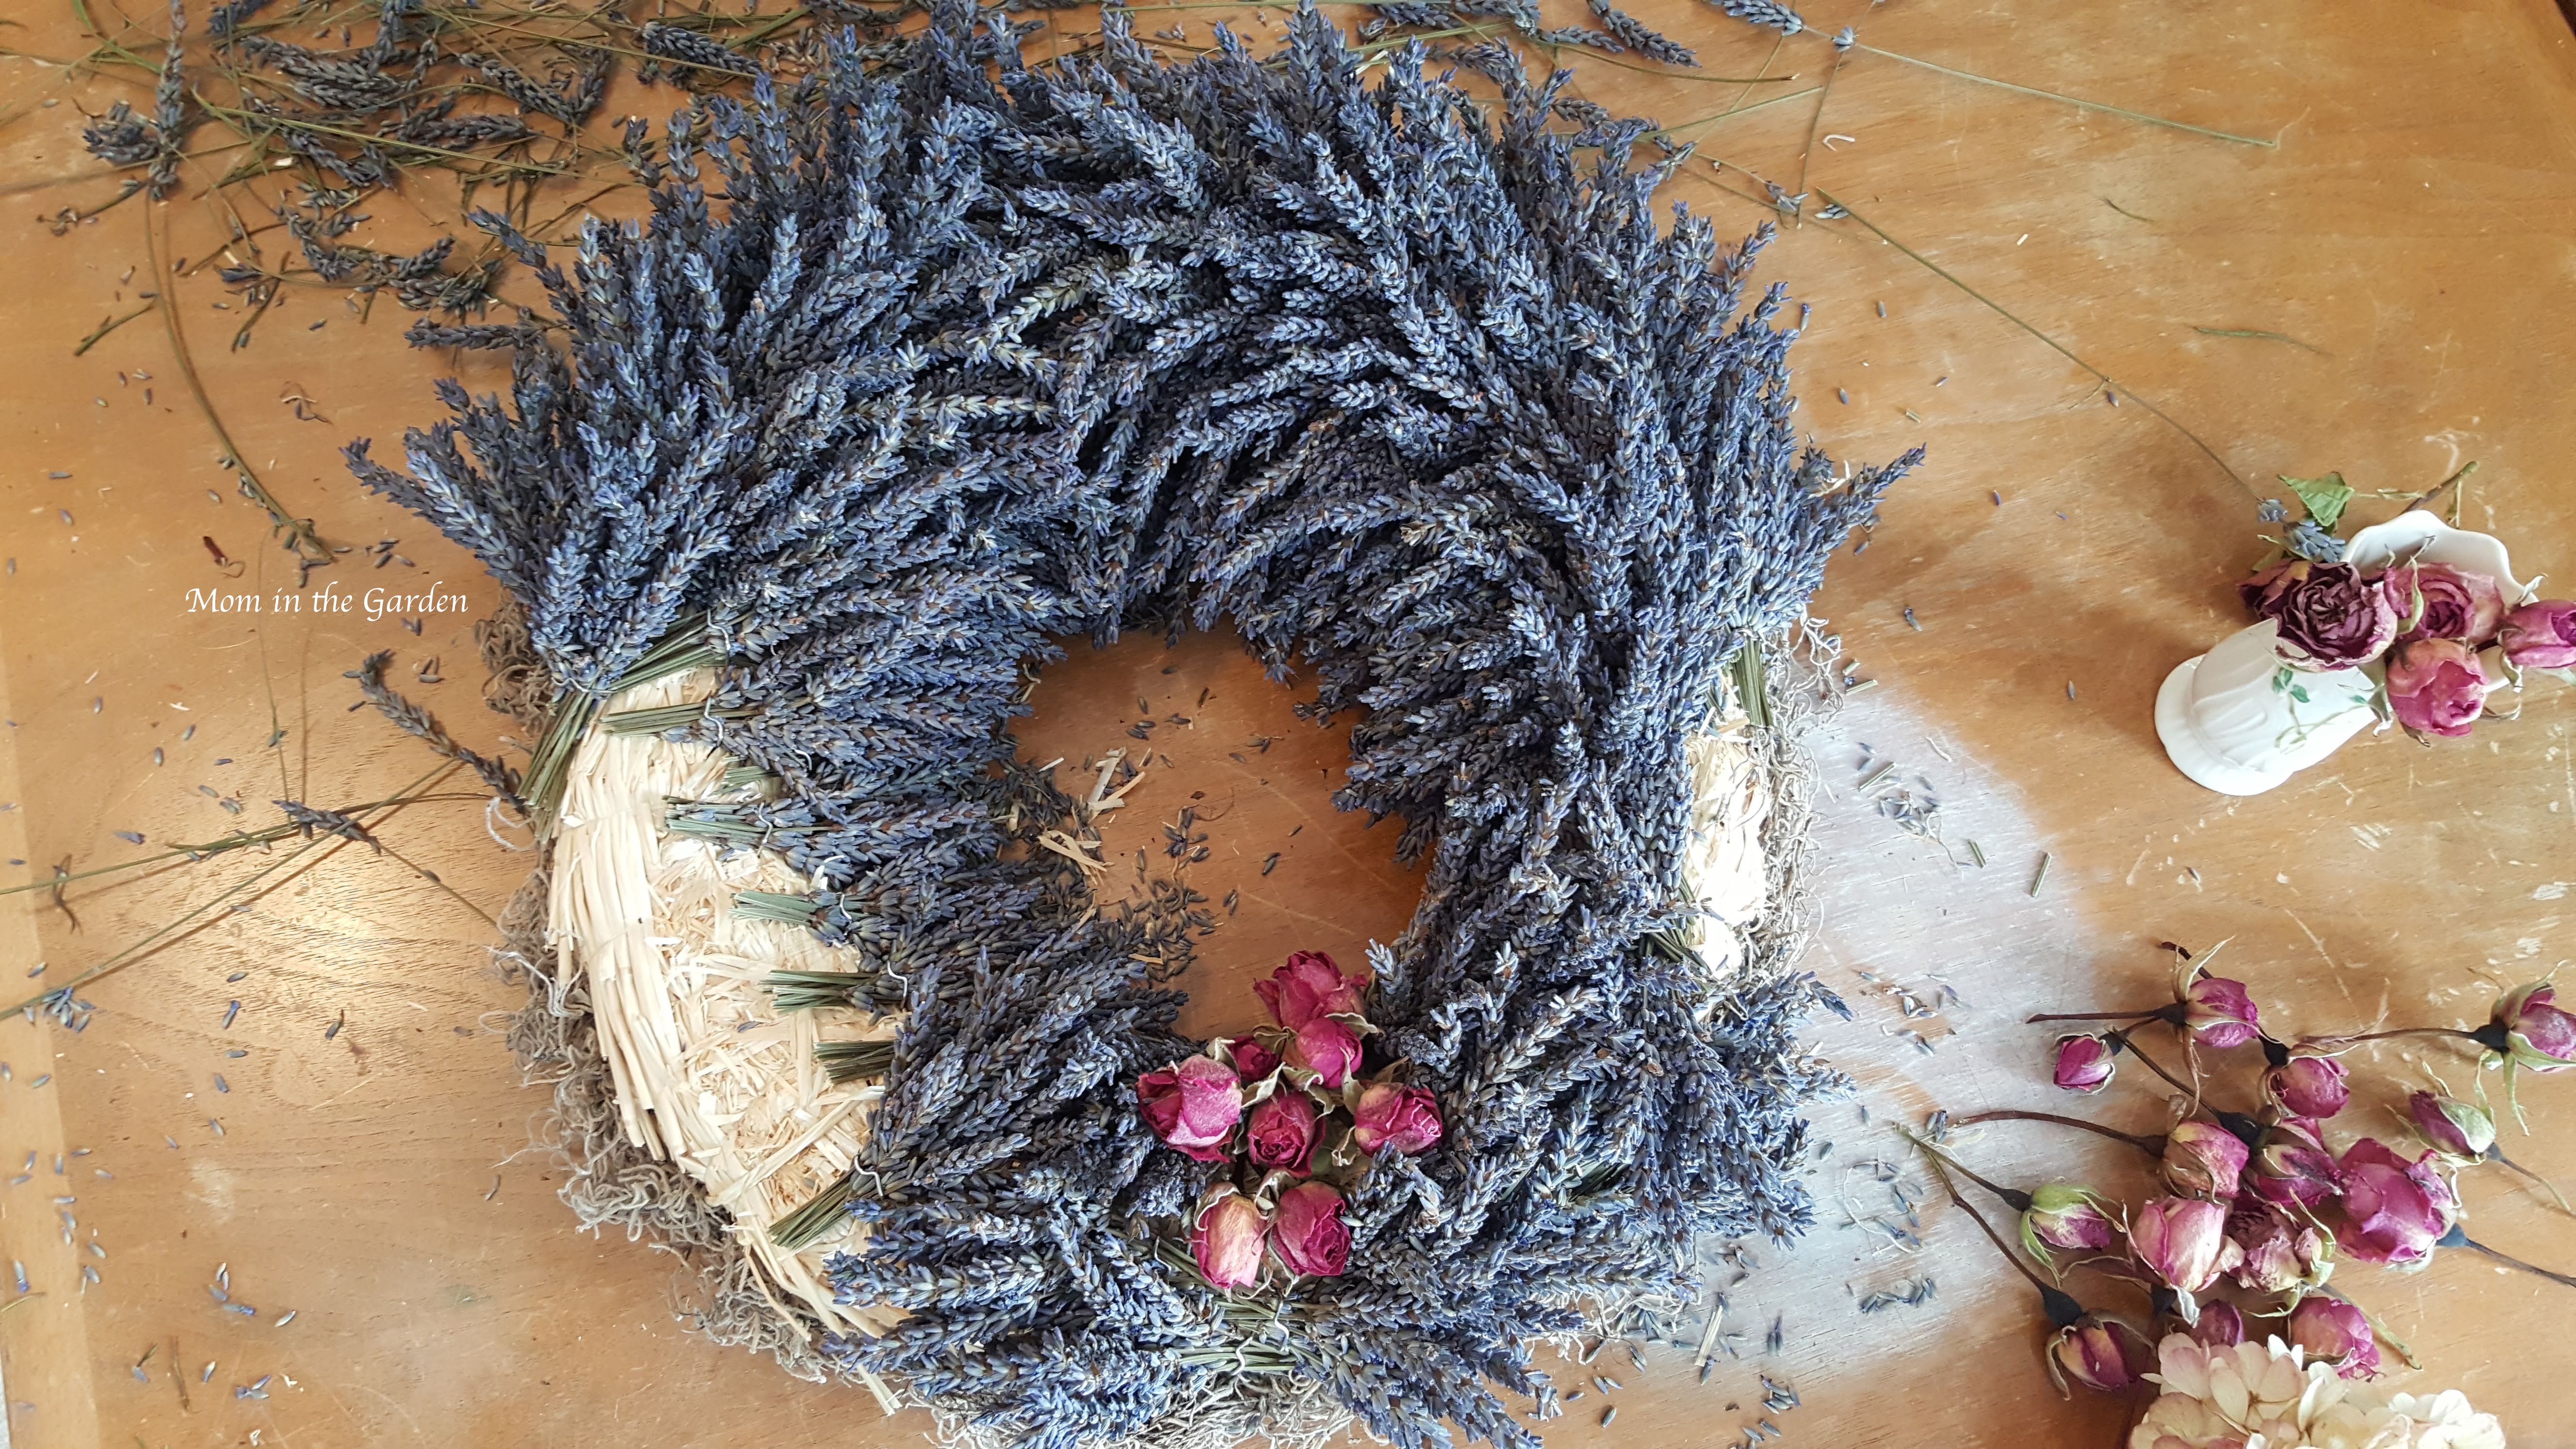
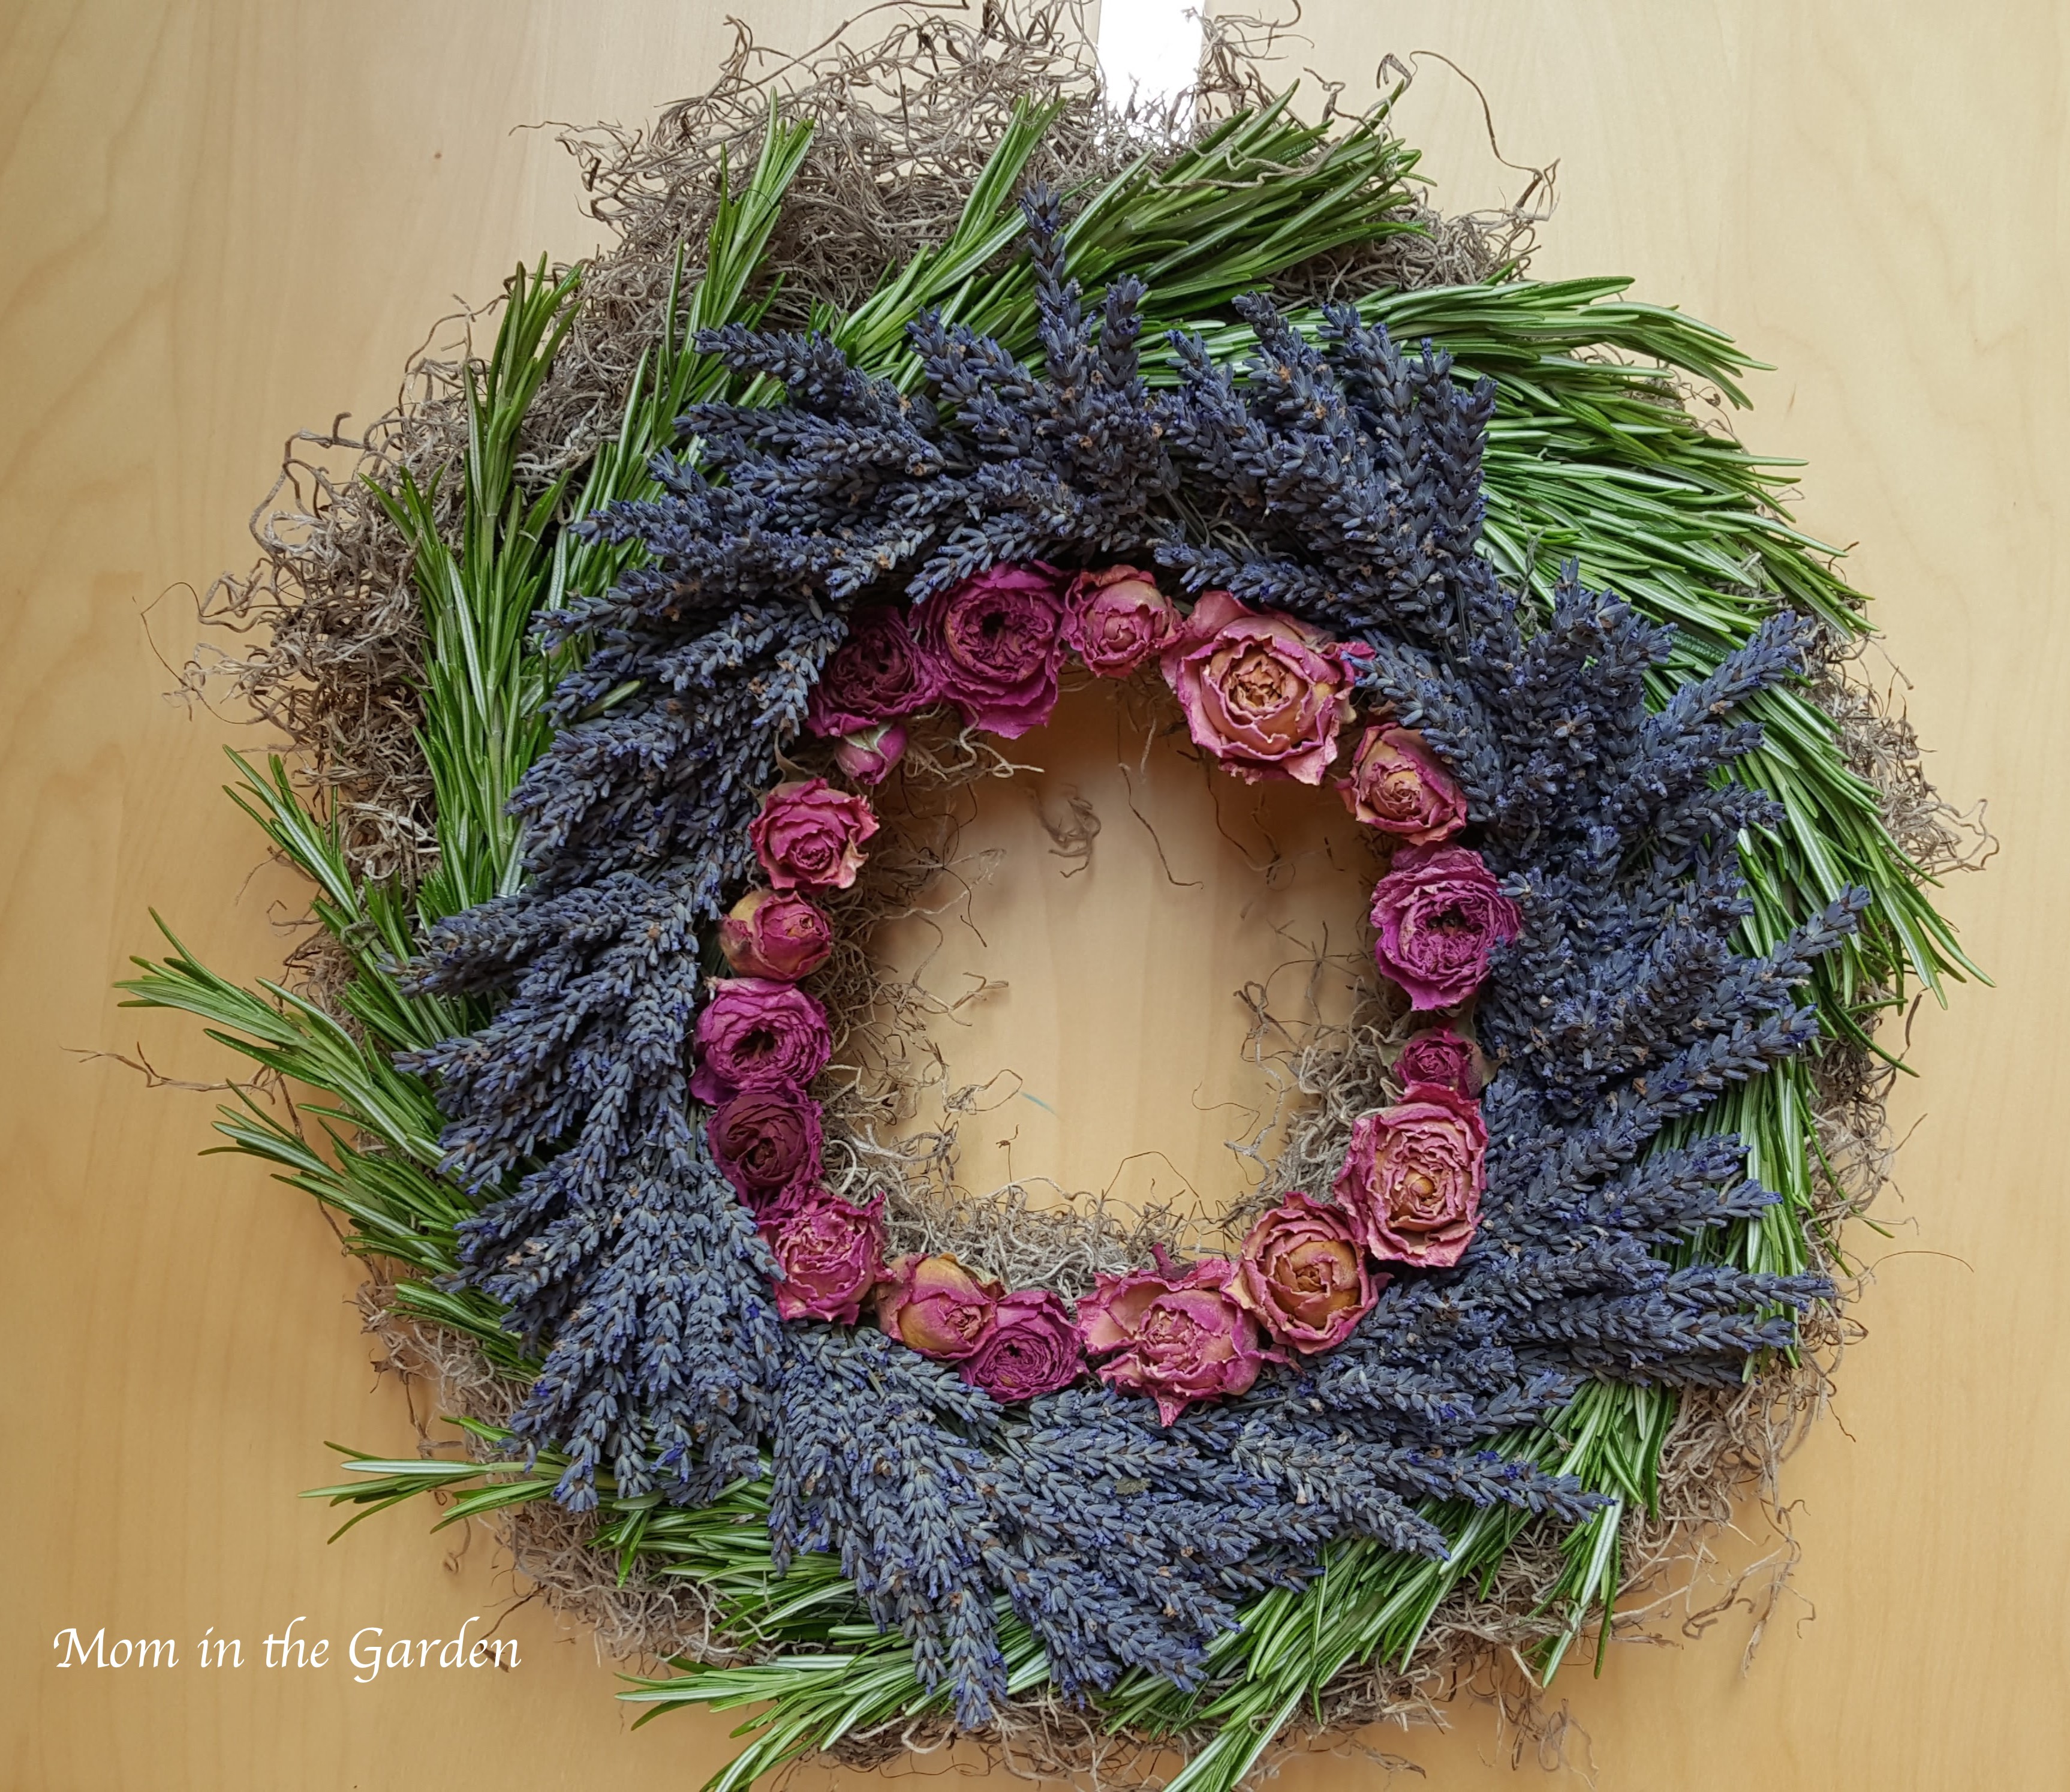
The third lavender wreath will have poppy seed pods and roses.

My third lavender wreath had roses and poppy seed pods.  I started at the top left for this one, and placed the roses on the right.

Pinning the roses on.

The roses are also from my garden.  I try and cut as many as possible early in the season so they will be dried enough for the wreaths.  I think I’ve finally decided that it is best to cut them while they are still closed. They will still dry even when opened, but the color stays darker when they are closed.

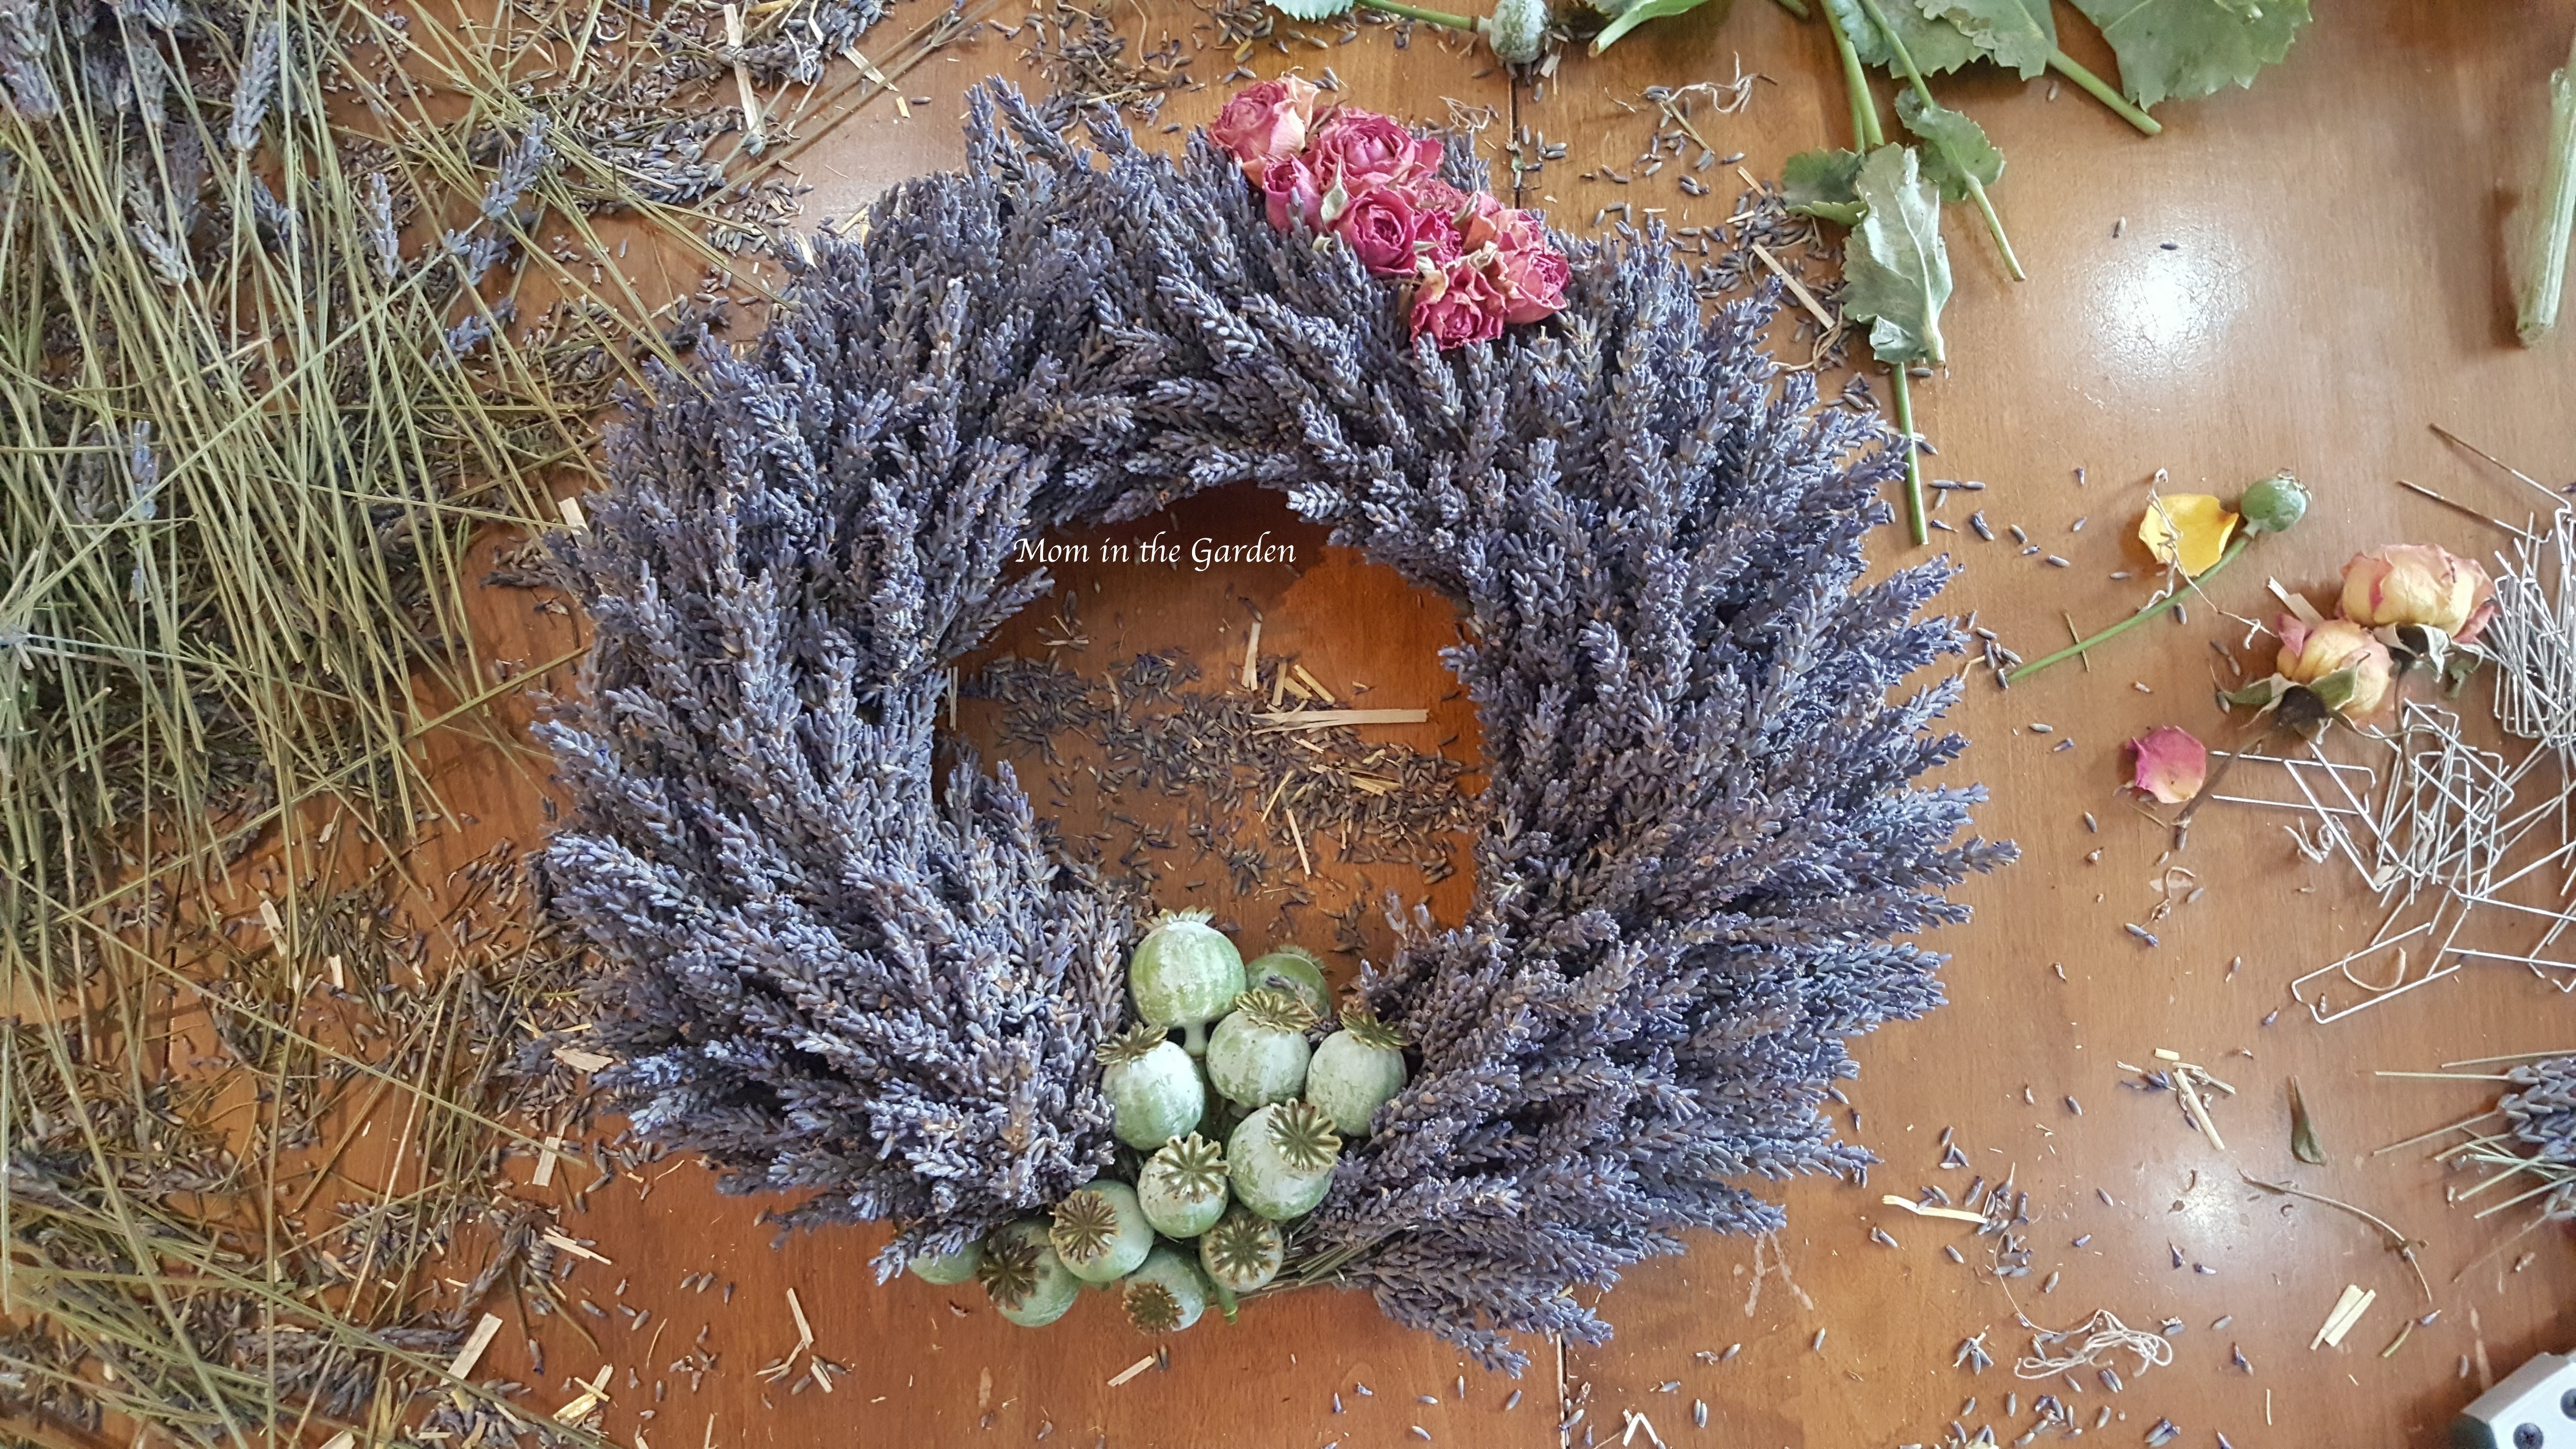
The poppy seed pods were neat!

I really like the poppy seed pods!  This is my first time using them in a wreath. I know they dry brown, so I’m not sure how it will look in a few weeks time. I’ve also learned NOT to turn the wreath upside down as millions of teeny tiny seeds will go everywhere! 🙂

I LOVE making lavender wreaths! I had to stop at three because I don’t have any more wreath forms and I can’t seem to get my hands on them here!  Please let me know if you see where I can buy them in Ireland!

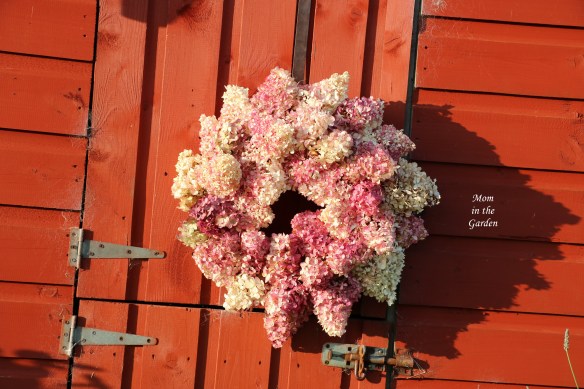
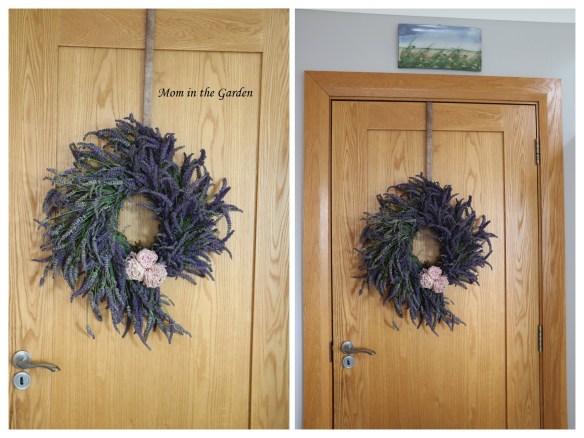
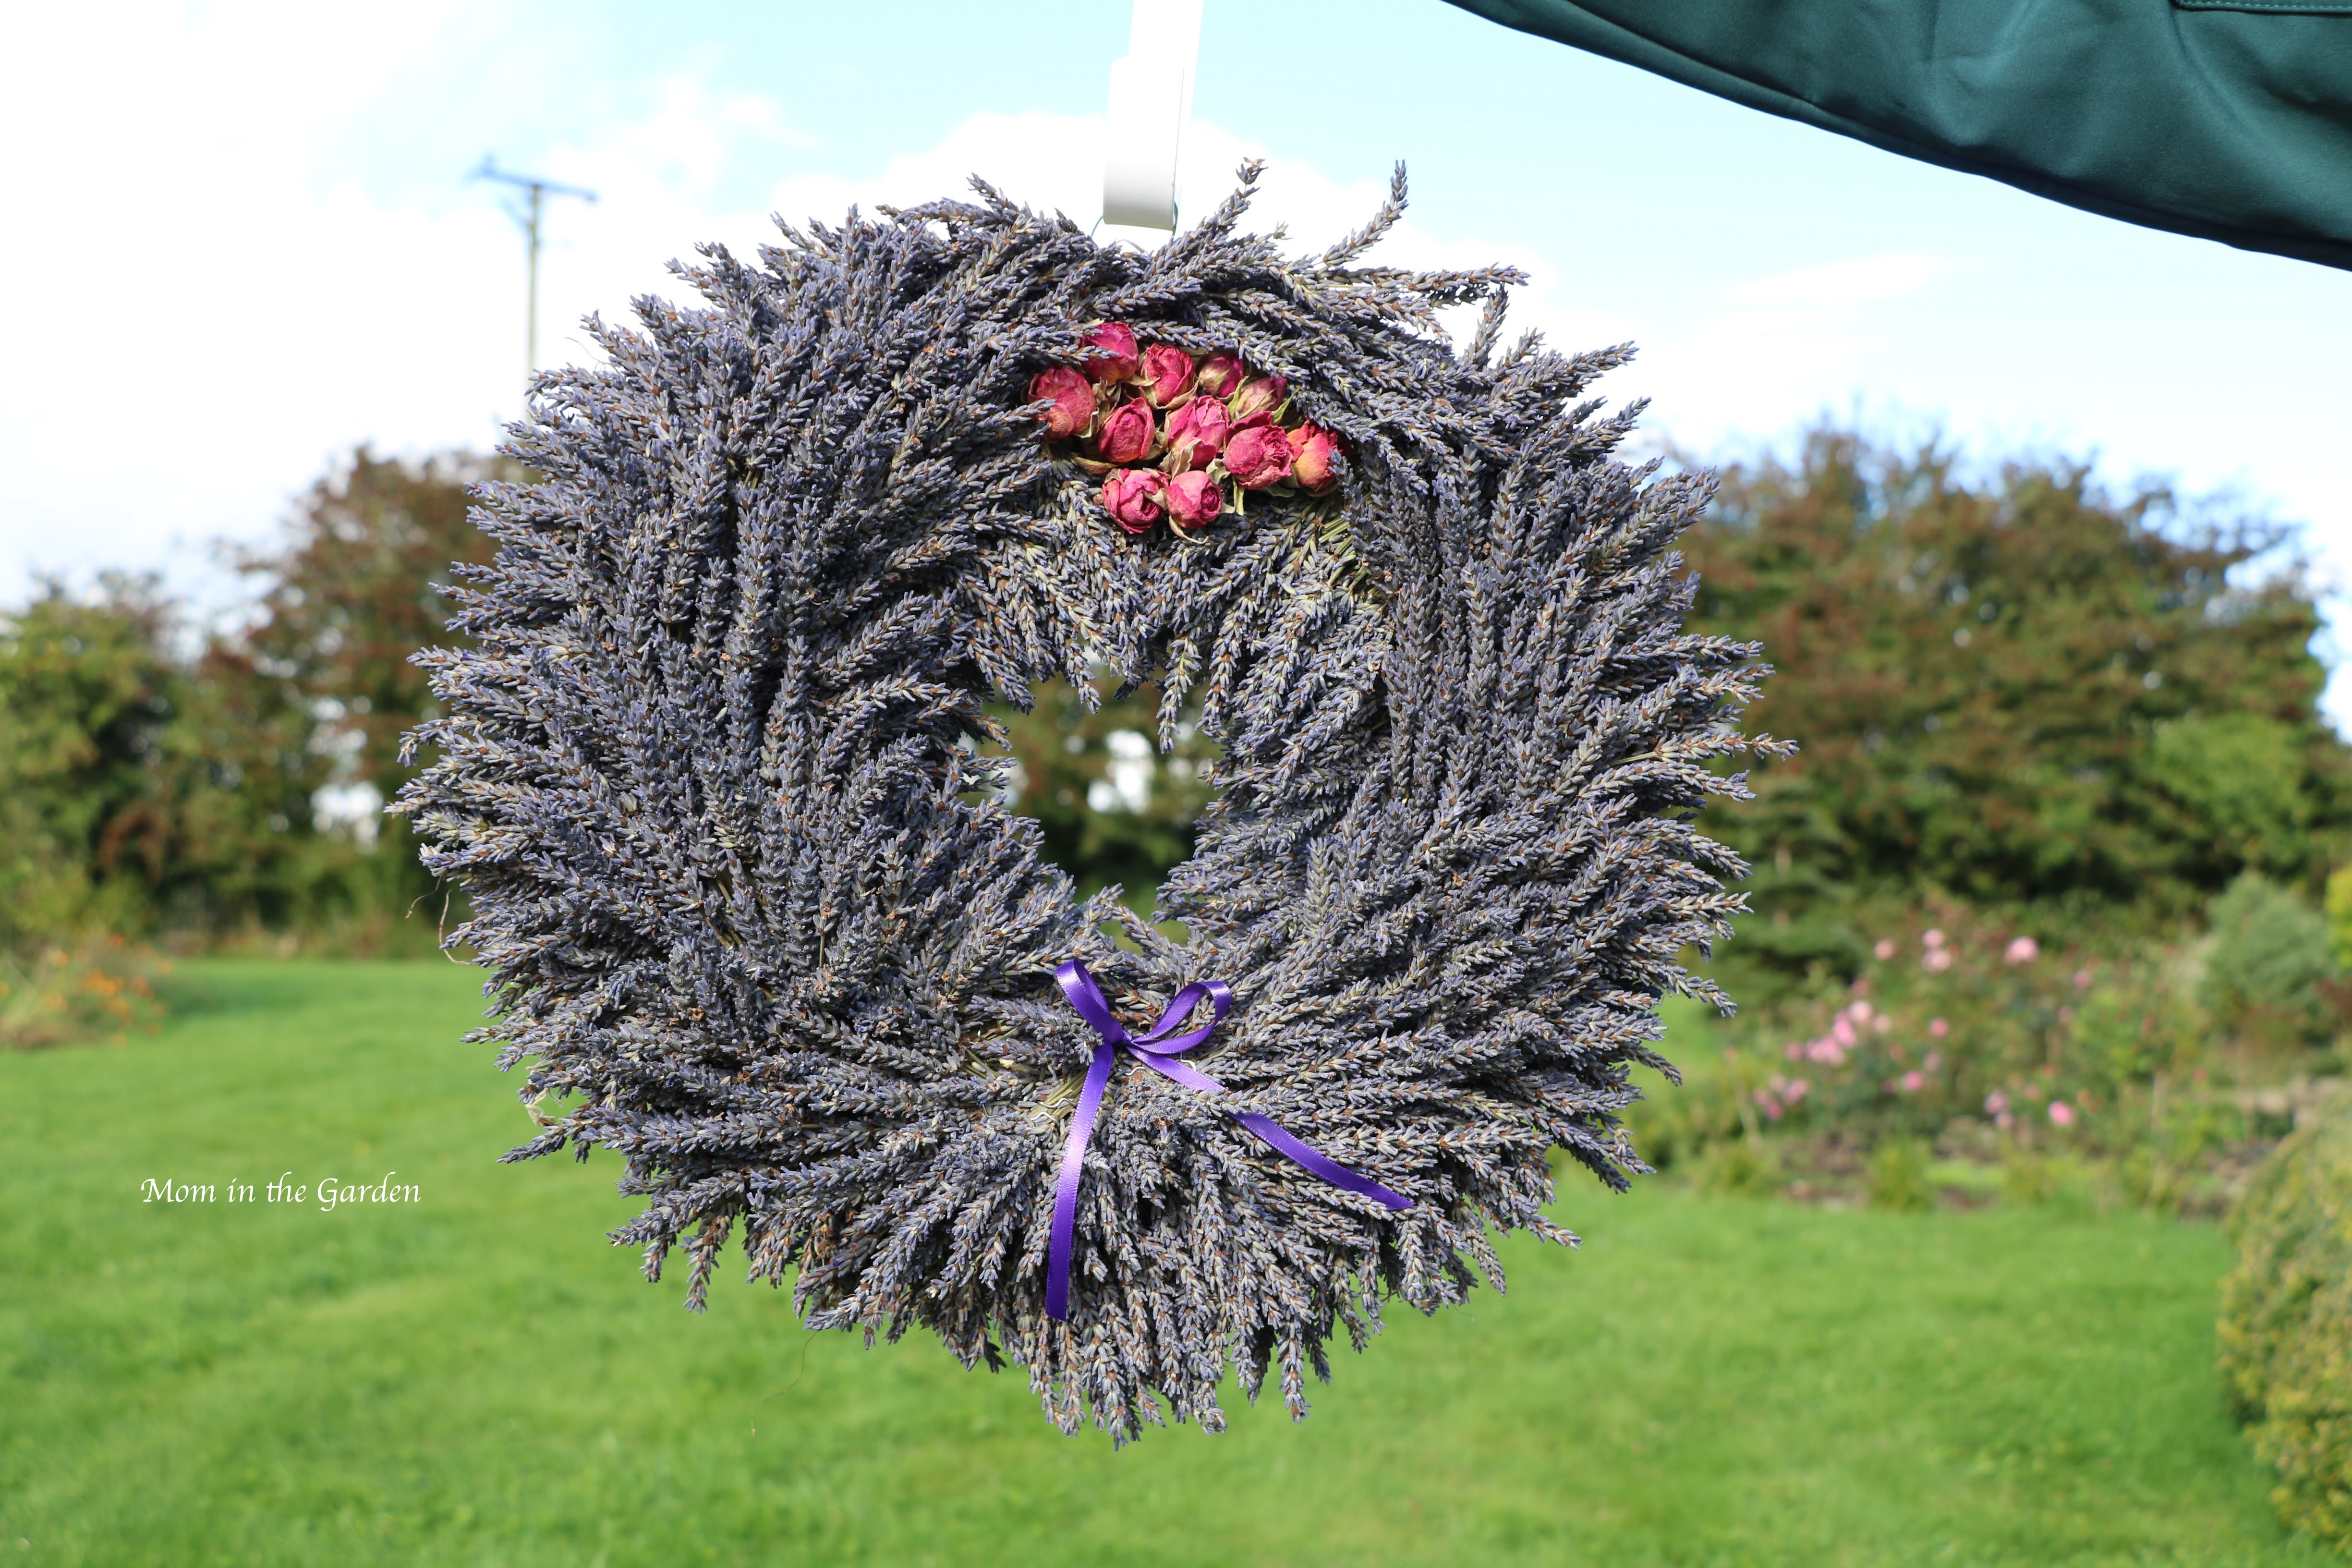
Plain and simple with LOTS of lavender.

A little bit more than “plain and simple”, but still LOTS of lavender!

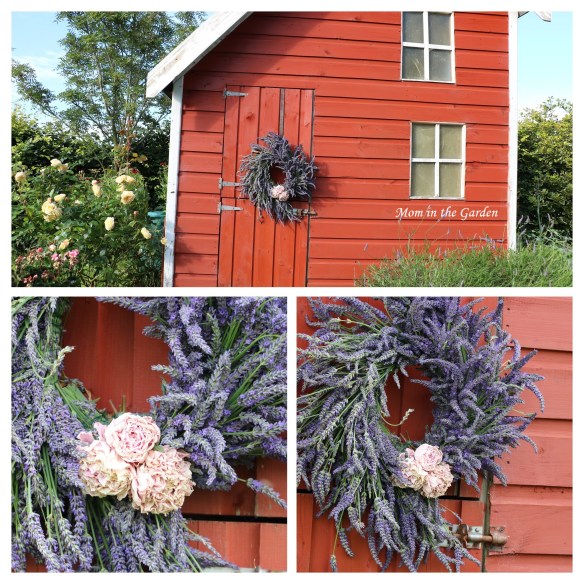
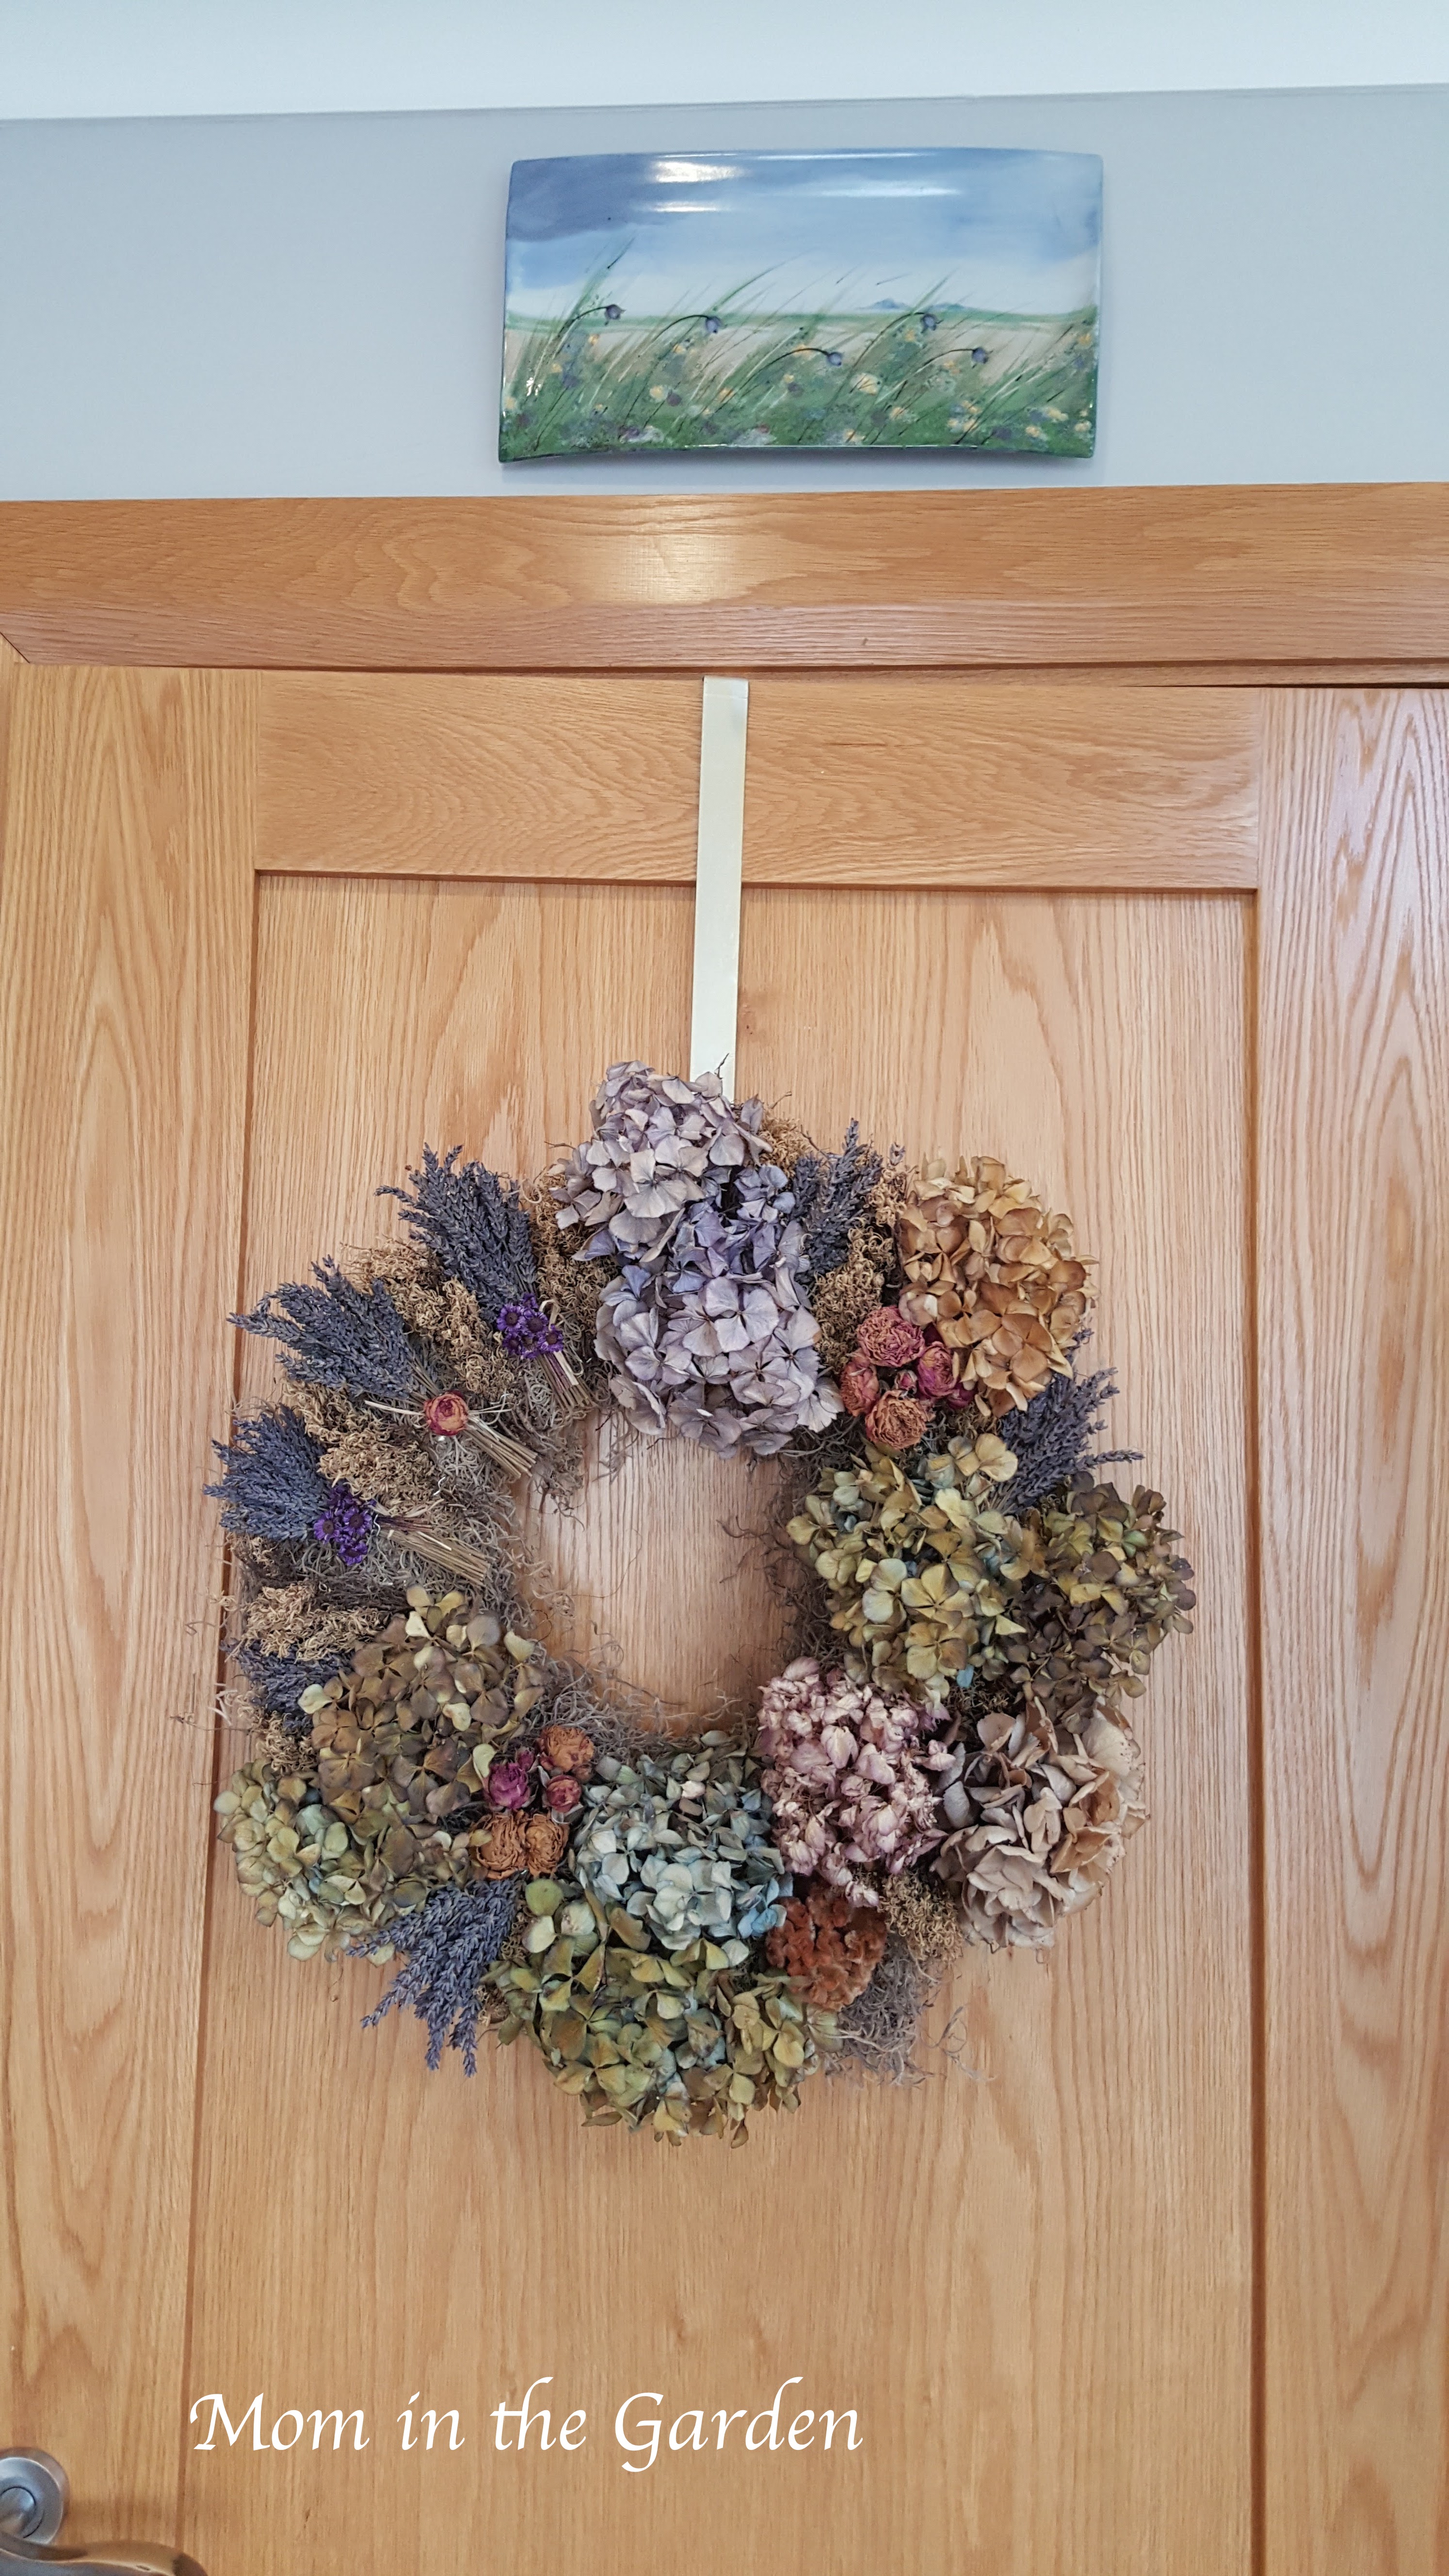
Over the top! A lavender wreath with yarrow, roses, poppy seed pods, rosemary, and one globe artichoke. Oh – and LOTS of lavender!

Whatever lavender doesn’t get used in the wreaths will be taken off of the stems and stored in containers to be made into sachets (eventually).  The lavender stays fragrant for a very long time!

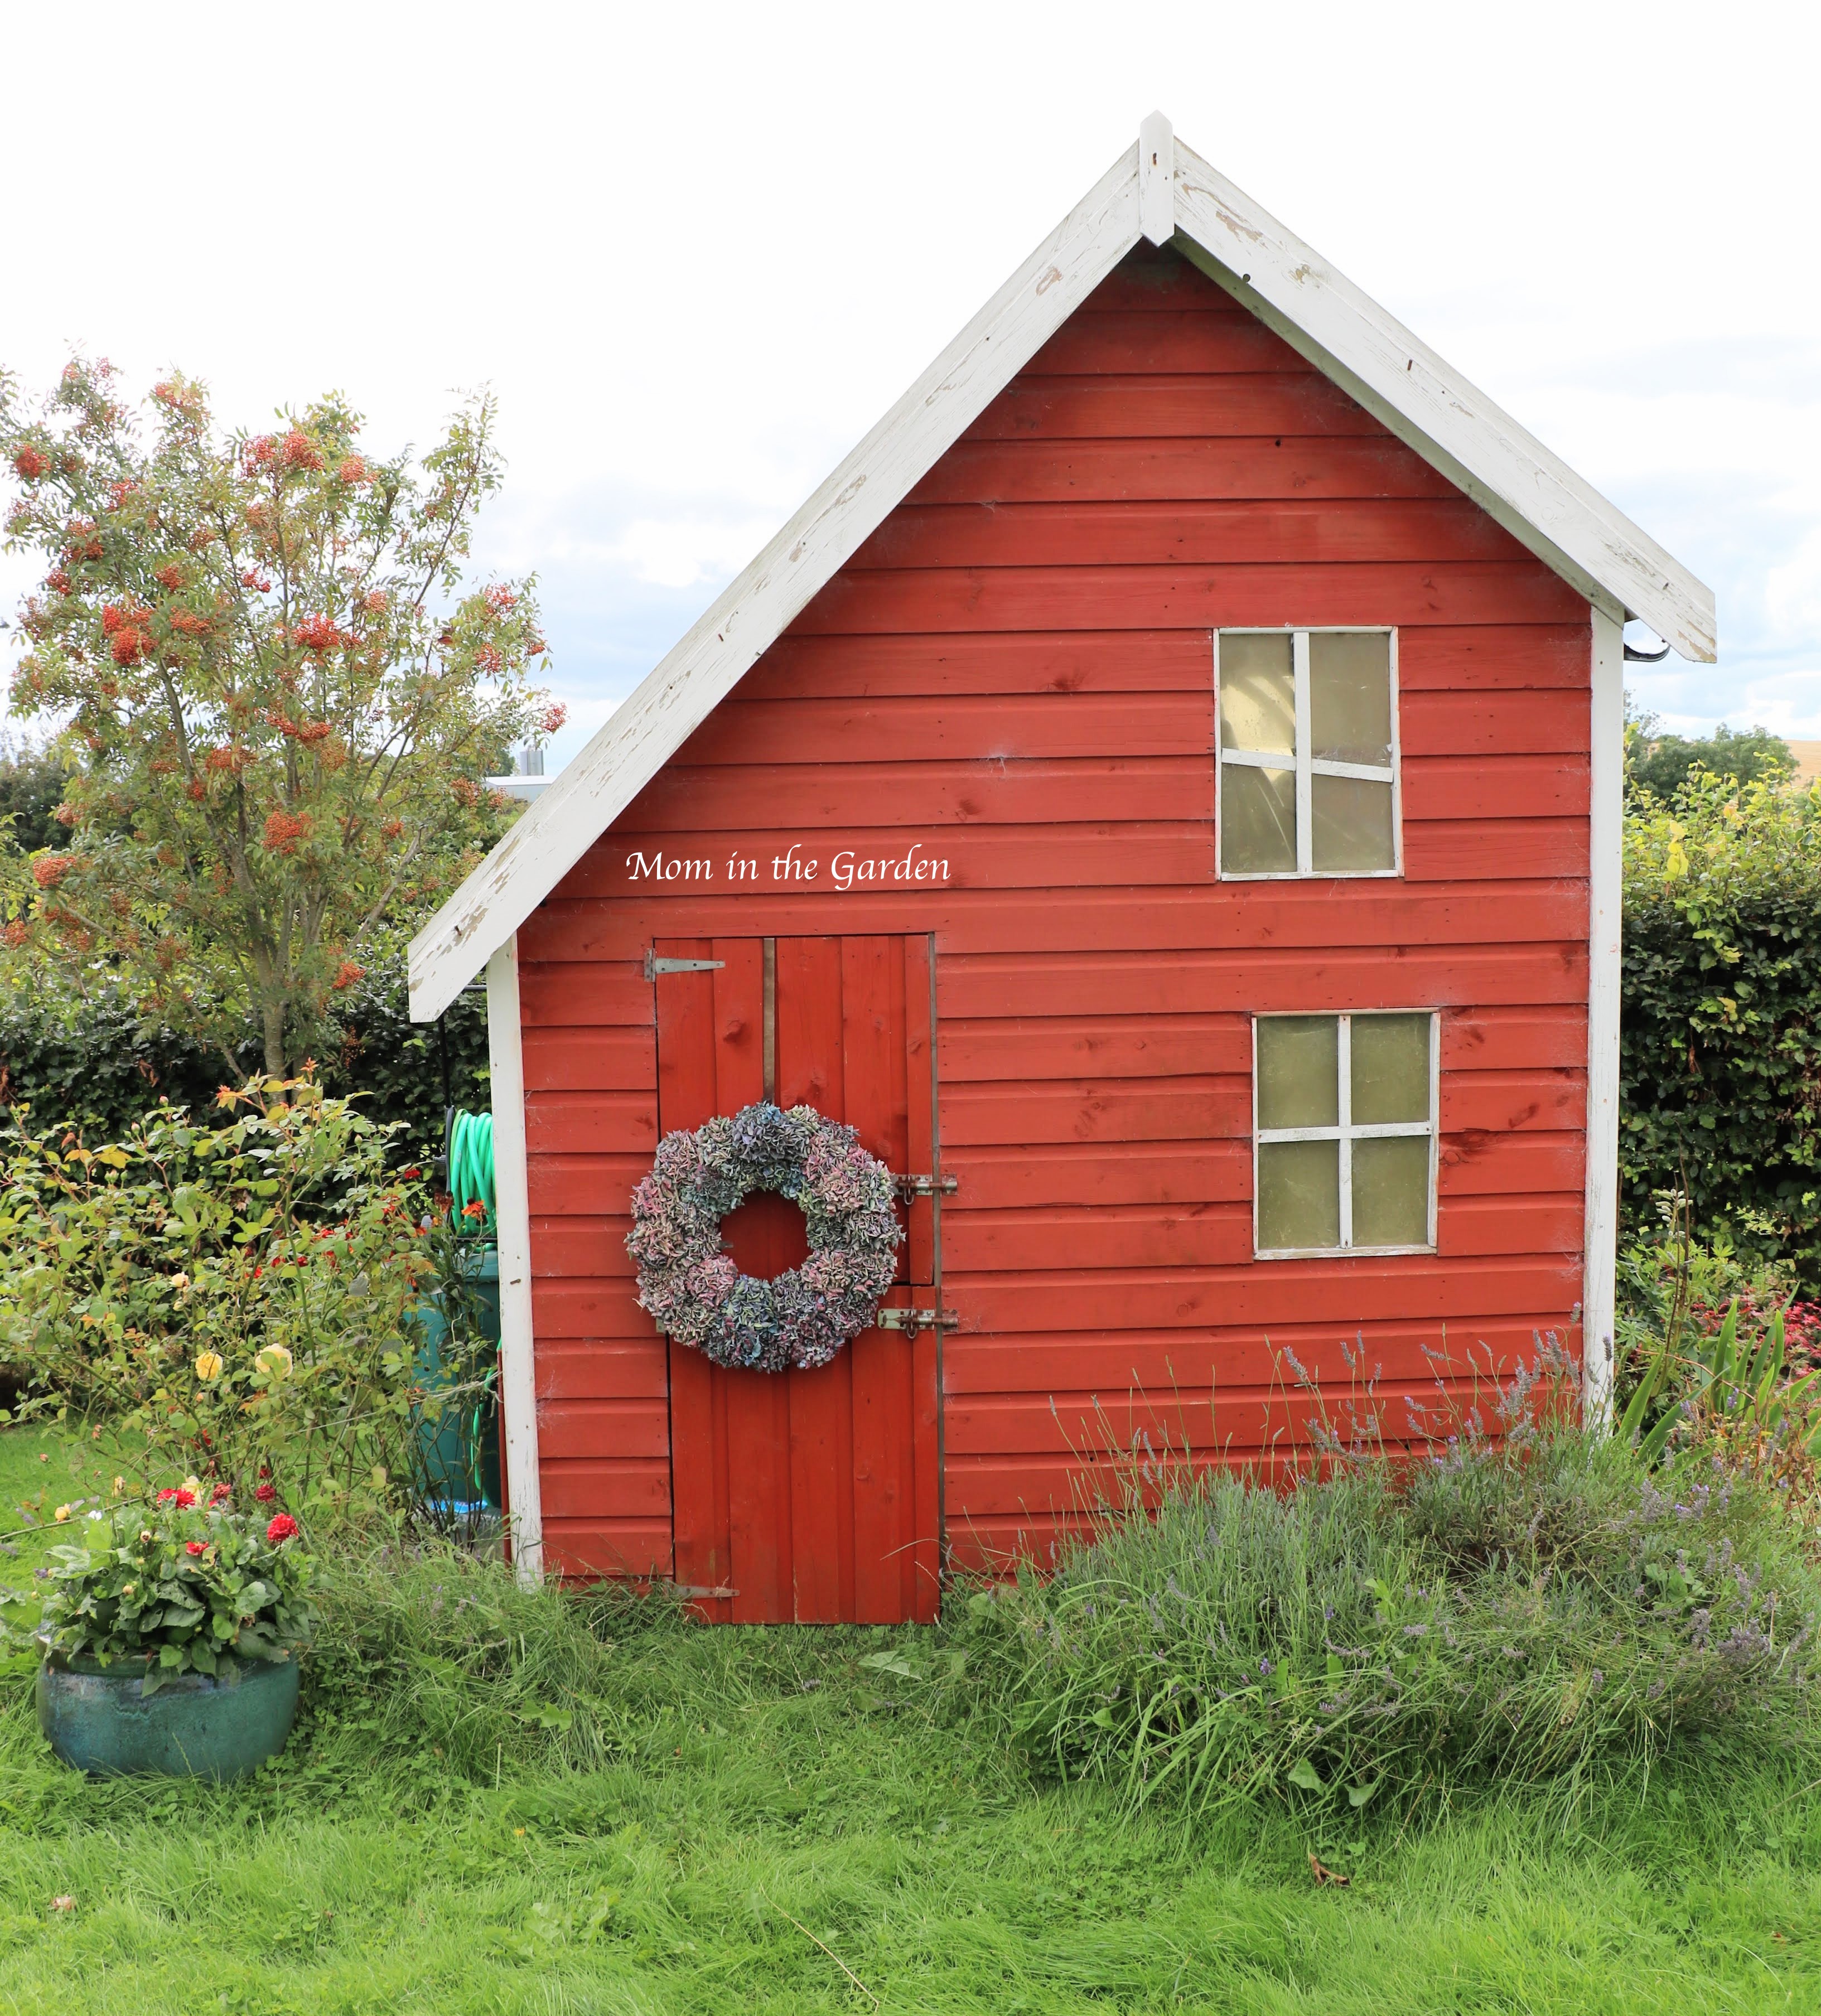
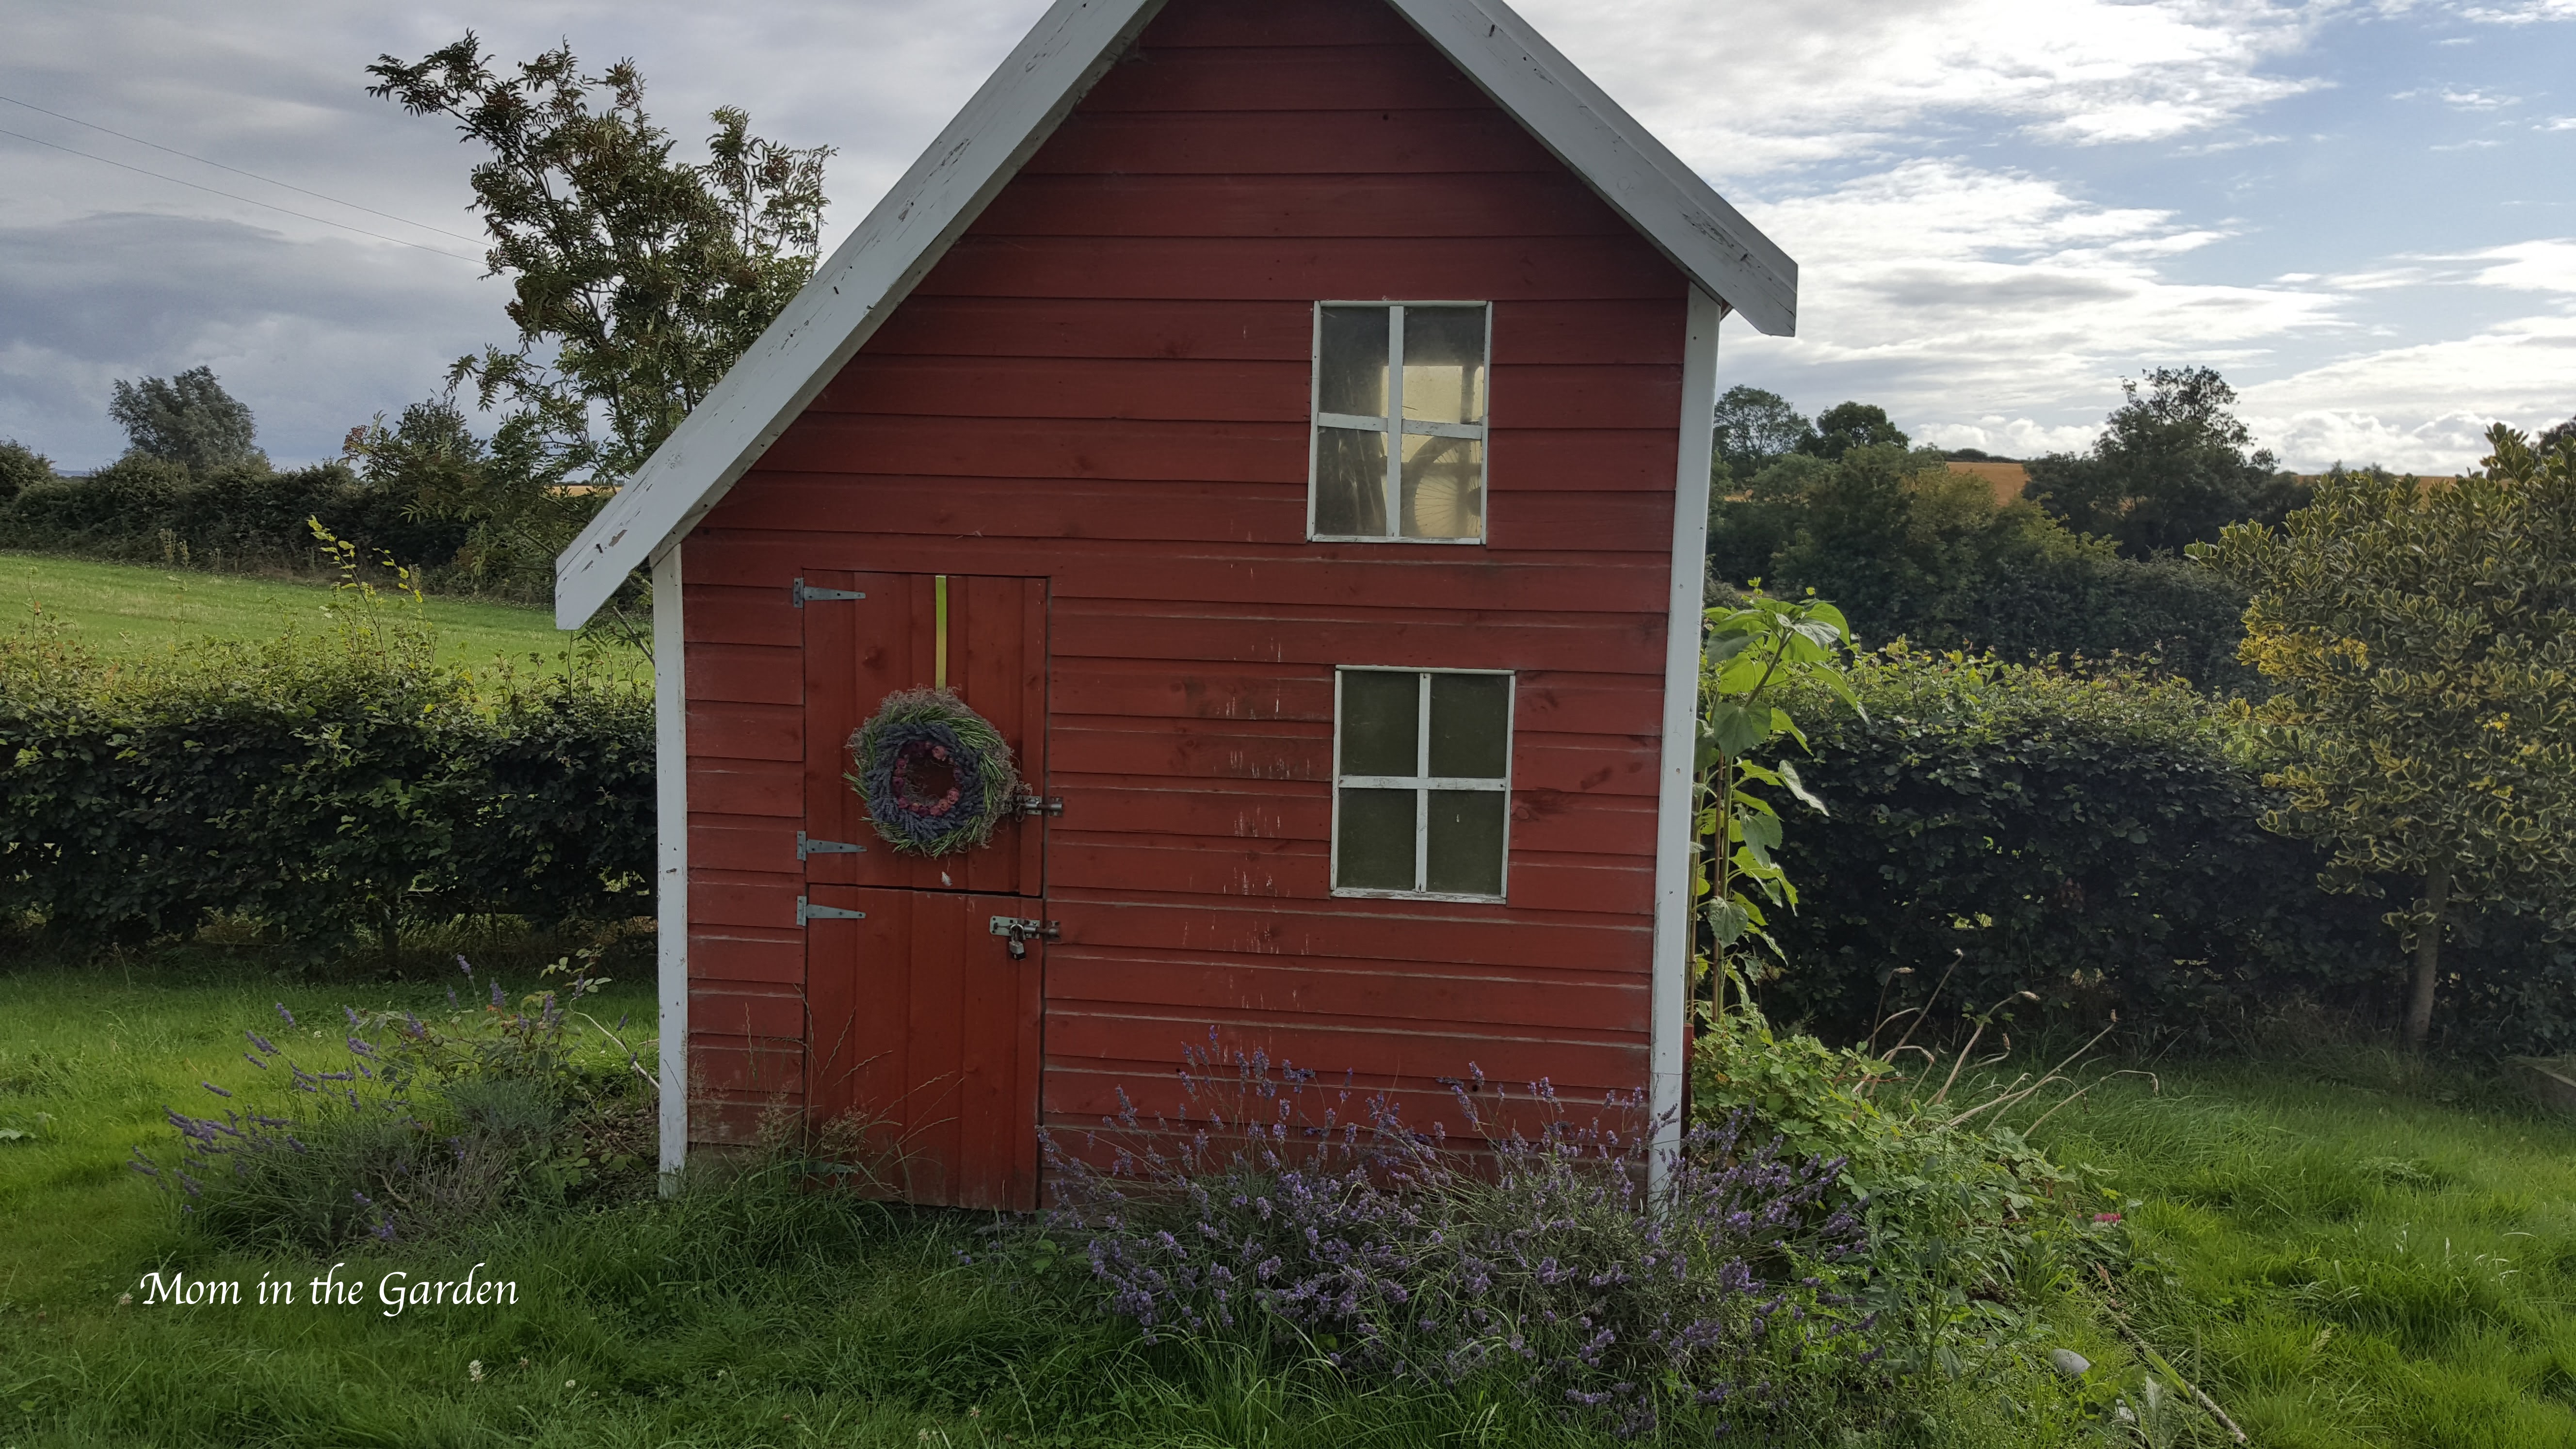
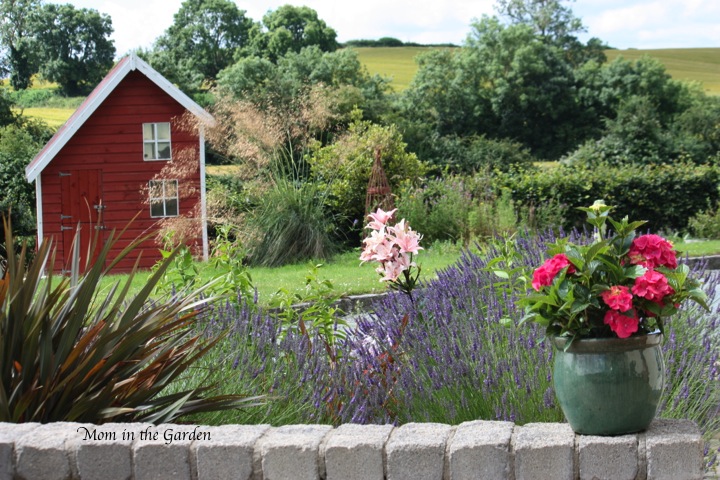
There is lavender growing around our playhouse, too!

I have not harvested all of my lavender, as that wouldn’t be fair to the bees!  No, there is still plenty for them.  I will have to trim those plants later in the season, after the bees are finished with them.

I hope you enjoyed seeing how I create my lavender wreaths!

In peace,
Dana

A Summer Wreath of Lavender, Rosemary & Roses

lavender in the garden

I love having scented plants in the garden.  Three of my favorite scented plants are lavender, rosemary, and roses.  I also like to dry roses and lavender because they really keep their scent and they are so easy to dry.

this is how we hang

I dry my roses early in the season knowing that I’ll want to use them before the end of the summer.  I’ve learned that the dark pink ones dry best, and I need to cut them before they start to open too much.  I was experimenting with the yellow roses in the picture above.  They have such a beautiful sweet scent, but they dry a rather ‘brownish’ color that isn’t pretty.

this is what we start with

Lavender is usually ready to harvest in the middle to end of July here in Ireland.  I LOVE to work with lavender!  I’ve made wands and sachets and wreaths before. You can read and see about those here,  here and here.

Step one: Spanish moss

Making a wreath is so easy.  I use a straw wreath and floral u-shaped pins to attach everything to the wreath. The Spanish moss is a great filler.

rosemary as the base

I like to have green in with the lavender to brighten it up.  We have a rosemary plant that doesn’t get used enough in cooking so it is getting rather big.  I gave it a super trim and had quite a lot to work with then.

one bunch of lavender at a time

I did not have any design in mind when I started (ahem, probably not the best way to start!).  I just went with the flow and put things where they seemed right to put. 😉

just need the roses now

The roses are the most delicate. It was helpful to have the moss to use to help pin them in place.

My hands smelled so good while making this!  I’m not sure which I like more – the rosemary or the lavender!

My gladiolas ‘the dark knights’ and some of those sweet smelling yellow roses that tend to droop!

lavender wreath on our playhouse

This is our playhouse. I’m slowly creating a tiny garden around it and I’ve started with lavender.

wreath on the playhouse door


lavender, rosemary & roses wreath

Tadah!  It was so quick and easy to make and I love the result.  It didn’t require that much lavender, either, which means I still have loads left to work with!

Summer Wreath 2016

My wreath from last summer needs some freshening up, but I still like it 🙂  Are you making anything from the garden this summer?

In peace,
Dana

A Simple Garden Wreath

Garden Wreath collage updated

everything you need!

I love wreaths.  I love using plants from the garden.  I love making things with my hands. (that’s a whole lotta love!)  What a great start to my day to be able to make this wreath!  I dried all the flowers this season and it was so easy to put it together.

My video is not a “how to” but more of a summary.  I wasn’t sure how the wreath would come out so I didn’t video me making it.  Next time I will!

Super easy to make!

Super easy to make!

We’ve had some much needed rain, but now the sun is out and it is just glorious.

Enjoy the video, and enjoy your weekend!


In peace,
Dana

Making Lavender Wands: The Video!

lavender & lilies

lavender, lilies & hydrangea

I LOVE lavender.  I love the smell of it, how it looks before it is in bloom, how it looks after it blooms,  and how even just brushing past it in the garden will cause it to emit its lovely scent.  I love everything about it!

view of the fields, too

view of the fields, too

There are a few different things you can do with lavender.  I usually dry it and then make sachets.  I have also made lavender wreaths.  You could probably find a vase or two around my house, full of lavender!

dried lavender bouquets, wands & sachets

dried lavender bouquets, wands & sachets

lavender sachets

lavender sachets

lavender wreath

lavender wreath

But I think the most interesting thing to do with it is to make wands.  They are kinda quirky.  I have a bunch of them arranged in a vase.  One daughter has a wand on her dresser.  They are also pretty on a bathroom counter.  I think they also make a nice “little gift” to give someone.

lavender wands

lavender wands

My lavender is at the perfect stage for making lavender wands; the flowers are just starting to open and the stems are not yet stiff. The stems have to be pliable to bend them over the blooms.  You can have a look at my picture instructions of how to make wands here:   https://mominthegarden.wordpress.com/2013/07/22/lavender-wands-my-first-lavender-wreath/

lavender in bloom

lavender in bloom

a mature lavender plant

a mature lavender plant

I have ventured to make an instructional video, prompted by my dear neighbor from NY, Betty.  Since I can’t show her in person how to make them, I thought I’d make a video for her (and share it with all of you!).

wands in a vase

wands in a vase

This is my first attempt at making “a” video.  The outcome was making 4 short videos! As it happens, I prefer having nice short videos when I look up how to make things myself.  Please feel free to let me know what you think!


In peace,
Dana

Mom in the Garden (2014)

Mom in the Garden (2014)