Creative Floral Fun

Hello there! You are very welcome to my blog. Today I was working with my 16 year old daughter, making face masks together. It was her first real sewing project, and she was deservedly proud of herself. I was glad we did it together, and even more glad that she had initiated it. But confession time: sewing is something I am not comfortable with. I just never fell in love with it. I’m hoping that she will learn how to sew and learn to really enjoy it, too. Now – working with flowers – THAT is something I love to do!

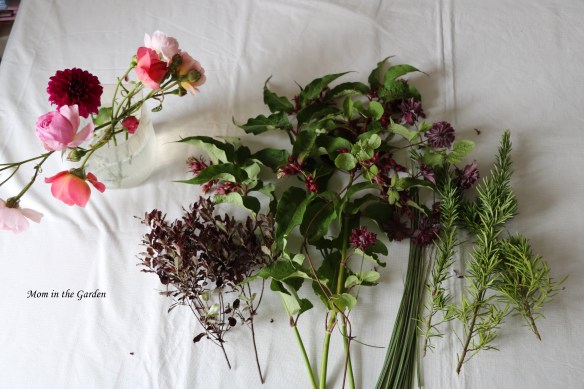
I had a bunch of chores to do around the house yesterday. As a ‘treat’ to myself for doing all of that, I decided to make another flower arrangement. 🙂 All work and no play makes for a very dull day. Just like I did for my last arrangement a few weeks ago, I walked around the garden with my secateurs and snipped whatever I fancied. The tricky part was finding something ‘lofty and light’, which honestly I couldn’t find. But let me walk you through what I did use, and why:

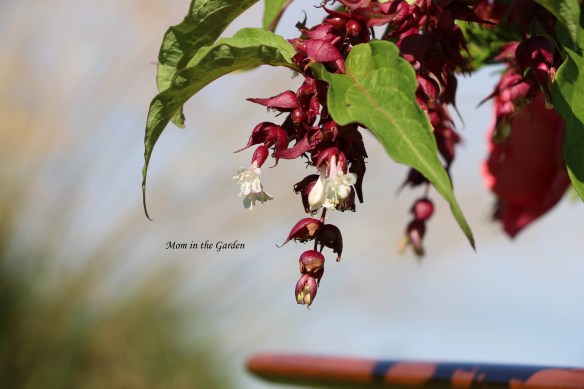
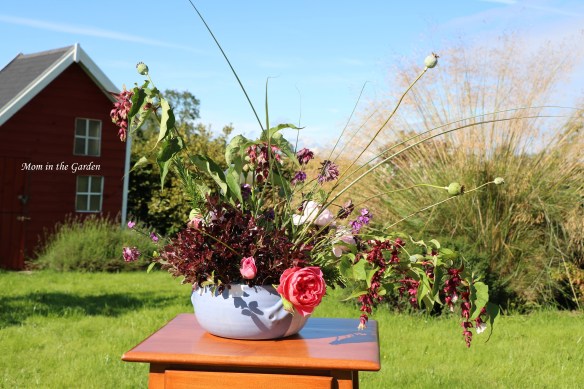
Leycesteria formosa – also known as Himalayan honeysuckle or pheasant berry. This is great for creating structure. I love how the berries hang – giving a curve to the ends of the branch. The deep burgundy color of the berries and flowers is very pretty, too.

Pittosporum Tom Thumb – this deep, dark (purple/burgundy?) colored shrub with curly edged leaves is so easy to work with. I used it as filler to help hold things in place and to hide the white tape (see below for why I used white tape).

Rosemary – I liked the different texture of this plant. These are straight spikes and given I couldn’t really maneuver them in my container (I’ll explain below) I only used a few sprigs.

Erysimum ‘Super Bowl’ Mauve – I added these light purple stems to break up the strong tones of burgundy in the arrangement. Each stem only had a couple of small flowers on the very end of them, so I added two stems for each place that I added them. They more or less stayed together.

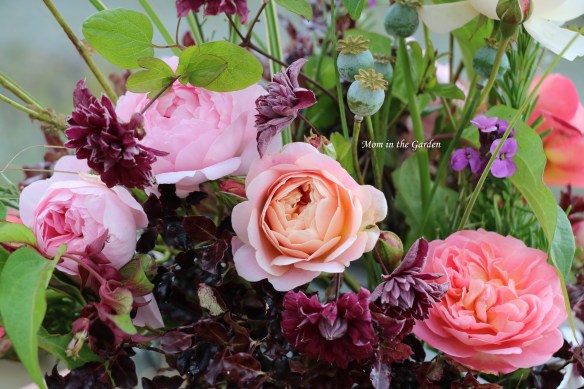
Clematis Purpurea Plena Elegans – this flower worked so well last time, I couldn’t pass it up. I was able to bring some of the flowers quite high, which is what I was hoping for. They are also a burgundy color.

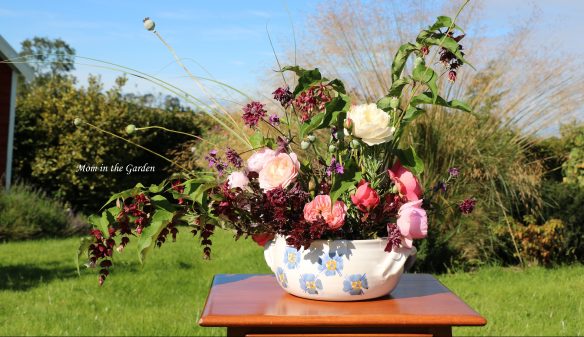
Poppy pods – you know me, I have HUNDREDS of poppies in my garden! I collected small pods (the pod is what is left after the flower finishes blooming, and which holds the seeds) with long stems. In the center of the arrangement I have a group of them which I cut to all the same height. The rest of the pods I fanned out high above everything else.

Ornamental grass. I have one stem of this grass fanned out just on one side of the arrangement – to flow with the poppy pods and the sideways leaning Leycesteria formosa.

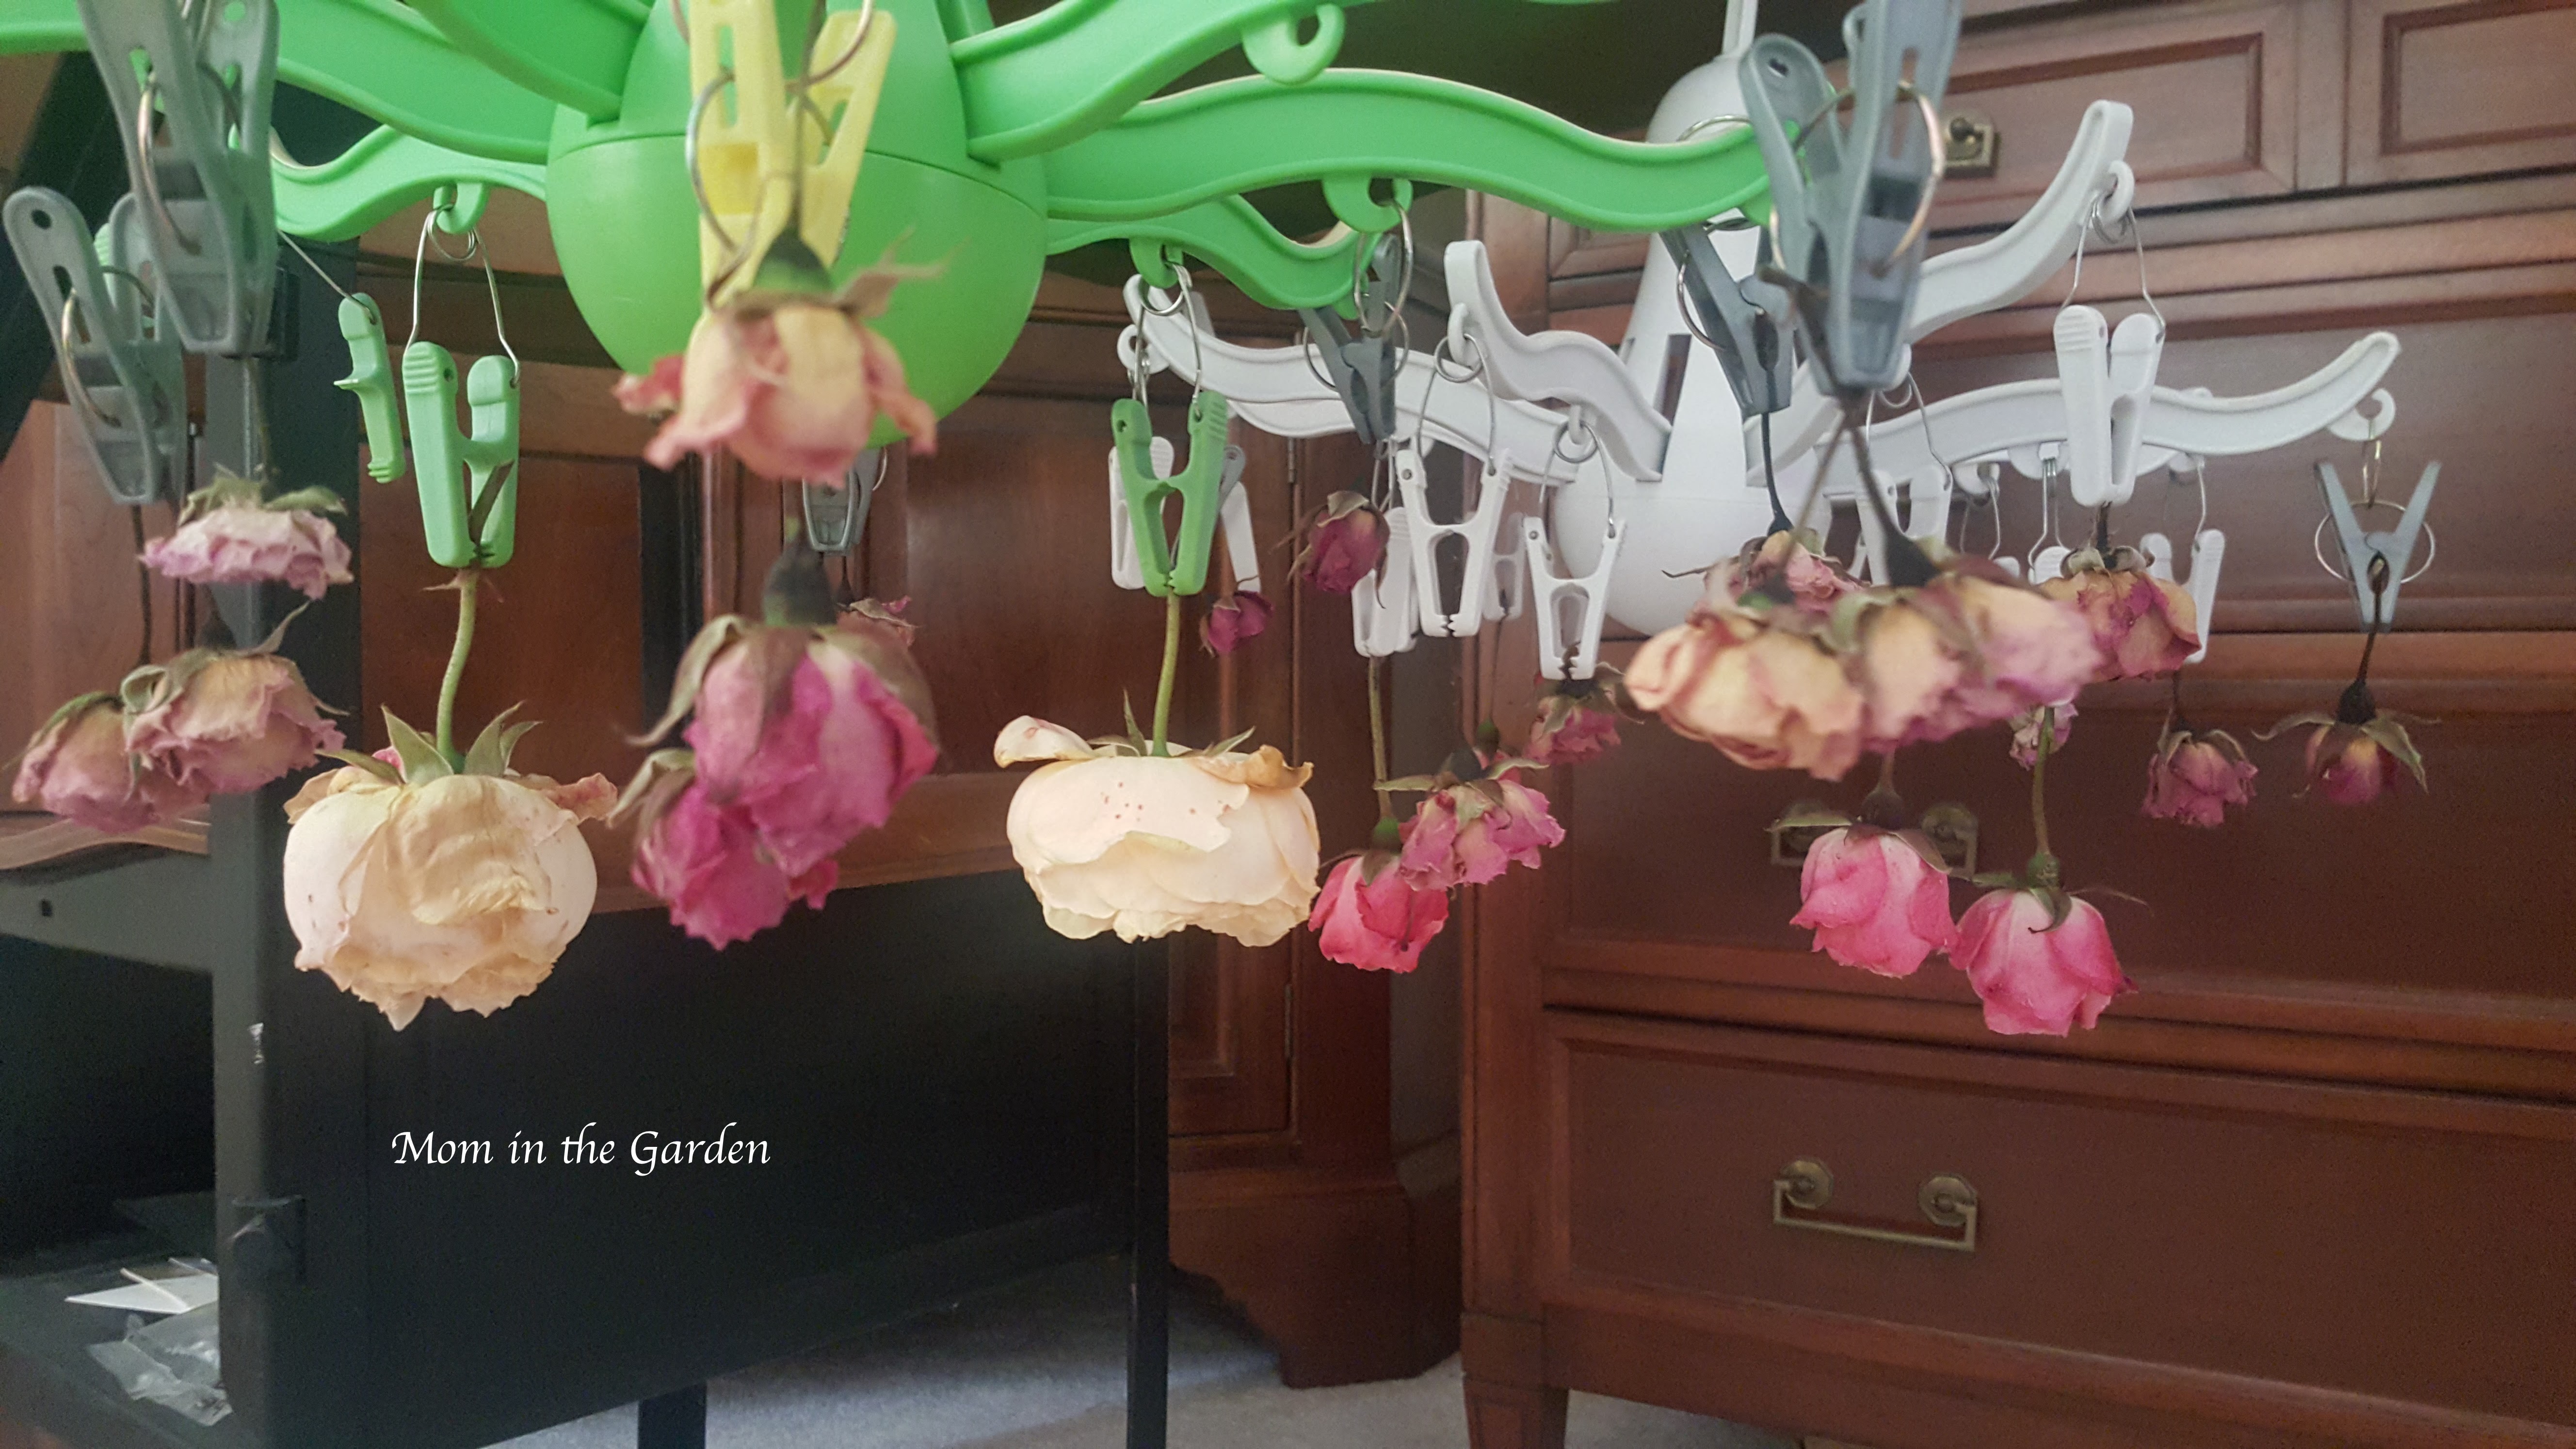
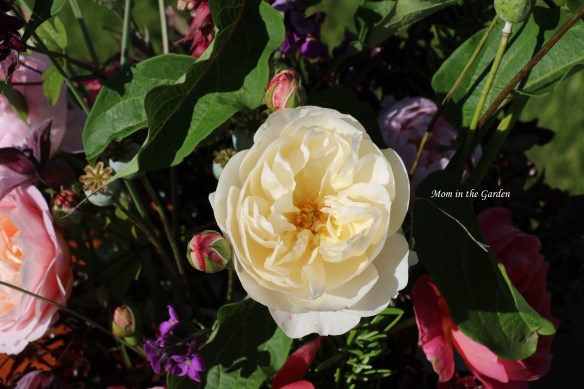
David Austin Roses – Eustacia Vye (an apricot-pink color), Lichfield Angel (cream), Boscobel (salmon), Scepter’d Isle (light pink) and possibly one more light pink variety but I can’t recall which one! There were too many beautiful roses in the garden to not put them in an arrangement.

The container I used is part of our pottery collection from when we were married 24 years ago (Suzanne May Irish pottery). I still love it! I used two frogs to hold the roses, but that wasn’t nearly enough for the rest of the plant materials. So I used white tape along the rim to create a bit of a grid to support the stems. Honestly, it worked well enough! You can see the white tape around the rim of the container in some of the pictures.

I gathered some flowers, started the arrangement, and then went out and gathered some more. I was delighted to have so many different plants to use!

For me, the moral of the story is, do what you love to do! I’m so glad to have planted materials that I can use for flower arranging – and I can’t wait to add some more!

I hope you are enjoying the last little bit of summer! Stay safe and healthy.

In Peace,
Dana

Plant materials
I started with some roses, Pittosporum Tom Thumb, Leycesteria formosa, and some short stems of ornamental grass which I later traded for one full, very long stem with several strands of grass, and some Rosemary. In this picture is also a single dahlia (a deep fuchsia color) which didn’t make the cut.
arrangement in progress
This is how we roll! The container on the table is filled with apples from a branch that broke from our tree. They are patiently waiting to be made into pie, or crumble or apple sauce! But back to the arrangement: I used 4 strips of tape to create a grid which more or less worked to support the stems.
Leycesteria formosa flower closeup
A close up view of the Leycesteria formosa flower.
Full arrangement close up sun day 2
I made the arrangement yesterday, but the weather was rather dull. So these pictures were taken today when it was lovely and sunny, because everything looks nicer with blue skies! Some of the roses are more open today, day 2.
Full arrangement day 1
See, isn’t there a very dull feeling to this picture, which was taken yesterday?
Close up Eustacia Vye day 1
The center rose, Eustacia Vye, is such a lovely mix of colors (apricot and pink). Here it is slightly open on day 1.
Center of arrangement full sun day 2
The center rose, Eustacia Vye, has really opened up on day 2!
Lichfield angel tall cream rose
The buds of the Lichfield angel rose are a peachy pink, before blooming into a lovely cream color. In this picture there is also a small green poppy pod, some Rosemary, and some Erysimum ‘super bowl’ mauve. I thought the mauve color brought some nice change to the strong burgundy theme.
Lichfield angel above
A view of Lichfield angel from above.
back of arrangement close up full sun day 2
This is a close up of the back of the arrangement, with a focus on the Boscobel rose. I knew there was going to be a front and back and I’m going to blame my inability to anchor items properly for the poor design of the back. The two roses are just lost in space here. Nevertheless, I still love the front, and will take note of changes for the back for next time!
Back of arrangement full sun day 2
Full view of the back – there is room for improvement!
Eustacia Vye center sunlight day2
Eustacia Vye, center rose on day 2, with Clematis and Pittosporum Tom Thumb.
Eustacia Vye center day 1
Eustacia Vye, the center rose on day 1.
Full view arrangement in sun
It was a fun floral project, and I think that perhaps my Poppy pods, although not light and lofty, had a similar effect.

I hope you enjoyed your visit to Mom in the Garden! I am very happy to say that my daughter was quite happy with her sewing project and made several very nice masks. I’m so happy for her! Take care! 🙂

my daughter using the sewing machine
My daughter did a great job learning how to sew and how to use the sewing machine!

A Summer Wreath of Lavender, Rosemary & Roses

lavender in the garden

I love having scented plants in the garden.  Three of my favorite scented plants are lavender, rosemary, and roses.  I also like to dry roses and lavender because they really keep their scent and they are so easy to dry.

this is how we hang

I dry my roses early in the season knowing that I’ll want to use them before the end of the summer.  I’ve learned that the dark pink ones dry best, and I need to cut them before they start to open too much.  I was experimenting with the yellow roses in the picture above.  They have such a beautiful sweet scent, but they dry a rather ‘brownish’ color that isn’t pretty.

this is what we start with

Lavender is usually ready to harvest in the middle to end of July here in Ireland.  I LOVE to work with lavender!  I’ve made wands and sachets and wreaths before. You can read and see about those here,  here and here.

Step one: Spanish moss

Making a wreath is so easy.  I use a straw wreath and floral u-shaped pins to attach everything to the wreath. The Spanish moss is a great filler.

rosemary as the base

I like to have green in with the lavender to brighten it up.  We have a rosemary plant that doesn’t get used enough in cooking so it is getting rather big.  I gave it a super trim and had quite a lot to work with then.

one bunch of lavender at a time

I did not have any design in mind when I started (ahem, probably not the best way to start!).  I just went with the flow and put things where they seemed right to put. 😉

just need the roses now

The roses are the most delicate. It was helpful to have the moss to use to help pin them in place.

My hands smelled so good while making this!  I’m not sure which I like more – the rosemary or the lavender!

My gladiolas ‘the dark knights’ and some of those sweet smelling yellow roses that tend to droop!

lavender wreath on our playhouse

This is our playhouse. I’m slowly creating a tiny garden around it and I’ve started with lavender.

wreath on the playhouse door


lavender, rosemary & roses wreath

Tadah!  It was so quick and easy to make and I love the result.  It didn’t require that much lavender, either, which means I still have loads left to work with!

Summer Wreath 2016

My wreath from last summer needs some freshening up, but I still like it 🙂  Are you making anything from the garden this summer?

In peace,
Dana