Because we are all worth it!

I am usually a frugal gal. Well, I will admit that being frugal most of the time allows me to splash out when the occasion arrises.  I have no problem splashing out on certain things.  It all just depends on the situation.  Last year, I came across this vintage purse and it stopped me in my tracks. I thought, “this is beautiful!”.  As my older daughter’s favorite color is purple, I thought it would be something nice for her to have for really special occasions (her Debs this year, maybe? or a wedding?…). This would be one of those cases where I thought  “it is worth it”!  So under the Christmas tree it went.

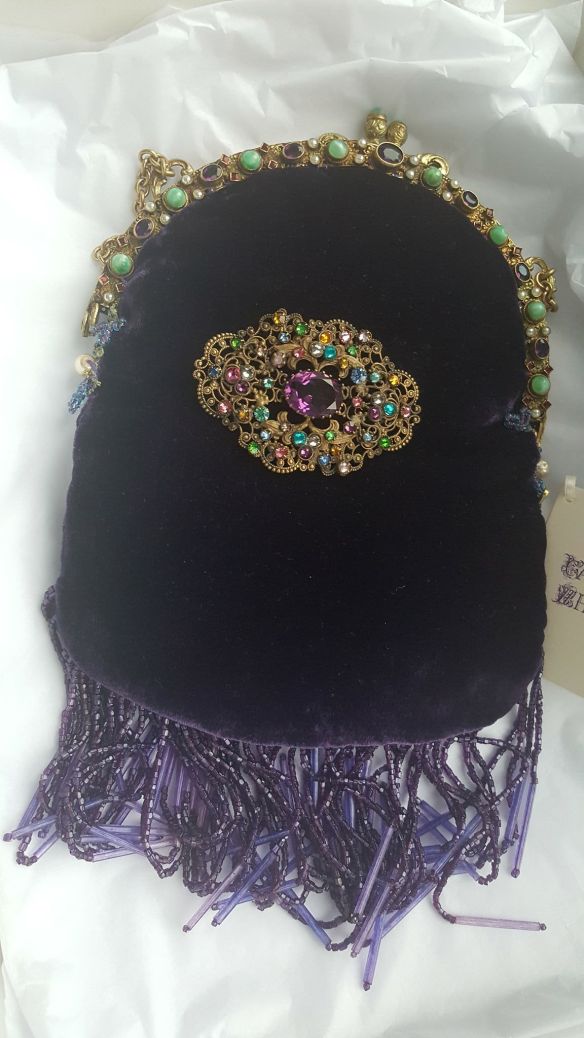
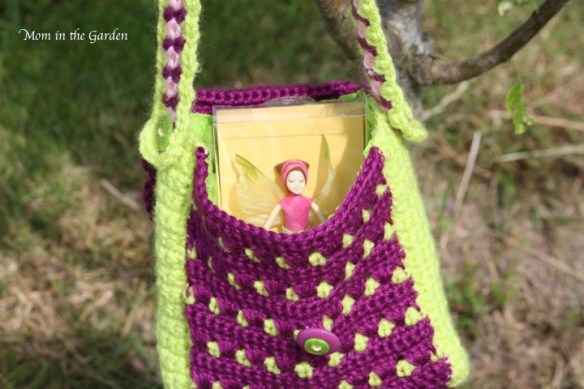
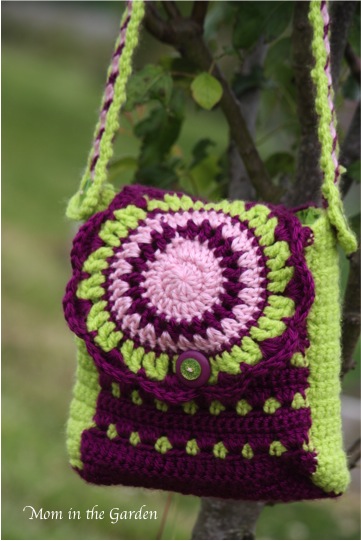
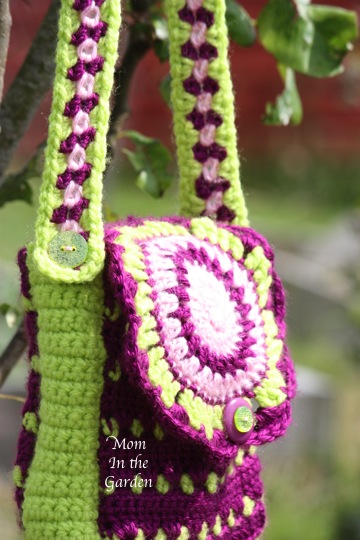
a bag created by Cathy White using a vintage handle

It is a vintage bag created by Cathy White. I had the pleasure of meeting Cathy and speaking with her about how she makes the bags. The detail and care that goes into her work is simply amazing.  You can go and see more of Cathy White’s bags here.  While waiting for that special occasion, my daughter has the purse hanging on her bedroom wall with all of her “special memory” items.  It is gorgeous even hanging on a wall!
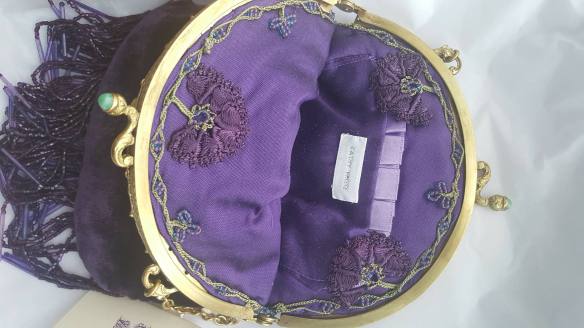
amazingly detailed

Fast forward to this year, and my other daughter’s Irish dancing school is planning to host a “World’s Ball” to celebrate the amazing accomplishments of their school at the World Championships of Irish dancing (most notably a new World Champion in the boys U16 category!). It is going to be a Black-tie affair.  Time to pull out all of the stops!

In my possession, for the past number of years, is a dress my mother gave to me which she wore when she was much younger.  I have been waiting patiently for the right occasion to wear this beautiful, green velvet, full length dress.  My mother is a bit taller than me, so I had to wear high heels, but otherwise it was a perfect fit!  It looked amazing!

My daughter and I at the ball

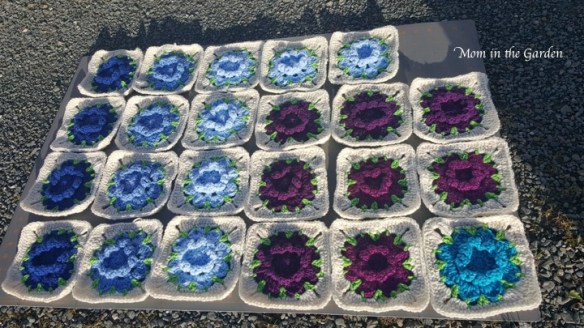
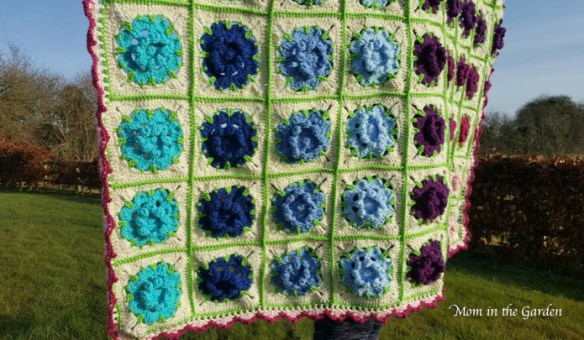
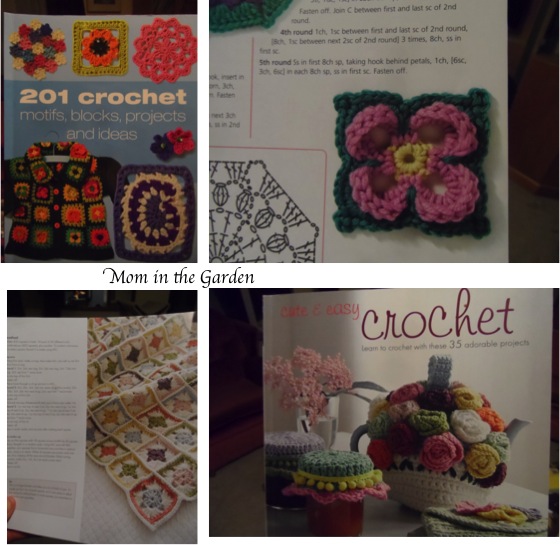
O.K., so I had the dress, shoes, and bag, but I still needed a shawl.  It was time to get cracking, as of course, I had too many projects going on at the same time.  I haven’t made anything like this before, and I couldn’t find any patterns on-line that were what I wanted. So it was a matter of trial and error.  Lots of error.  🙂

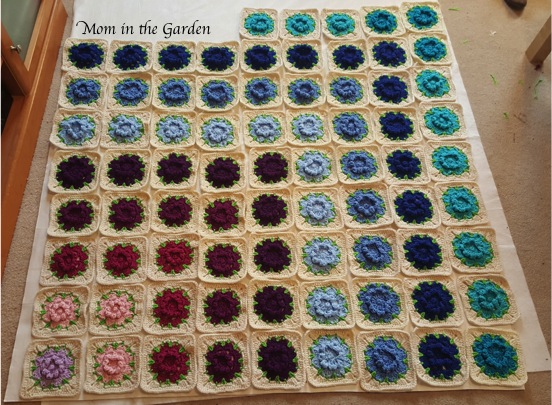
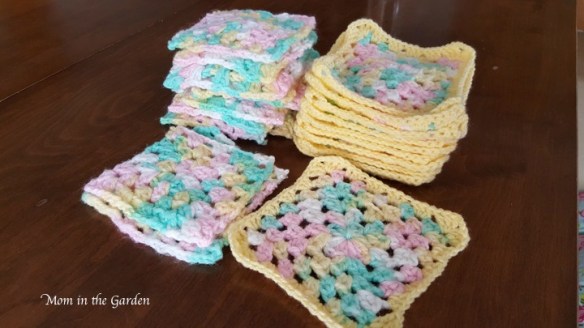
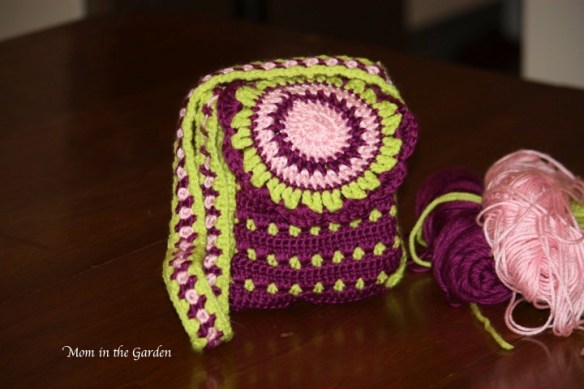
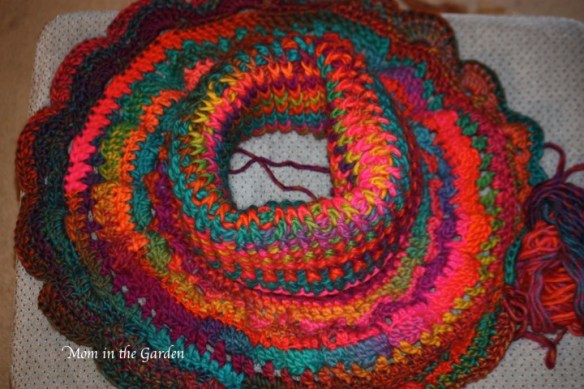
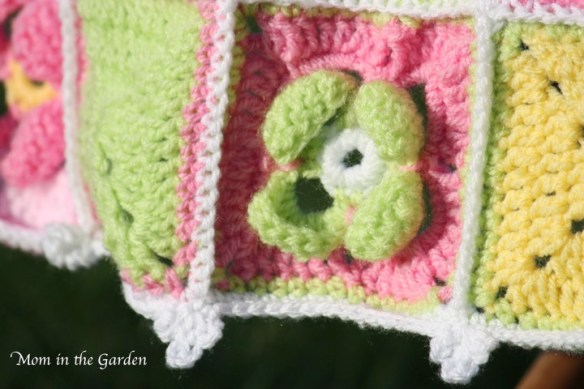
piece by piece it comes together

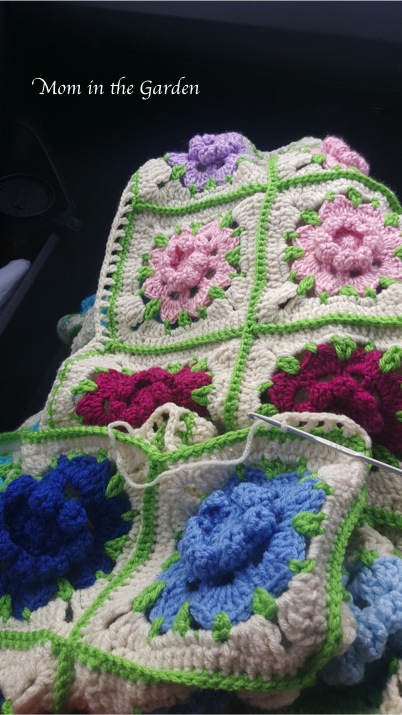
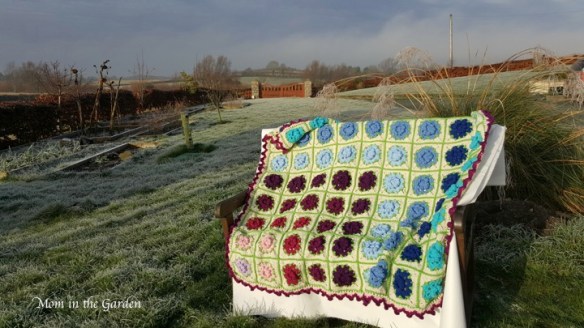
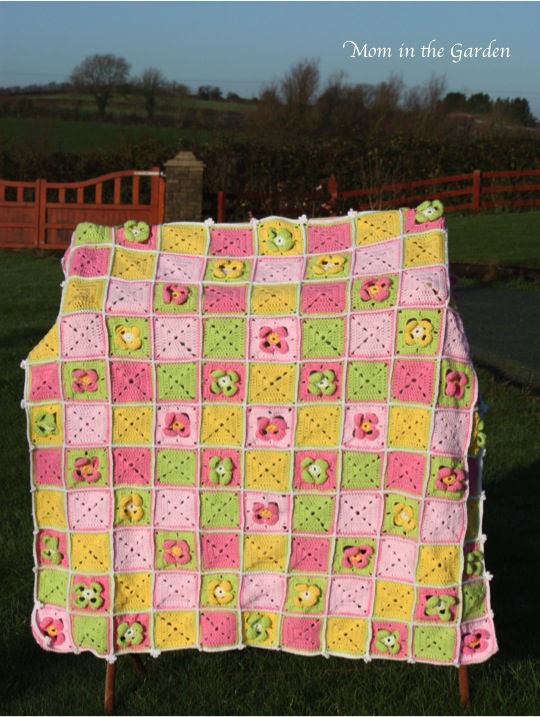
Crocheting the squares was the easy part.  Crocheting the squares *together* was the tough part.  I call this shawl bespoke because it is a one of a kind (mainly because I’m sure I can’t duplicate it)!

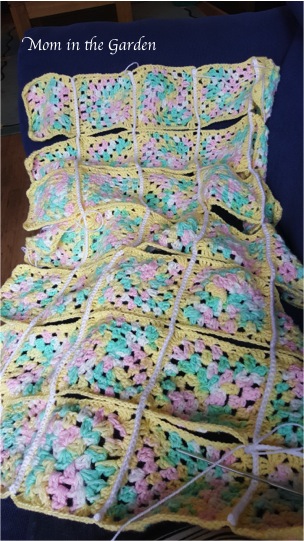
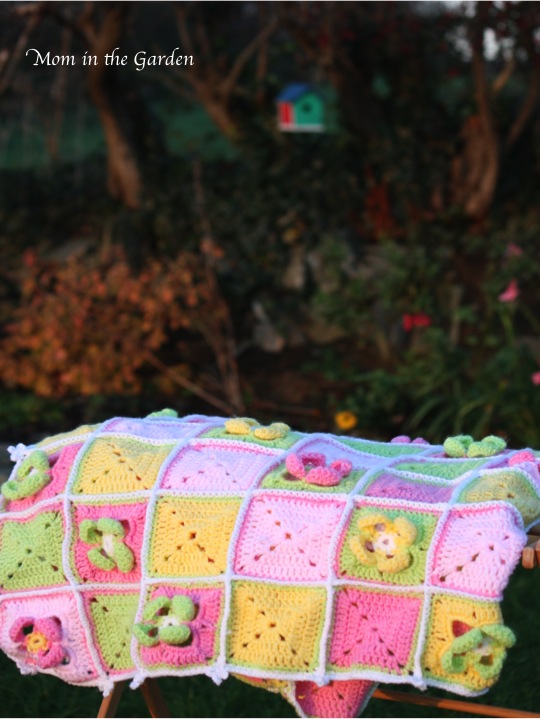
crocheting the squares together was rather tricky

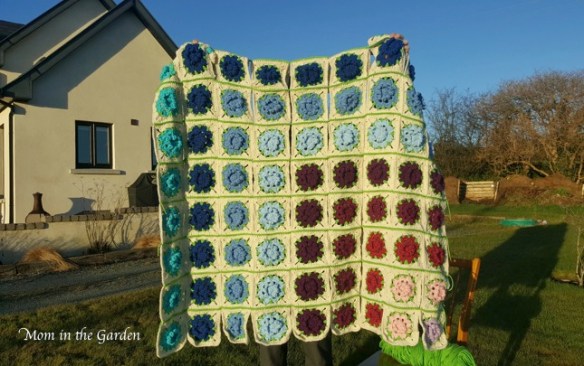
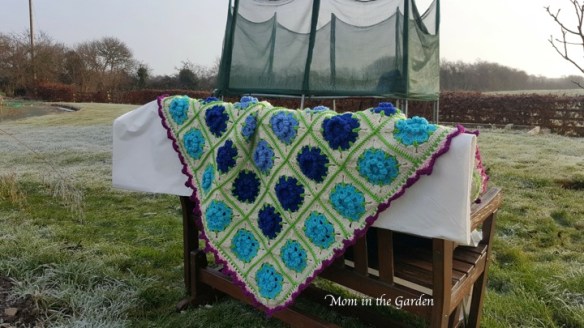
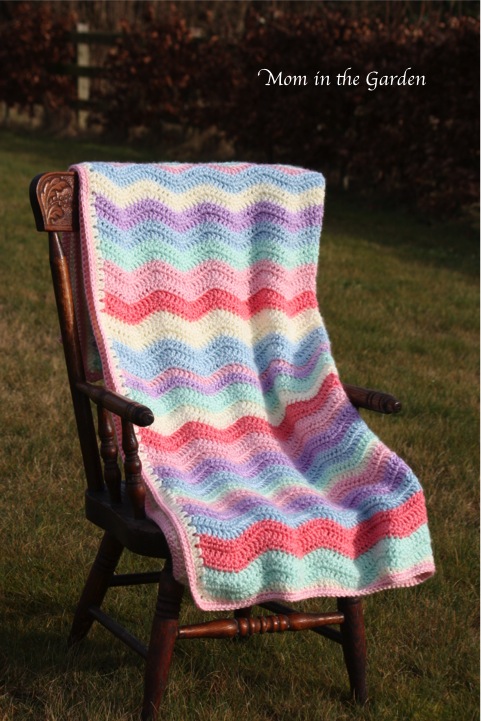
The next process was “blocking” the squares, or in my case, the entire shawl.  This involves wetting it down and pinning it in place to dry.  It helps to keep the shape.  This really does work, especially with this project as it was quite floppy otherwise!

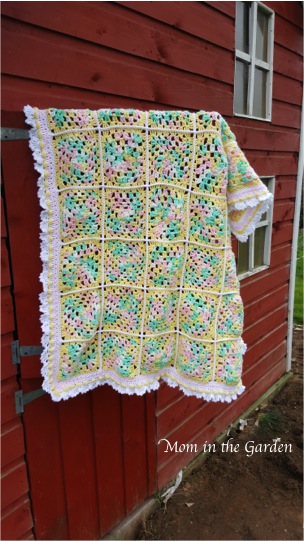
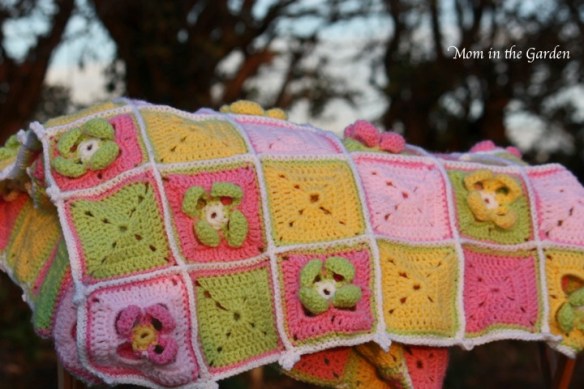
sequins for a bit of sparkle (this pic was taken during “blocking”)

I also added sequins to all of the blue flowers, because sleep wasn’t really necessary at this point.  My family thought I was mad.  But when I was finished, they “got it” and agreed that the sequins added a very fun, sparkly touch!

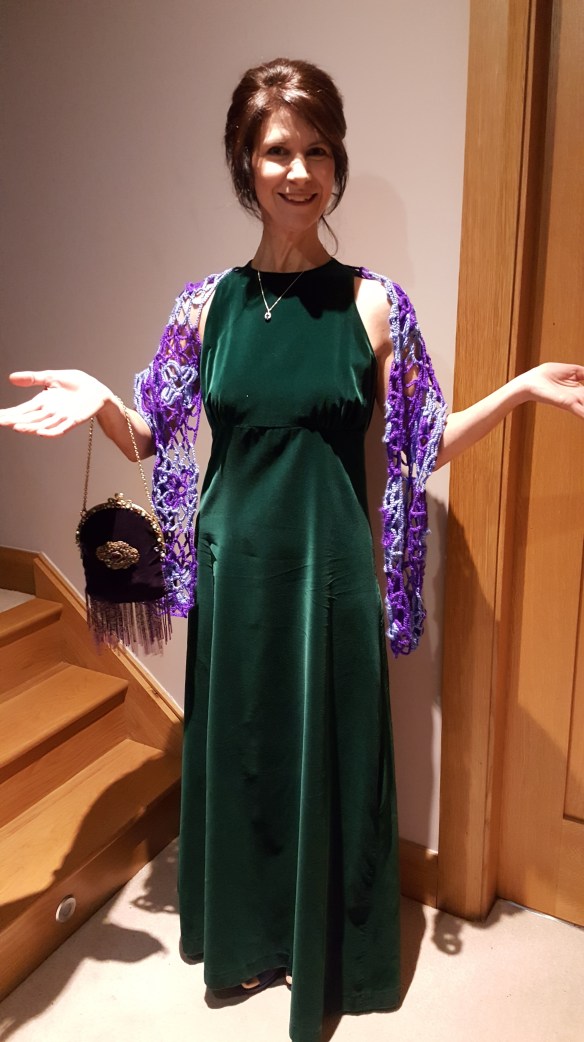
A vintage purse to match a vintage dress,  on a vintage gal!

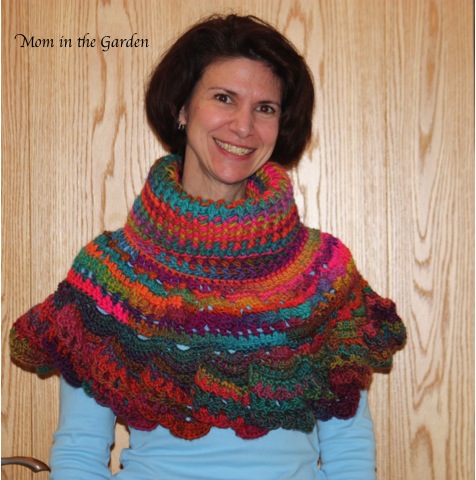
Ta-da! Finished! Everything was so worth the effort.  The dress was beautiful (and can I say that it was really comfortable, too?!). The hairdressers completely transformed me. It is still a mystery to me how they do that.  My daughter, the shawl, the bag, everything was just lovely.  We had such a wonderful time at her ball. It was a very special night for us.

worth the effort

The simple message here is that we are all worth it. Splurge on that something special, don’t wait to use those special soaps, creams, candles; use them now! Buy the pretty purse, or dress, or the fancy yarn!

Live life. Be present. Be kind.

Because we are all worth it.

Wishing you a happy, healthy and prosperous new year!

In peace,
Dana

A Crochet Flower Blanket for Someone Special

first we start with some flowers...

first we start with some flowers…

Happy New Year!  Well, almost Happy New Year.  My forte has never been to have perfectly timed posts, something that perhaps I should work on.  Thankfully, this isn’t earth shattering stuff, and a light hearted post about a crocheted blanket can really be a “perfect” read any time at all.

The caption under the first photo above (“first we start with some flowers…”) is in fact, incorrect.  The first photo and caption should be of Pinterest.com.  THAT is where it all begins.  Lots of time scrolling through endless photos, searching for that one look that not only captures my attention, but seems reasonable enough for me to attempt to make it.

Not surprising to myself, my finished product looks nothing like the blanket for which it is based on (pin above).  I have a knack for that…  I also had to make small adjustments due to the fact that my yarn was heavier than what she used.  But I must give credit to the very talented woman who made this pattern, and who’s blanket is simply beautiful. Here is the link to where I found it:

http://atime4allseasons.blogspot.ie/2015/04/rebekahs-flower-afghan.html?spref=pi

I like to learn something new with all of my projects.  With this one I learned a few things.  First I learned about not mixing different brands of yarn.  Yeah, I know, I’m sure everyone knows that already. But due to lack of ‘stash’,  and the colors I wanted to use, some of my flowers are made of Caron Simply Soft yarn, while the majority of the blanket is made of Redheart Supersaver yarn.  I think to the untrained eye, this isn’t a problem. But to anyone who works with yarn it is blaringly obvious.   I also learned that it is most ideal to have all of your yarn purchased before you begin a project AND that you actually know what the project is going to look like when finished (again, before you begin).

starting at my desk

starting out small at my desk

I’ve discovered that my creativity is unpredictable and rather unreliable.  I couldn’t visualize the blanket at the start, so I just had to go with it and see where it brought me (not a great strategy for planning ahead!).

still early days

still early days

This project evolved from a small throw to a rather large throw.  The colors also changed as I went along. It really was crazy, because I didn’t know what pattern of colors I was aiming for: rows of colors, random colors, diagonal colors.  I’m not sure how to describe the pattern I chose in the end: an arrow?  It fit the bill as something different…

two new colors were added two months into the project!

two new colors were added two months into the project!

I started the blanket in October.  I have a day-job, so I worked on the blanket every spare moment.  My family really helped out too, pinch-hitting for me by doing all of my typical house-jobs.  It took three months, and everyone was happy when I finished it!

taking over the family room on a white table cover

taking over the family room on a white table cover

working on the border while in the car

working on the border while in the car

I love flowers.  All of the different colors of flowers in the blanket reminded me of our visit to Monet’s garden.  The green within the squares are like leaves (in my head!), and I decided to join them with green to brighten it up, versus joining with cream which would have been a more conservative option.  {Thanks goes to my daughter for helping with that decision.}

still a work-in-progress here, but with the sunny day I wanted to capture how it was coming along

only joined together horizontally

It was absolutely a labor of love.  I so enjoyed making it and it was being made for a very special someone.  She is someone who is always doing for others, and yet is somehow in the background and never seeking attention.  It really is the little things that people do which make them so appreciated and loved.

almost there... border not quite finished

almost there … and a view of my laundry drying outside and on the other side of the blanket is my very messy compost heap 🙂

a close-up

a close-up before the border is completely finished (graciously being held up by my daughter)

the pinks

the pinks

I enjoyed making the border, too.  The entire blanket is lined in green.  I think if I were to be critical, I would say that I should have made a more substantial cream border before moving on to the pinks.  Time was not on my side at this stage (it was a Christmas gift), and my hands were in a permanent cramped state, so I really couldn’t undo it once I’d moved on.

the final border

the final border, which apart from the lack of cream color, turned out quite nice

I went back to a blanket I made a couple of years ago for the final round with the trefoil motif:

while I copied this lovely pin for the first three rows of the border:

See, you can get lots of great ideas from Pinterest!

our final ta-dah! with the frosty garden as a back-drop

our final ‘ta-dah!’ with the frosty garden as a back-drop

The blanket is an awkward size, making it difficult to photograph the entire thing. Natural lighting is always best to capture the colors, so on the first sunny day I ran outside and took as many pictures as possible.  I know the white beneath the blanket (a table cover) looks unattractive, but everything was wet & frosty not to mention not the cleanest so there wasn’t much I could do.

a frosty sunny day

a frosty sunny day

close-up

close-up

the blues!

the blues!

all scrunched up

all scrunched up

I’m happy to say that the recipient likes it (phew!).

folds up neat and tidy

folds up neat and tidy (isn’t big and bulky)

Kitty sitting on our hutch

Kitty sitting on our hutch

And that is a wrap.  2016 is nearly finished.  I hope that your 2017 will be everything that you want it to be and so much more.

Thanks for stopping by, for reading, and for your lovely comments.

In peace,
Dana

Adding Color for a Cabinet Remake

cabinet "before"

cabinet “before”

This blog post is not a “how-to” for painting furniture.  There are plenty of sites offering lots of advice on that topic.  No, this post is a little “nudge” to anyone who has been thinking about painting a piece of furniture but has been hesitant for whatever reason.

I wanted to paint the cabinet in the above picture for a few YEARS.  It is a number of years old, was passed among a couple of family members and had two heat marks from tea cups by the time we got it.  The color is very dark, too.  But I really like the piece of furniture itself.

glass door cabinet painted turquoise

glass door cabinet painted turquoise to match the vessel

The problem was, well actually I should say MY problem was that I was afraid of “messing up”.  My fear of not doing a good job stopped me from trying.  Simply stated: I was chicken.

That is pretty sad, isn’t it?  But thankfully, I have some pretty awesome friends in my life, and they tackle all sorts of challenges, all of the time. That kind of pushed me and inspired me to give it a go. Also, I wanted my kids to see me go out of my comfort zone, to teach them that they can do anything they put their mind to, too.

A bit of color in the bathroom

A bit of color in the bathroom

Everyone is different.  Some people might not understand this “fear” of failure. I think they are pretty lucky.  The other thing is, it is only ‘painting a piece of furniture’. Logically, it wouldn’t be a big deal if I messed up.  But “fears” aren’t usually based on logic!

But that fear is now very much behind me, because I researched what I needed to do and tackled my project head on! I am very happy to say that I am absolutely delighted with my new turquoise cabinet.

If you are looking to paint furniture for the first time, I would recommend this site to get you started:  http://www.countryliving.com/diy-crafts/tips/a266/paint-furnishings-and-learn-from-my-mistakes/

The color was inspired by the ceramic vessel, which you can see in the above photographs.  I brought the vessel home last year (in carry-on luggage!) following our trip to Paris.  I just loved it, and how it reminded me of the wonderful time our family had on our vacation.

Painted cabinet

Painted cabinet (I might have an issue with buying multiples of soap & stuff …)

This is the cabinet now.  It is being put to good use.   I didn’t really know I had that many soaps! Now that they are in a glass cabinet I can keep track of all of our cleaning items.    🙂

I wonder what project I’ll tackle next?

Go on, tackle that job you’ve been putting off for all the wrong reasons!

In peace,
Dana

Pears, Sunflowers, Blueberry plants, Strawberry plants

A fall look at our Pears, Sunflowers, Blueberry plants, Strawberry plants


A Childhood Crochet Blanket “Remake”

In the beginning

In the beginning

Some things are just worth holding on to, don’t you think? The picture above is of the first blanket I ever made.  I was 10 years old, and staying with my aunt and her family for the summer.  They lived in Florida, so for this New Yorker it was a huge treat.  But what was my aunt going to do with me all summer when we weren’t at Disney World or at the beach?  Being an avid “crocheter” herself, she started me on my first blanket.

granny "squares" that were anything but squares

granny “squares” that were anything but squares

The blanket has done fairly well over the past 30 plus years! But recently it became clear it was in need of some serious repair. My aunt had me sew the squares together, instead of crochet them, and the sewing was coming apart.  I think I figured out why she had me sew them together instead of crochet: they weren’t squares at all!  I did a TERRIBLE job of counting my stitches, so none of the squares were the same shape.

every shape imaginable except "square"

every shape imaginable except “square”

Yeah, I was 10.   🙂  So I decided to “Square them up”!  I did the same border on all of the squares so I’d have the same number of stitches.

crocheting everything together

crocheting everything together

There are a million and one different styles for granny square blankets.  I looked at ALL of them on Pinterest!  I like nice clean white lines.  It is so easy.  And neat. I like that.

crochet together with a simple stitch

crochet together with a simple stitch

Next to decide: the border. I like to try something different with each project, so I played around with the border.

White & Pink edging

White & Pink edging

I wanted to make the blanket a little more substantial, so I went a few times around, each time with a different stitch.

White, Pink, White, Yellow & White border

White, Pink, White, Yellow & White border

I love the yellow border best.  They are like little puff balls all the way around.  The funny thing is, that is the BACK of them.  I crocheted them the entire way around before I discovered the “puff” that I liked so much was on the back of the blanket!  So I undid it, and turned the blanket around, and crocheted them on “backwards”.  I felt better after I did that.

almost finished ... one more border to go

almost finished … one more border to go

I was tempted to call it quits after the yellow border.  VERY tempted.  But I decided to see how it would look edged in a frilly white.

frilly white edging

frilly white edging

This gives it a bit of a different look, but I like it for this blanket.

full blanket all finished

full blanket all finished

I’m really happy with it, and glad that I took the time to remake it.  That summer was pretty special to me, especially since we didn’t go down to Florida very often.  That side of the family is my American-Italian side, and there is something quite special about that heritage. I have very fond memories, especially of my aunt.   Unfortunately, she has since passed away, and this blanket is my special connection to her.

blanket remake

blanket remake

really happy with the end result

really happy with the end result

I don’t spend a lot of time crocheting, and I tend to take long breaks between projects!  But I do love it, and I find it to be a relaxing past-time.

What about you?  Any projects keeping you busy at the moment?

In peace,
Dana

The garden with its fall color on

The garden with its fall color on


A Simple Garden Wreath

Garden Wreath collage updated

everything you need!

I love wreaths.  I love using plants from the garden.  I love making things with my hands. (that’s a whole lotta love!)  What a great start to my day to be able to make this wreath!  I dried all the flowers this season and it was so easy to put it together.

My video is not a “how to” but more of a summary.  I wasn’t sure how the wreath would come out so I didn’t video me making it.  Next time I will!

Super easy to make!

Super easy to make!

We’ve had some much needed rain, but now the sun is out and it is just glorious.

Enjoy the video, and enjoy your weekend!


In peace,
Dana

Making Lavender Wands: The Video!

lavender & lilies

lavender, lilies & hydrangea

I LOVE lavender.  I love the smell of it, how it looks before it is in bloom, how it looks after it blooms,  and how even just brushing past it in the garden will cause it to emit its lovely scent.  I love everything about it!

view of the fields, too

view of the fields, too

There are a few different things you can do with lavender.  I usually dry it and then make sachets.  I have also made lavender wreaths.  You could probably find a vase or two around my house, full of lavender!

dried lavender bouquets, wands & sachets

dried lavender bouquets, wands & sachets

lavender sachets

lavender sachets

lavender wreath

lavender wreath

But I think the most interesting thing to do with it is to make wands.  They are kinda quirky.  I have a bunch of them arranged in a vase.  One daughter has a wand on her dresser.  They are also pretty on a bathroom counter.  I think they also make a nice “little gift” to give someone.

lavender wands

lavender wands

My lavender is at the perfect stage for making lavender wands; the flowers are just starting to open and the stems are not yet stiff. The stems have to be pliable to bend them over the blooms.  You can have a look at my picture instructions of how to make wands here:   https://mominthegarden.wordpress.com/2013/07/22/lavender-wands-my-first-lavender-wreath/

lavender in bloom

lavender in bloom

a mature lavender plant

a mature lavender plant

I have ventured to make an instructional video, prompted by my dear neighbor from NY, Betty.  Since I can’t show her in person how to make them, I thought I’d make a video for her (and share it with all of you!).

wands in a vase

wands in a vase

This is my first attempt at making “a” video.  The outcome was making 4 short videos! As it happens, I prefer having nice short videos when I look up how to make things myself.  Please feel free to let me know what you think!


In peace,
Dana

Mom in the Garden (2014)

Mom in the Garden (2014)

A Crochet ‘Fairy Doll’ Handbag

Fairy Colours of 'passion', pink, and green

Fairy Colours of ‘passion’, pink, and green

Did you ever make something and just could not believe how well it came out? 🙂  I *love it* when that happens!  My little God-daughter’s sixth birthday was coming up and I wasn’t sure what to get her.  Then I learned she was having a fairy themed party because she’s taken a liking to fairies…

Tassie Design 'Fairy & Elf Collections'

Tassie Design ‘Fairy & Elf Collections’

I had this lovely little fairy doll that I decided would be perfect to give her.  The fairy has bendable arms and legs.  I found a website for the company that sells them: http://fromtheretohereimports.com/?page_id=6  The fairy dolls are actually designed and made by a family business in Thailand. It is an interesting story, but I’m getting a bit off-topic!

purse before the button...

handbag before the center buttons were sewn on…

But wouldn’t it be nice to have a ‘fairy doll’ handbag to carry the fairy doll? Such is the way my brain works, and thus the idea was formed.  The doll inspired the colours for the handbag; that and the fact that I had the yarn to hand so I was happy to use those colours! I have to say that the Caron ‘Simply Soft’ yarn is fantastic.  I have done a few different projects with it now, and every one is that bit nicer because of the softness of the yarn.

fairy with a view

fairy with a view

The ‘passion’ colour is definitely my favourite. The soft pink did a nice job of breaking up the sameness of the two main colours. The lime green yarn is not the Caron brand. In fact, it was some scrap yarn I bought to only make flower petals with.  But I loved the way it really brightened up the passion colour!

two contrasting colour buttons

very simple crochet stitches… two contrasting colour buttons

Those two buttons were in my button collection, just waiting for a neat little project like this!

hand sewn...

hand sewn, as if that isn’t obvious…

So… my least favourite thing to do is sew. That is probably because I am not very good at it.  This small task of creating a lining should have been a very quick and easy job on a sewing machine.  But I don’t have a sewing machine, and borrowing one was going to take longer than just getting to work and sewing it myself. I’ll chalk it up to being ‘good experience’!  (But next time I think I’ll make the effort to borrow one!)

finished lining

finished lining

I was really surprised with how it came out. It even fit! 🙂

sewing in the lining

sewing in the lining

I spent many, many hours on pinterest looking for pattern ideas for the handbag.  I could lose so many hours on Pinterest, it is not even funny. I love getting new ideas there!


Crochet purse

Simple stitches to create a basic, yet sweet, pattern

I designed the handbag myself, based on a couple of different styles I found.  I challenged myself a bit with the top flap.  It would have been easier to just leave the top open.  But sure, then all of the little princess’ things would fall out! 😉

finished.

finished.

It all just fell into place. (read: I figured it out as I went along!)

Fairy purse

Fairy handbag

The handle is called a ‘granny strap’ and involved learning “foundation single crochet”. But it is really easy to find instructions on-line and videos, too!  It was worth learning as I really like the look that it gives.

sparkly side button

sparkly side button on the ‘granny strap’

I was quite happy with the finished project.  I had used my 11 year old daughter to roughly gauge how long to make the strap.  I think it worked out O.K. based on how cute it looks on the little princess.

Little princess with her Fairy Purse & Fairy

Little princess with her Fairy Handbag & Fairy

Go on, try making something new! You just might end up making something beautiful and having fun, too!

With crocheting needle,
Dana

The websites I used for inspiration:

http://koalakidsfashion.blogspot.ie/2012/03/crazy-flowers-purse-crochet-pattern.html

https://www.etsy.com/listing/85170392/crochet-pattern-purse-garden-scene?ref=shop_home_feat_2

http://www.futuregirl.com/craft_blog/2011/1/granny-straps.aspx


Fun, Funky, and Fast to make! A Crocheted Poncho

color burst!

color burst!

The cold weather is hanging on. Someone needs to send Mother Nature a memo that we are quite finished with this cold spell.  Spring has sprung!  I’d like to spend more time in the garden without freezing my fingers off!  The only benefit of this cold weather  is that I can still wear my ‘made this season’ poncho.

the start of the cowl neck

the start of the cowl neck

When I saw this yarn in the This is Knit shop in Dublin (https://www.thisisknit.ie/index.php)((I really like this shop as the yarn I’ve bought there has been that little bit different.)) I didn’t even think twice, I straight away bought it … without having any idea what I was going to do with it.  Can you say “impulsive”???

cowl neck growing

cowl neck growing

The colours are just so fun! The yarn wasn’t cheap, so I was stingy in the amount that I bought. I would, of course, regret that later.

the poncho is growing

the poncho is growing

Right, so after buying the yarn I spent hours on Pinterest, as you do, looking for ideas of what to make.  I don’t even think it is possible to go onto Pinterest for just a moment, actually.  It completely sucks-me-in to looking at millions of different pages!  I love it!!!

bobbles

bobbles

Yes, yes, I do have a Pinterest Board ’cause where else am I going to put all of those fabulous ideas???  https://www.pinterest.com/danasheridan/

So the idea for the poncho was born, but I didn’t actually find a pattern that I loved completely.  I bought the pattern for one, but I only used the cowl neck portion of that pattern. Then I roughly followed the ‘much too difficult for me’ pattern of another, improvising along the way out of necessity.

poncho body improvised

poncho body improvised

The cowl neck took way more yarn than I would have liked.  I probably should have used a smaller hook. I’m sure you’ve guessed by now that not only did I run out of yarn too soon, the shop had sold out of it. But not to worry!  The distributors of this brand of Katia art wool at the Trim Wool Shop ( http://www.trimwoolshop.ie ) had this same colour in stock and would mail it to me.  They were super nice on the phone, and I was delighted…  Only the dye-lot was different; it was quite muted compared to the vibrant colouring of the neck.  I think the good news was that it toned down the poncho!

funky colours

funky colours

It was fun to make and figure out what I liked, and what I didn’t like.

Finished!

Finished!

The finished product is rather funky and fun and I can wear just about any colour with it!  I have to say that I really like it.  It is definitely a “one of a kind”!  🙂

Even though I love still getting a chance to wear my new poncho this season, I’d really like for the warm spring weather to arrive!

Peace,

Dana

a belated Happy St. Patrick's Day!

a belated Happy St. Patrick’s Day!

Winter is for Crocheting … A Baby Blanket

In the beginning...

In the beginning…

I have a new hobby obsession.  Actually, it isn’t new to me, but I’ve recently started doing it again: Crocheting.  I have completed more projects in the past 12 months than I have in the past 10 years!

I’ve discovered some cultural differences with my hobby.  While I say yarn, the rest of Ireland and the U.K  call it “wool”.  Even our stitches are slightly different; A double crochet for me is a treble for Ireland/U.K.  But in the end, we  all  I figure it out one way or another.

Baby blanket almost finished

Baby blanket almost finished

As for patterns, it is quite easy to find free patterns online, or even purchase them online.  I liked this very soft (free) ripple pattern by attic24:  http://attic24.typepad.com/weblog/neat-ripple-pattern.html     You only have to count to 4!  Great stuff!  Definitely a pattern for those of us who are easily distracted, because you know quite quickly if something isn’t right.

Cathedral edging

Cathedral edging

I bought the yarn in the States on my last visit there. I know, who brings home yarn???  Well, I did… because it was incredibly soft and I loved the colours and I couldn’t *not* buy it!  🙂  It is called Simply Soft by Caron, and it truly is so soft! I thought it would be perfect for a baby blanket.

Cathedral edging

Cathedral edging

I looked through what seemed like 100 different edging ideas.  But I decided to go with  ‘Cathedral edging’.  I found the (free) pattern here:   http://www.halfknits.com/blanket-edge-patterns/   

a look at the first rows of edging

a look at the first rows of edging

The only part of crocheting that I don’t enjoy is hiding the tie-ins when you change colour.  Can you see all of the different changes in colours?!  It is crazy!  So I thought I’d try and widen the colours a bit so I wouldn’t have to change so quickly, but I really didn’t like the thicker stripes.  To cover that up, I decided to alternate between 1, 2, and 3 rows of thickness for all of the colours. I think for my next blanket, though, I will stick with two rows for each colour.  I also arranged the colours randomly, and not in a pattern.  I’m not sure if I liked that 100%.  I would probably go for an exact pattern next time.  Good to live and learn!

Completed blanket

Completed blanket

The best part of making something so lovely and soft is to give it away to a sweet little girl.  I’m going to share with you that the night before I gave it away, I wrapped the blanket up in a few of my lavender sachets.  I just thought the lavender would be a nice relaxing scent to have for the baby.  My lavender is, apparently, quite strong in scent! But I’m hoping the little one will be all nice and calm and relaxed when she uses her new blanket.

Did you happen to notice the little chair in my pictures?  It is an antique potty chair!  It comes from my father’s side of the family and I just love it and the history of it. Here is a close-up of the top.  Can you imagine using something so lovely as a potty chair?

Antique potty chair

Antique potty chair

Antique Potty Chair

Antique Potty Chair

O.K., now I hardly want to finish my post with a picture of a potty chair, antique or no antique!  So I leave you with a picture I took 2 days ago.  Mr. Fokker Anemone.  They bloom for me all winter long and I just love the little bit of colour they bring to the garden. I hope you are enjoying your winter, where ever that may be!

Peace,
Dana

Mr Fokker Anemone

Mr Fokker Anemone


Acts of kindness last a lifetime, as remembered through a crocheted flower blanket

It all started with some pink and green...

It all started with some pink and green…

When I think of acts of kindness I think of “the little things”.  That is because I still have fond memories from when I was young of how certain people were patient, supportive, and kind to me.  Let me explain…

trefoil ... little touches of sweetness

trefoil … little touches of sweetness

I learned to crochet way, way, way before it was fashionable to do so.  I was ten years old (ha! O.K., maybe I shouldn’t say that it was that long ago?) and my swim coach and his wife were a lovely retired couple with no children.  I became their surrogate granddaughter and Mrs. Emerson’s love of crocheting was passed on to me with many wonderful afternoons of lessons. I still have and use the set of crochet needles she gave to me.

green flower up close

I have such happy memories of our times with them.  Mr. Emerson was my very first swim coach.  Boy did he have a tough job!  But I remember that he was quite patient with all of us beginners, and always kind.  Being a part of the swim team really felt like being a part of their family.  It was a very fun time!

The very centre of my flower blanket

The centre pink flower is the very centre of my flower blanket

So now when I crochet I find myself thinking fondly of the times when Mrs. Emerson taught  me a new stitch, or showed me a new project, or generally of the wonderful times we had together.

Pinks, yellow & green all lined in white

Pinks, yellow & green all lined in white

As for swimming, I am now a coach myself and I absolutely love it! I think of all of the coaches who were patient with me, encouraged me, and supported me all through my many years of competitive swimming.  Now it is my turn to ‘pay it forward’ and do the same.

an evening shot giving a different hue to the colours

an evening shot giving a different hue to the colours

As for the crocheted flower blanket, it all started while I was away with my daughter at a swimming competition!  We popped into a wool shop and I simply loved the spring colours they had (it was March last year): pinks, yellow, green (especially the green)!

spot the pattern...

spot the pattern…

This is the part where I could write “lessons on how not to make a blanket”…  I just bought balls of wool. I didn’t have a project in mind but I had a vague idea that it would be a blanket.  🙂

I had a couple of books, too many ideas, and not enough yarn!

getting ideas from books

getting ideas from books

I found a flower pattern that I really liked. To make it fit a blanket and with other granny squares I just added stitches to the outside.  The picture of the blanket above is what I had in mind for tying it all together. I really liked the white lining and border.

There is a yellow cross through the centre, and two diamonds of flowers. Can you see it?

There is a yellow cross through the centre, and two diamonds of flowers. Can you see it?

I won’t show you the many pictures of failed attempts at “randomness”.  Random just did not work for me. I needed to have some order to my madness!  I also had white and light pink granny squares that just did not go well with these colours.  This is the tough (silly) part when you just crochet without a pattern.  I finally disciplined myself to create a pattern of colours and flowers.  Life got much easier then!

natural sunlight

natural sunlight

I have green flowers on a yellow square at the centre point of each border.  From there, I alternated pink and yellow flower colours in a diamond shape. There is also a diamond shape around the very centre pink flower.  To add more flowers, I decorated the corners.  I think I mostly worked diagonally!

spot the pattern...

spot the pattern…

The flowers took a long time to make.  WAY longer than I wanted them to.  The granny squares are a cinch to make.  Crocheting it all together actually made my hands get all cramped!  huh?  I must have been holding everything together too tightly.  There are 121 squares.  That is because I ran out of dark pink yarn and decided I was totally done with this project! Having started in March, done a bit in April, nothing over the summer, and then started again in September, this project was dragging on way too long!  The blanket pattern with the white border simply said to crochet them together horizontally first, then vertically.  It would have been helpful to say “slip stitch over the already crocheted together rows”…   Nevertheless, I figured it out.

Yep, I have the blanket hanging on my clothes horse.

Yep, I have the blanket hanging on my clothes horse.

I waited on the border until I found something a bit different.  The tiny trefoils are simple to make and I liked the look (makes me think of shamrocks).

Here is where my border came from

Here is where my border came from

I only put them at the corners of each square.  I tried more but didn’t like the look.  I should tell you that there were many times I unraveled my work because it just wasn’t good enough.  Now I can honestly say that I really like it.  O.K., I love it.  🙂

looking very sweet on hot pink!

looking very sweet on hot pink!

And that is my story of how acts of kindness can last a lifetime!

I hope there is kindness in your life today!

Dana