
Hello there, and welcome to my blog! The weather has not been cooperating, and it has been a colder than usual start to April. The one saving grace is that there have been nice stretches of sunshine, making the cold somewhat bearable. Despite the cold, our big garden project is well underway. We are really happy with the progress so far. Actually, it all started 10 years ago, when we first created the vegetable garden. We had 7 beds, a few apple and pear trees and lots of enthusiasm! Over the years, the enthusiasm faded as the weeds took over. The paths were never correctly made, and more or less it all became too much to maintain. I’d hung on to about 4 bed over the past number of years, but once we decided to do a makeover, I’d stopped fighting with those, too – and the weeds finally won.
Due to the failed attempt at creating stone paths, and the terrible state of everything, we decided to have the area dug up, and start fresh. The idea of then covering the entire area with weed preventing ground cover was very, very appealing! But in thinking about it, and talking with other gardeners (thank you Paddy!), the issues like how unsightly it is when it inevitably peeps up along the edges, and how annoying and tedious it is to cut through it when trying to add new plants, played a roll in my final decision. I’ve decided to mainly use the ground cover in the pathways and not in any of the beds. We put down cardboard under the ground cover, too, to help keep the weeds down as long as possible! To cover the paths, we are using Hoggin. Hoggin is a mix of gravel, sand and clay that is firm when compacted (read: easy to walk on), yet also allows water to drain through it. It was recommended to us, and we are really happy with it.
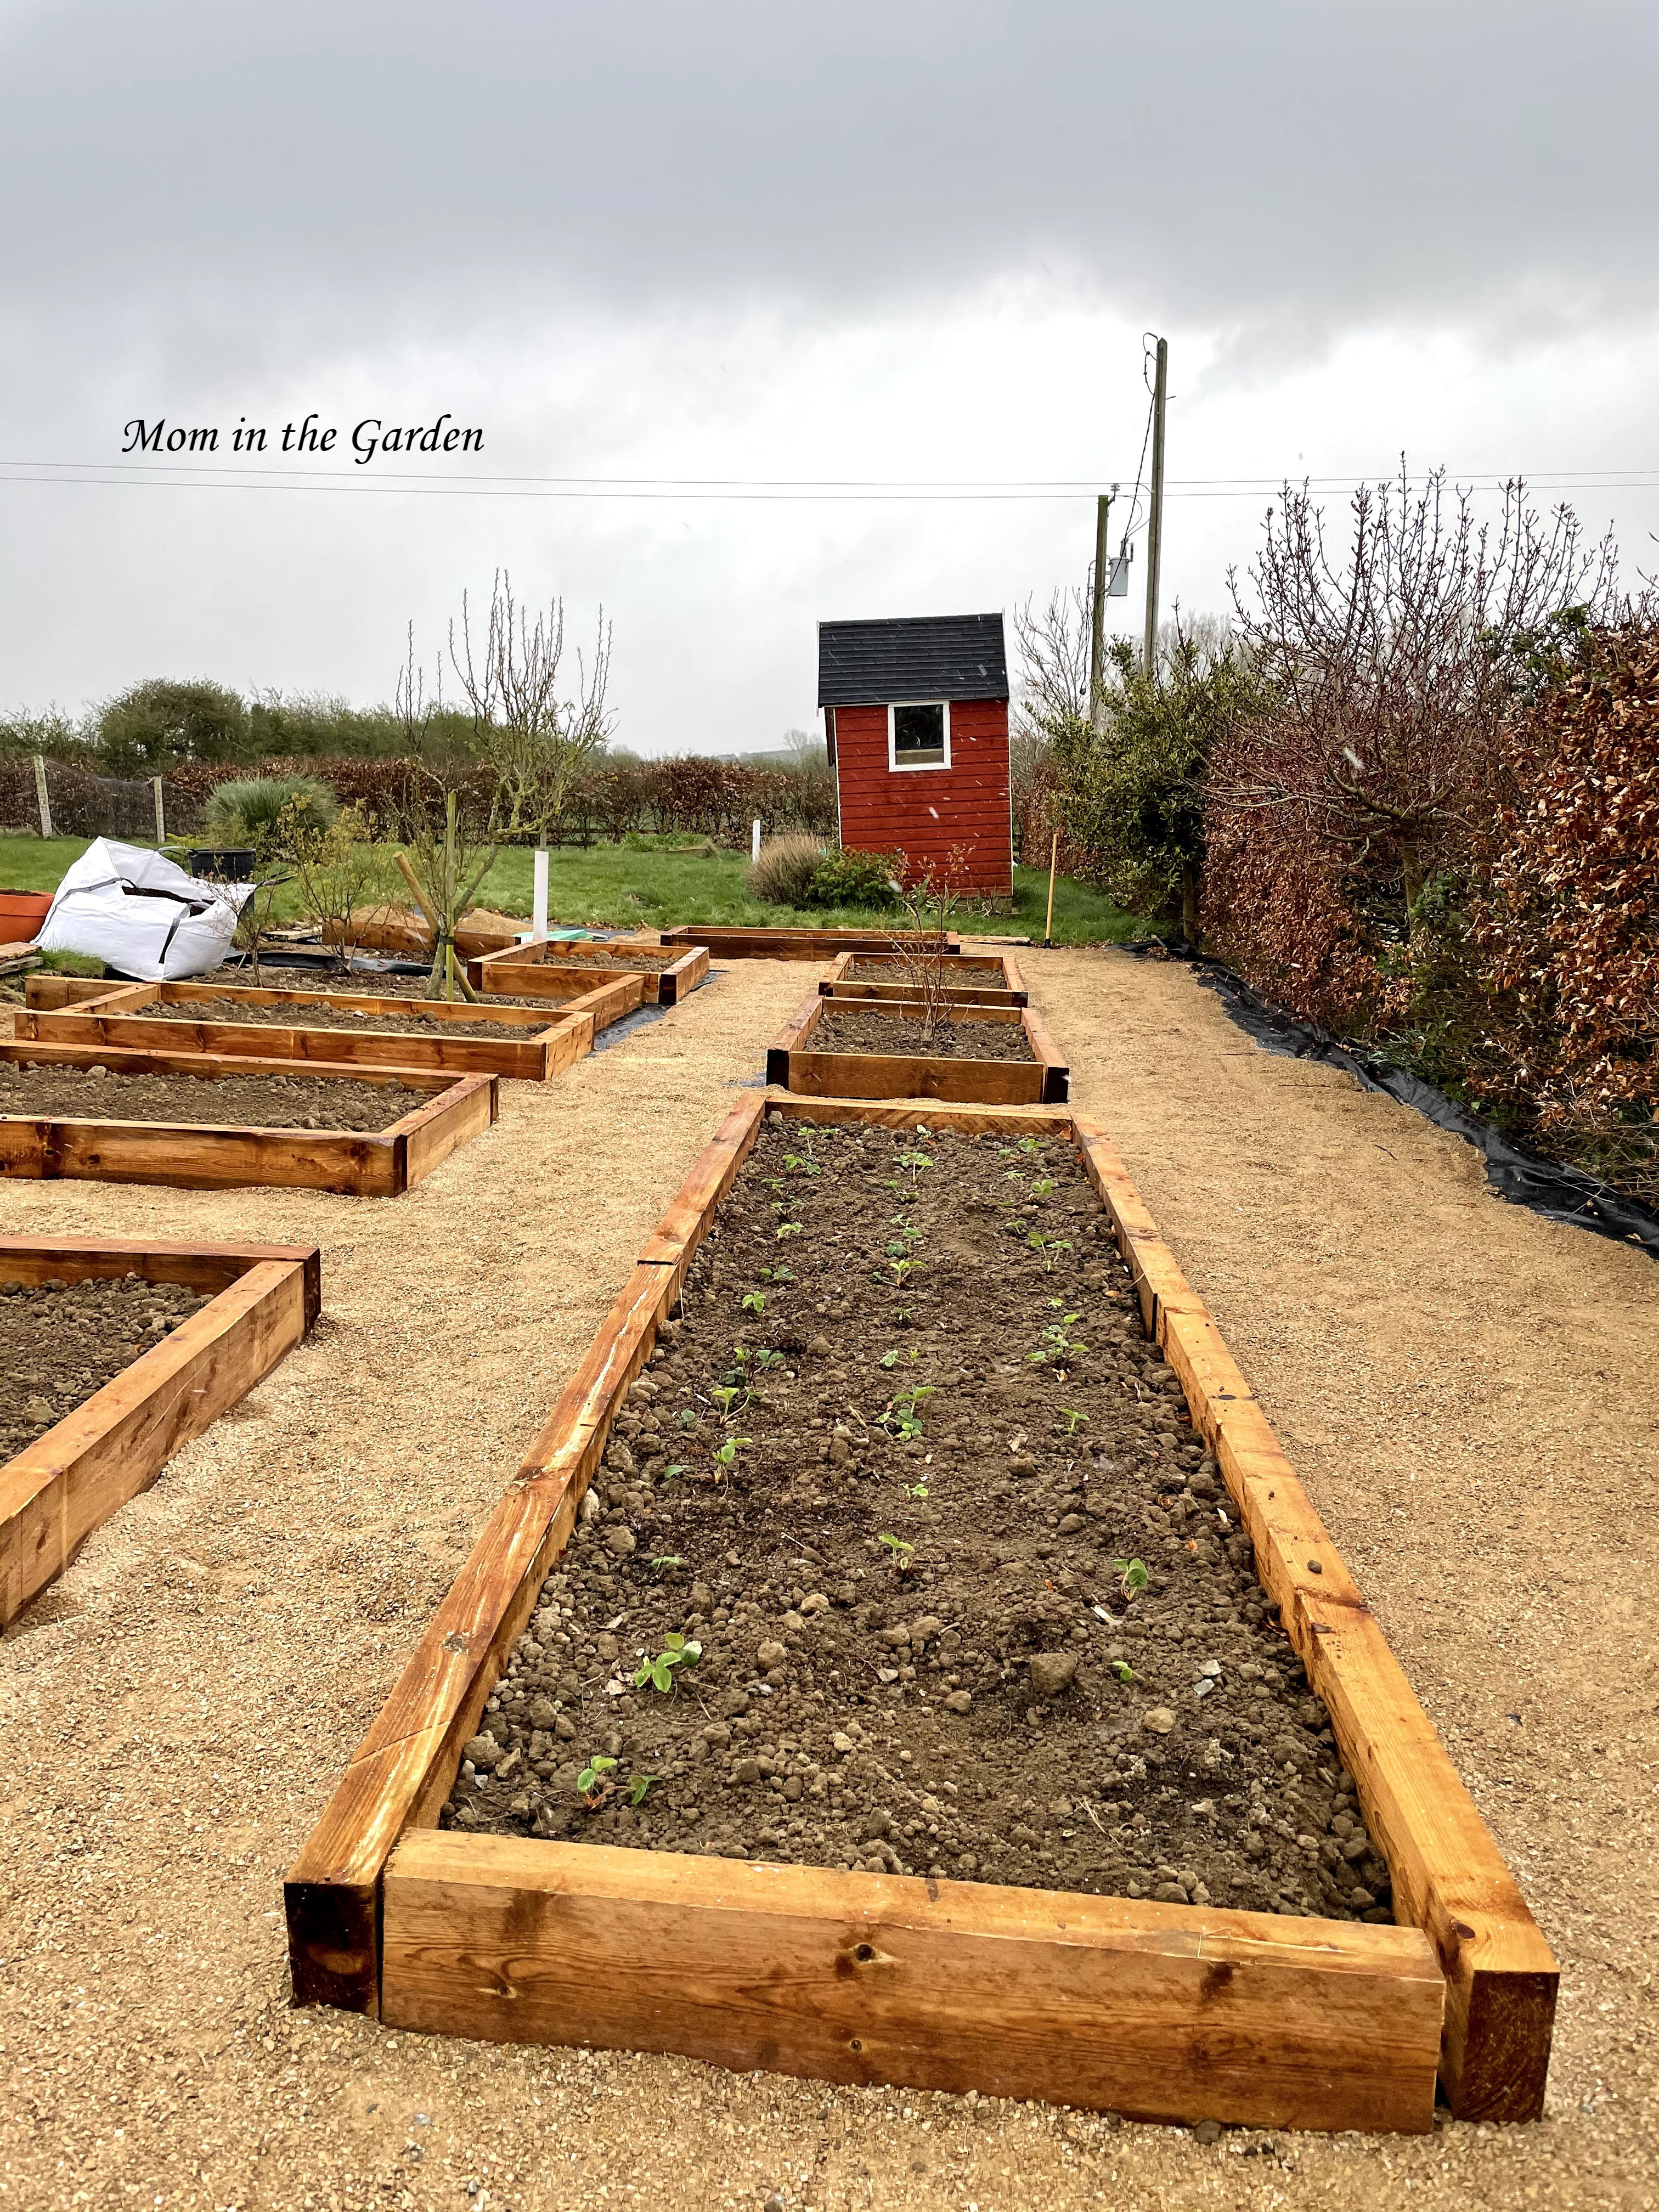
We now have 8 beds in place, and they are filled with topsoil. I’m mixing my compost into the beds too. It is quite wonderful to work in beds with no weeds! 🙂 The size of these beds are more comfortable for weeding, too. I have one bed that is quite large and is specifically large for me to fill with sunflowers. The other beds are (roughly) 2.4m x 1.2m. Our strawberry bed is double the length. I’m already much happier with the slimmer width! Much easier for planting and future weeding.
So, the beds could be filled in no time. We usually grow sweet pea, garlic, pumpkins, and sunflowers – depending on how the seed planting goes! We sometimes grow courgette (zucchini), too. One bed has strawberries and one has blueberries. If I don’t use the beds for veggies I will certainly fill them with flowers! I’ll also have a shaded area, near the hedge, that I plan to use for potted plants (I’m thinking hostas). It’s still a work in progress – all of the Hoggin has not been spread out, and we need to finish off the edging. I’ve put mulch around our blueberry shrubs. I haven’t used that mulch before, so it is a bit of an experiment. I know some people like it, and some people don’t. So I am trying it around the blueberries as a start.
My husband and son have done all of the hard work (aside from the clearing of the mess). I drew up the master plan and have persevered to help get it done. I’ve also started all of our seeds to help fill those beds. Even though I do this every year, it is still nerve wracking until the seeds have germinated, the plants have grown, been transplanted into the bed, and they have finally settled in to their beds! It’s a long 8 – 10 weeks!
Before we had everything dug up, I saved a bunch of strawberry plants (all those that were not completely covered in weeds). They are now planted in their new home, as are the blueberry plants, and some raspberry plants which my neighbor gave me. Taking a bit of a chance with the raspberries as it is a tiny bit late to plant them, but hoping they will take. I’m really happy with how it is all coming together. I’m glad to have something in the garden to focus on, since that’s how I enjoy spending my time. I found some lovely pictures of the area from earlier years, to compare what it looked like then to now. I know it wasn’t great previously, but I did still love it. I’m just glad to have the area looking a bit more neat and tidy.
Do you have any projects that you are working on? I hope they are going well!
Stay safe and healthy.
In Peace,
Dana
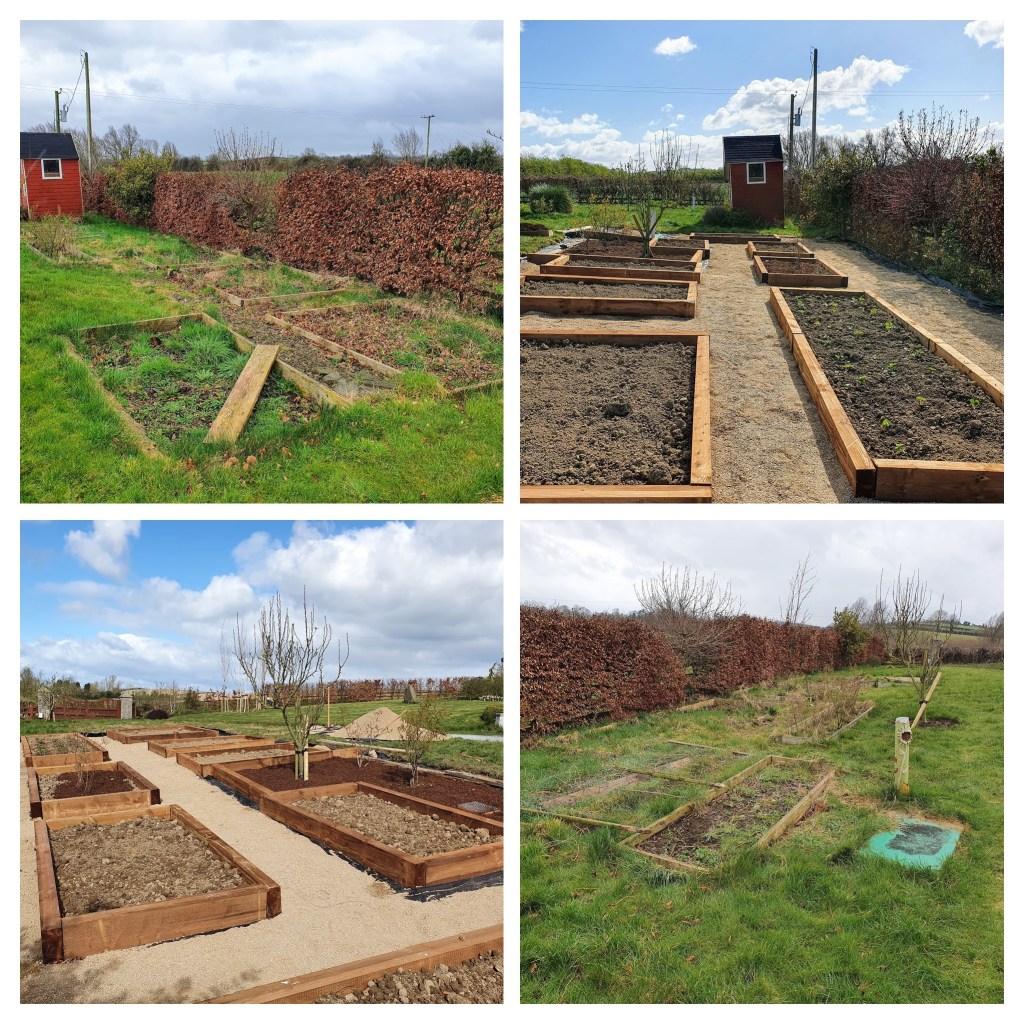
OK, so there is nothing like starting with the worst looking pictures, ever! We didn’t tidy up the strawberry beds or the sunflower bed this season, because we knew we were going to do *something* with the area! It wouldn’t normally look quite as bad as it does above – although it was in pretty bad shape! One big change this time around is that we’ve pulled the beds out from the hedges. The hedges were very young and low when we first built the beds, but they have grown and now provide quite a bit of shade! We’ll probably cut the hedges a bit lower, too, to keep the shade in check. We also have more room between the beds now, which is better for getting the wheelbarrow in and out and is just generally more comfortable. You can see the pile of Hoggin in the bottom left photo. Getting that spread out is the next job.
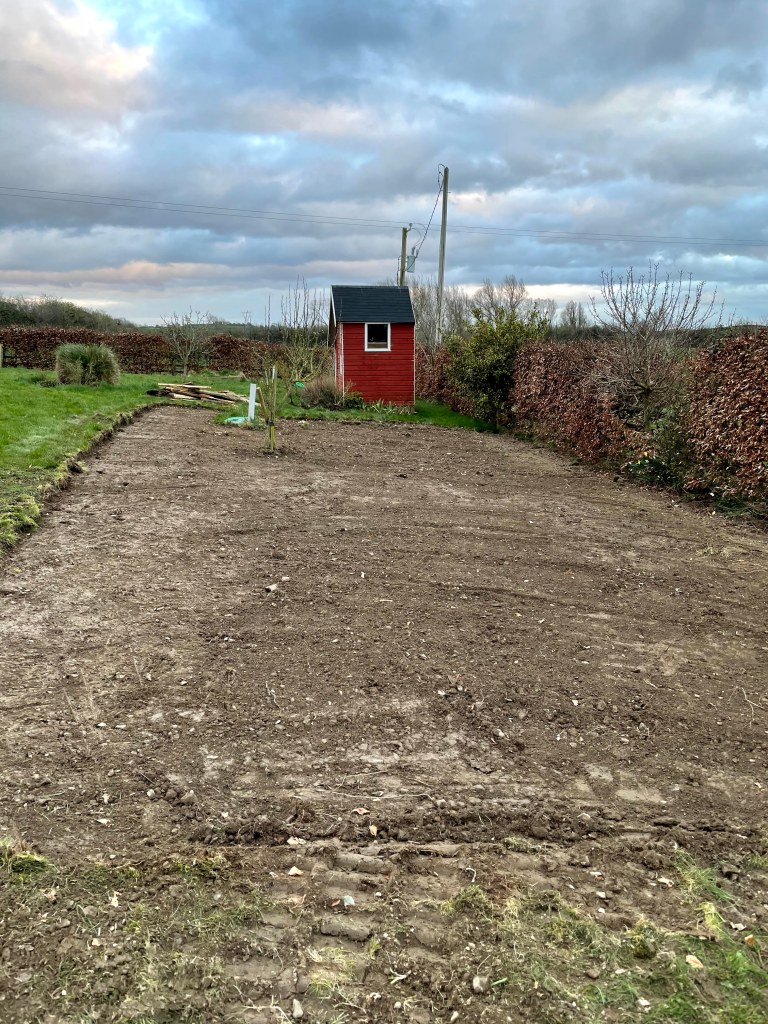
A clean slate! I was a tiny bit sad, but more relieved to have all of the mess cleared away.
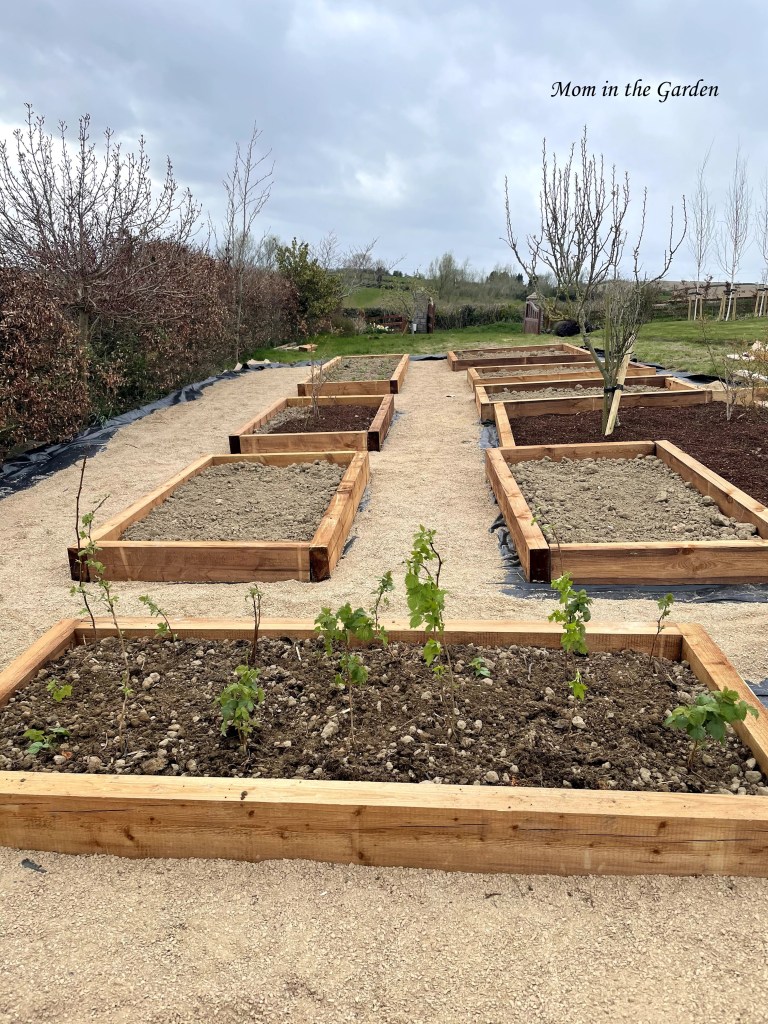
The newest addition to the garden: raspberries! I mixed in a bunch of our compost, which had loads of worms. We’ll see how the plants do. Confession time: we’ve tried raspberries before and they didn’t survive. No idea why.
Here’s our new strawberry bed (it’s a double). The beds weren’t screwed together yet, which you can see in this photo. I have room for 3 more plants!

Here’s a peek back to the ‘old’ garden. Sweet peas, sunflowers and the stone path.
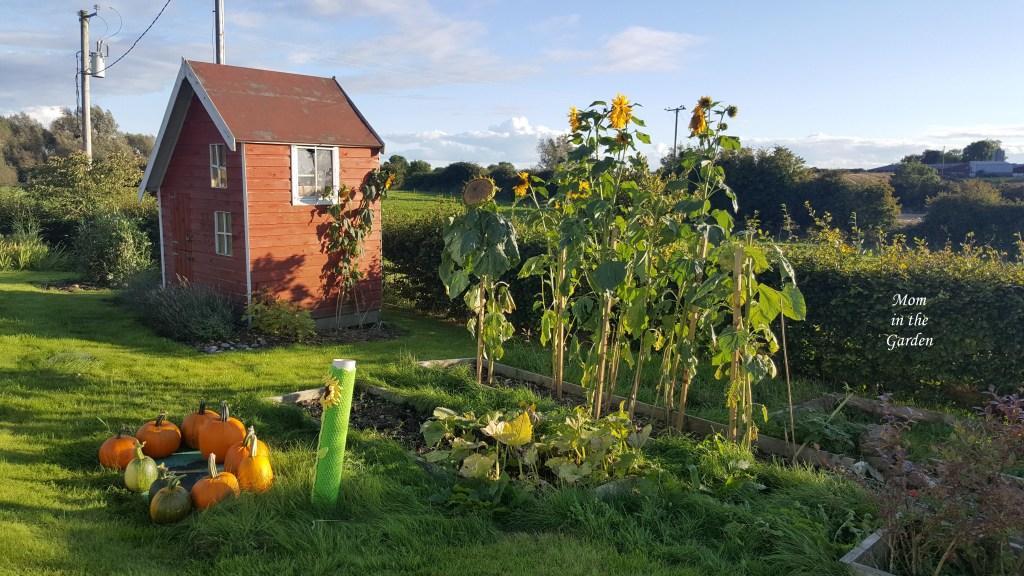
Another peek back! This was a good year for pumpkins (a few years back). This is also the old playhouse roof. That was changed last year to a nicer black shingle.

O.K., enough about the veggie garden. Moving on to other items in the garden: The aubrietia is looking beautiful and PINK these days! I’d forgotten how vibrant it can be.
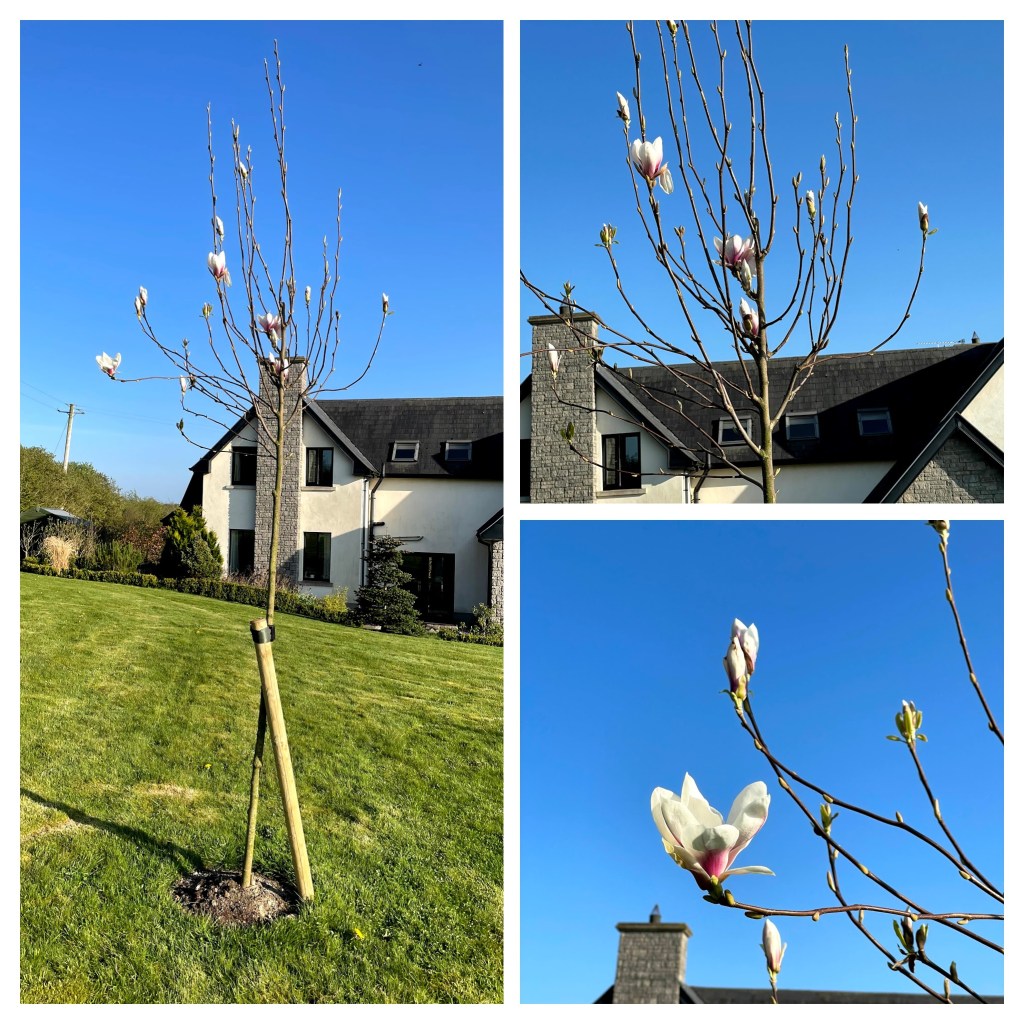
This was another new addition to the garden at the end of October last year. It is a Magnolia tree ‘Heaven Scent’ and it has a bunch of blooms on it. I didn’t really notice any scent around them, even when I climbed the ladder 🙂

A view from the ladder! The flowers are quite pretty.

Some years the weather is brutal with wind and rain, and the hyacinth, which are quite top heavy, fall over. We’ve been lucky this year and although it has been cold, they have mostly stayed upright. The holed leaves are curtesy of the slugs. I love the scent of hyacinth (which is not for everyone).
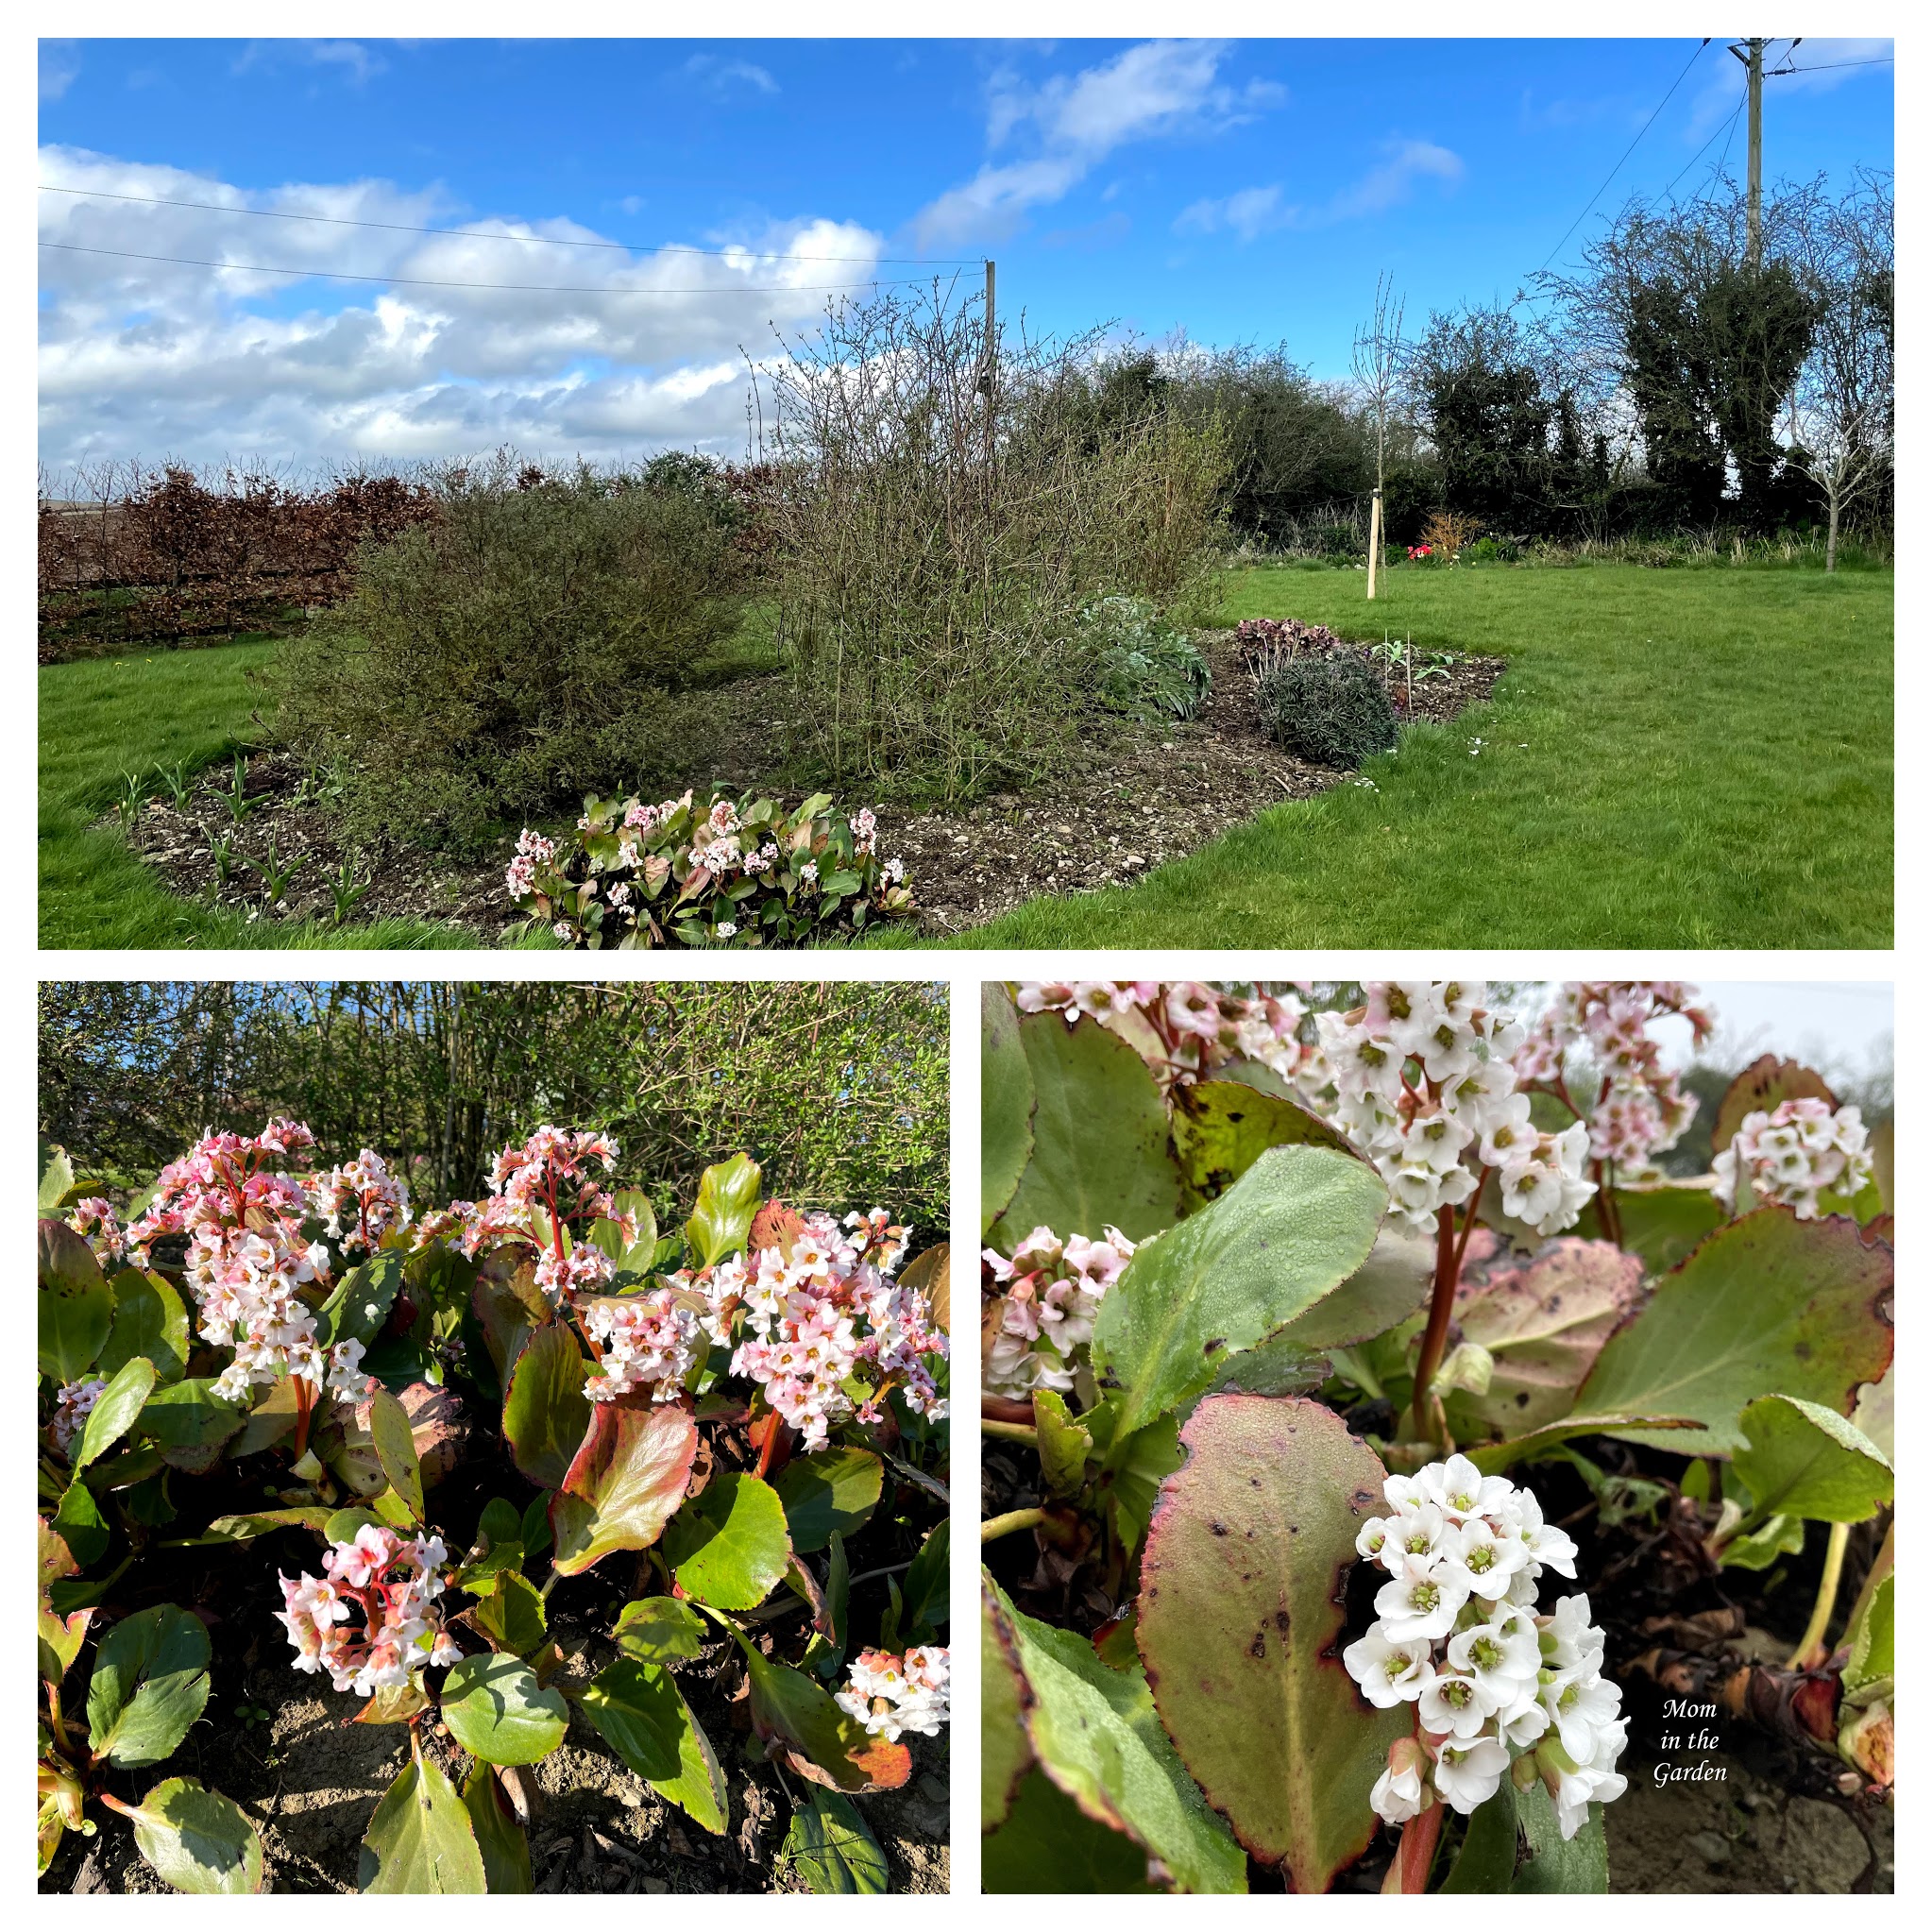
My white Bergenia is another plant that is doing exceptionally well this year. There are lots of blooms, which start out white and fade to light pink. The leaves show signs of slugs, but not too badly. It’s making a nice impact statement at the front of the Rainbow garden.
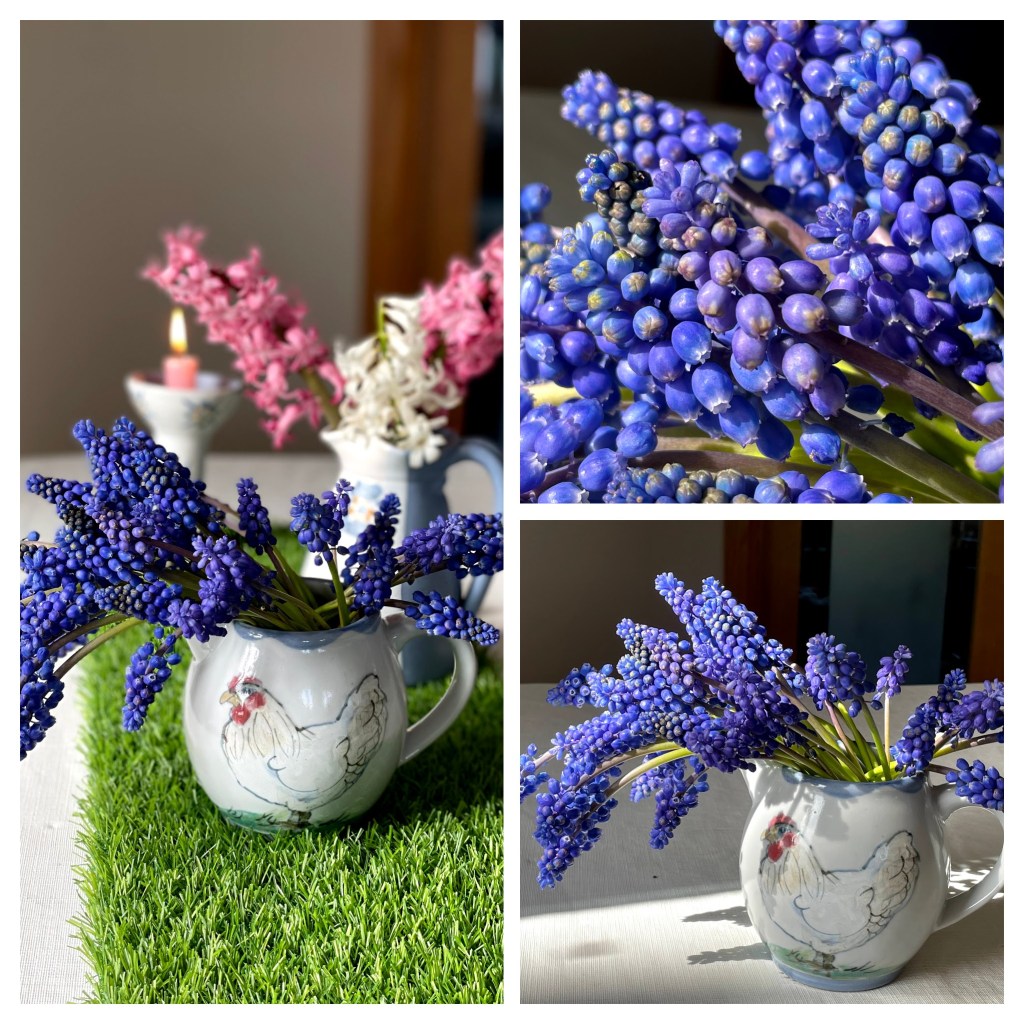
I have some grape hyacinth growing under our hedge. I think it is perfect there, because I don’t mind cutting it to bring it inside (if it were in the yard, I’d be more inclined to leave it outside!). It can be quite pretty in a vase.

Sadly, I didn’t put this ‘together’ until after Easter! Missed opportunity. But we are enjoying it now.

What can I say? It’s still sweater whether, but at least I match the aubrietia (it’s my favorite color). I hope you enjoyed the garden tour! Take care! 🙂


A garden project update
LOOKS GREAT!
Thanks so much! I think we’ve learned a lot over the past number of years. I’m excited to get back into planting again! 🙂
You and me both!
A huge amount of work done! I like the wooden edging to your beds. Can you tell me about it – our bed edging is showing signs of age!
Hi Paddy, we’re getting there! The last time we built beds, I was adamant that we use completely untreated wood. (I don’t use any chemicals in the garden.) They did well for a good while. This time though, we went with what is called ‘Eco-friendly’ sleepers, which don’t have the harmful chemicals that would have been in the old sleepers. These are fresh cut redwood, and FSC certified. Now, having said that, they talk about the tanalisation and staining process on the website, so they are treated. I guess this is my compromise on quality, looks, and health of the wood and the garden, which I hope will be ok! They were €30 per sleeper in our local DIY store.
Not cheap!